Retro Dreamcast Rhythm Game Controller Built From Scratch

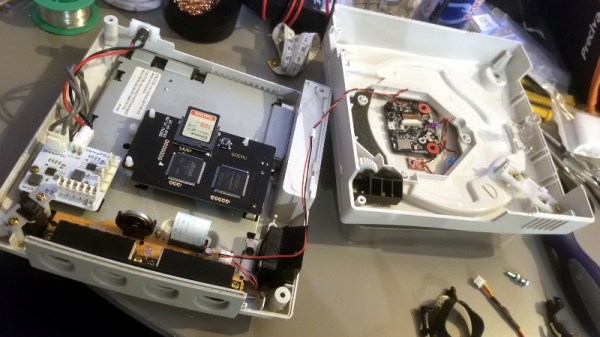
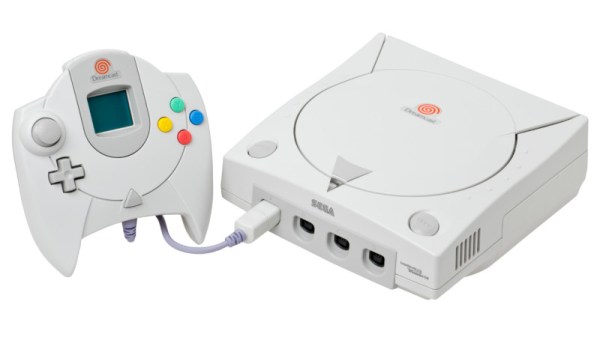
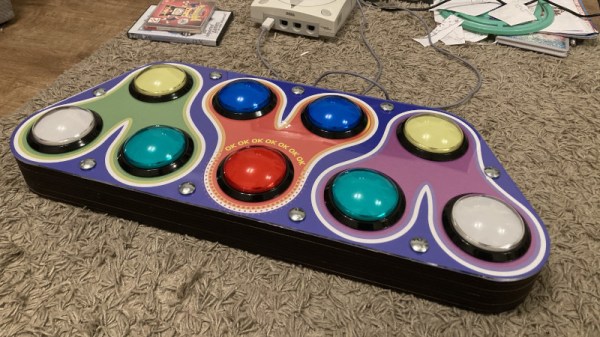
Pop’n Music is a rhythm game which has had both arcade and home console releases over the years. [Charlie Cole] is a fan of the Dreamcast version, and decided to build his own controller for the game using the new hotness, the Raspberry Pi Pico.

The controller itself is built out of layers of lasercut MDF, along with an acrylic top and cork bottom to make it sit nicely on surfaces. Arcade buttons are installed to play the rhythm game, mimicking the design of the official cabinets seen in arcades. To run the controller, a Pico was pressed into service, with [Charlie] hoping to use the Pico’s PIO hardware to easily and effectively interface with the Dreamcast’s Maple bus. There were a few headaches along the way, and it didn’t quite live up to expectations, but with some clever use of dual cores, [Charlie] was able to get everything up and running.

Often, such vintage gaming hardware can be thin on the ground, so having the skills to build your own can come in handy. We’ve seen rhythm game hardware modded before too, like this repurposed DJ Hero controller. Video after the break.

Restored Dreamcast Is A SEGA Fan’s Dream Come True

[Bren Sutton] has been a long time fan of SEGA’s Dreamcast, eagerly snapping one up right around its October 1999 European release. But after years of neglect and a somewhat questionable paint job a decade or so back, he decided it was time to spruce his old friend up. He could have just cleaned the machine and been done with it, but he took the opportunity to revamp the console’s internals with both practical and cosmetic trickery.

The first step was getting the system looking a bit fresher. Removing the silver metallic paint he applied in his youth with a rattle can wasn’t going so well, so he ended up buying a broken donor console on eBay so he’d have a new shell to work with. The donor was yellowed with age, but a coating of peroxide cream and a few hours under a cheap UV light got it whitened up nicely. Now that he had a fresh new case, [Bren] turned his attention to the internal components.

Those who might be plugged into the active Dreamcast homebrew scene may already know that several upgrade modules exist for SEGA’s last home game console. One of the most popular replaces the optical drive with an SD card filled with your favorite game ISOs. You can also get a modern high efficiency power supply, as well as a board that replaces the original soldered-on clock battery with a slot that fits a CR2032. [Bren] threw them all in, ensuring several more years of gaming bliss.

But he wasn’t done yet. He also wanted to add some visual flair to his new and improved console. After some consideration, he gingerly cut the logo out of the Dreamcast’s lid, and installed an Adafruit CLUE board underneath it. With a few carefully crafted GIFs installed onto the CircuitPython-powered board, the console now has a gorgeous fully animated logo that you can see in the video after the break.

[Bren] could have really taken his console to the next level by doubling its available RAM to an eye-watering 32 MB, but considering the limited software support for that particularly bodacious modification, we’ll let it slide. Continue reading “Restored Dreamcast Is A SEGA Fan’s Dream Come True”

Double The RAM Of A Dreamcast Console For A Cool 32 MB

The Sega Dreamcast is the forgotten orphan of the console wars, an extremely capable machine never able to escape the shadow of its PlayStation rivals and because it marked the end of Sega’s console line, never redeemed in reputation by a more popular successor. It retains a significant following a couple of decades after its heyday though, and still sees hardware hacks such as [Tsowell]’s doubling of its available RAM to 32 MB.

The console shipped with 16 MB of memory in two banks, but while the SH4 processor can address twice that figure the designers at Sega never brought the required address line out from under the BGA. So it should be impossible to give it a memory expansion, but when hardware hackers are at work nothing should be ruled out. The hack involves manipulation of the bank switching addressing, and took several careful readings for us to fully understand. The new RAM chips have two address lines tied together and wired to another, a job for some fine but ultimately not impossible soldering. To take advantage of the extra RAM there are a set of patched BIOS images.

So, if you either have a spare Dreamcast you care little enough about to risk, or you consider your console hacking skills to be so advanced that it will be a piece of cake, you can now double the platform’s RAM. Extra points if you also make it portable.

Thanks [John Little] for the tip.

Header: Evan-Amos / CC BY-SA 3.0

Trimmed Dreamcast Board Makes For Perfect Portable

In the last year or so we’ve been seeing an array of portable game system builds based around “trimmed” Wii motherboards which have literally been cut down to a fraction of their original size. It turns out that most of the board is dedicated to non-essential functions, with the core Wii system contained within one specific area that can be isolated with a steady hand. But as [Gman] shows in his latest build, the same concept can also be applied to the Sega Dreamcast.

But of course, there’s a bit more to it than just taking a hacksaw to a Dreamcast motherboard. [Gman] had to supplement the trimmed system with quite a bit of additional hardware, such as a power management board he originally designed for portable Wii projects.

Other components were specifically built for this project. For example there’s a custom PCB that handles emulating the Dreamcast controller using a PIC32MZ microcontroller. He’s also using a LM49450 to pull digital audio from the motherboard over I2S, completely bypassing the analog output.

While not currently functioning, [Gman] also included an SPI OLED display and the hardware necessary to emulate basic functionality of the system’s unique Visual Memory Unit (VMU) right in the front of the system. We’re looking forward to seeing him revisit this feature in the future when he’s got the software side of things worked out.

The Nintendo 2DS inspired enclosure is completely 3D printed. A Prusa i3 with textured PEI bed was used to achieve the gorgeous dappled look on the system’s front panel, while the buttons were done on a Form 2 SLA printer. With a mold made from the printed buttons, [Gman] was able to cast the final pieces using a variety of colors until he found a combination he was happy with.

If you’re not Team Sega and would rather hack up your own tiny versions of Nintendo’s hardware, look no further than this fully functional trimmed Wii built into an Altoids tin.

Run Your Own Phone To Bring The Dreamcast Back Online

Playing a video game online is almost second nature now. So much so that almost all multiplayer video games have ditched their split-screen multiplayer modes because they assume you’d rather just be alone at your house than hanging out with your friends. This wasn’t always the case though. In the early days of online multiplayer, systems had to rely on dial-up internet before broadband was readily available (and still had split screen if you didn’t even have that). Almost no one uses dial up anymore though, so if you still like playing your old Dreamcast you’re going to have to do some work to get it online again.

Luckily for all of us there’s a Raspberry Pi image to do almost anything now. This project from [Kazade] uses one to mimic a dial-up connection for a Dreamcast so you can connect with other people still playing Quake 20 years later. It’s essentially a network bridge, but you will need some extra hardware because phone lines use a high voltage line that you’ll have to make (or buy) a solution for. Once all the hardware is set up and working, you’ll need to make a few software configuration changes, but it’s a very straightforward project.

Granted, there have been ways of playing Dreamcast games online before, but this new method really streamlines the process and makes it as simple as possible. The Dreamcast was a great system, and there’s an argument to be made that the only reason it wasn’t more popular was that it was just slightly too far ahead of its time.

Thanks to [Rusty] for the tip!

Dreamcast Gets A Plug-n-Play Hard Drive Mod

The Dreamcast was a proud moment for Sega, at least initially, being the first console to launch of a new generation. Unfortunately this didn’t translate into massive sales, and the plug was pulled far earlier than expected. The console retains a dedicated fanbase to this day however, who continue to tinker with the hardware. [DreamcastChannel] is one of them, and put together a nifty plug-and-play hard drive mod.

The mod is based on earlier work, which consisted of manually soldering the 44 lines of an IDE cable on to the main Dreamcast motherboard. This allowed an IDE hard drive to be neatly mounted inside the shell, but [DreamcastChannel] knew it was possible to do better.

Starting from scratch, the GDROM optical drive assembly is gutted, leaving just its metal case and PCB. The IDE cable for the hard disk is then soldered to the pads on the PCB. A 3D printed mount is used to fix the hard drive to the metal case. This allows the entire assembly to slot neatly into the Dreamcast, using the GDROM’s original connector.

It’s a hack that makes putting a hard drive into the Dreamcast neat and tidy. Combined with a hacked BIOS and Dreamshell, it makes playing backup games a breeze. We’ve seen plenty of Dreamcast hacks before, too – the VMU is often a key candidate for attention. Video after the break.

Continue reading “Dreamcast Gets A Plug-n-Play Hard Drive Mod”

Arduboy Brings New Life To Dreamcast VMU

The Dreamcast VMU was a curious piece of hardware. Part memory card, part low-end LCD gaming toy, its fate was sealed once SEGA abandoned the console platform on January 31, 2001. With a limited market penetration and no major killer app, the VMU is a largely forgotten piece of ephemera from a past era. All the more reason to refit one with an Arduboy, instead.

[sjm4306] has taken the Arduboy and repurposed it into a VMU-friendly form factor. The PCB is designed to fit snug inside the plastic case, with conductive traces for the original rubber membrane buttons already in place on the main board. There are some minor fit and finish issues with the first prototype – problems with drill sizes, and connectors that don’t quite fit flush with the housing. Mistakes like these are familiar to any maker who has built a custom PCB or two in their time, and [sjm4306] is confident the bugs will be worked out in the second revision.

It’s a fun project that brings some fun gaming action to an otherwise forgotten platform. If an Arduboy isn’t enough, you could always try to fit a Pi Zero instead. And if you don’t have a VMU, you can always emulate one. Video after the break.

Continue reading “Arduboy Brings New Life To Dreamcast VMU”