Building An IoT Drill Press For Reasons Unknown

He’s a little cagey about the reasons, but [Ivan Miranda] plans to put a drill press on the internet. What could go wrong with that?

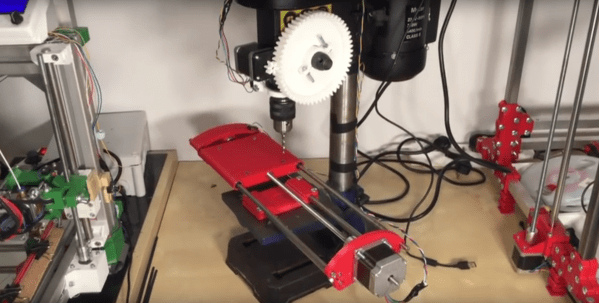
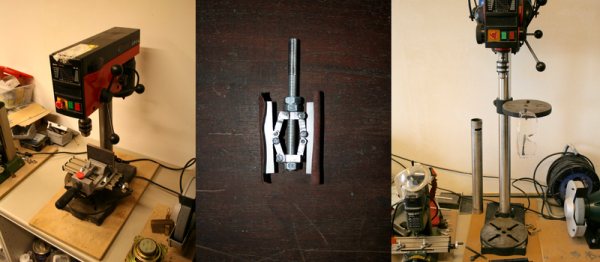
We’ll take [Ivan] at his word that there’s a method to this madness and just take a look at the build itself, in the hopes that it will inspire someone to turn their lowly drill press into a sorta-kinda 2-axis milling machine. [Ivan] makes extensive use of his 3D printer to fabricate the X-axis slide that bolts to the stock drill press table. And before anyone points out the obvious, [Ivan] already acknowledges that the slide is way too flimsy to hold up to much serious drilling, especially considering the huge mechanical advantage of the gearing he used to replace the quill handle for a powered Z-axis. The motor switch was also replaced with a solid state relay. The steppers, relay, and limit switches are all fed into a Teensy that talks to an ESP8266, which will presumably host a web interface to put this thing online.

The connected aspects of the drill press become a little more clear after the break.

Continue reading “Building An IoT Drill Press For Reasons Unknown”

Likely Everything You Need To Know Before Adopting A Drill Press

Oh sure, the thought of owning a happy whirring drill press of your very own is exciting, but have you really thought about it? It’s a big responsibility to welcome any tool into the home, even seemingly simple ones like a drill press. Lubricants, spindle runout, chuck mounts, tramming, and more [Quinn Dunki], of no small fame, helps us understand what it needs for happy intergration into its new workshop.

[Quin] covers her own drill press adventure from the first moments it was borne into her garage from the back of a truck to its final installation. She chose one of the affordable models from Grizzly, a Washington based company that does minimal cursory quality control on import machinery before passing on the cost to the consumer.

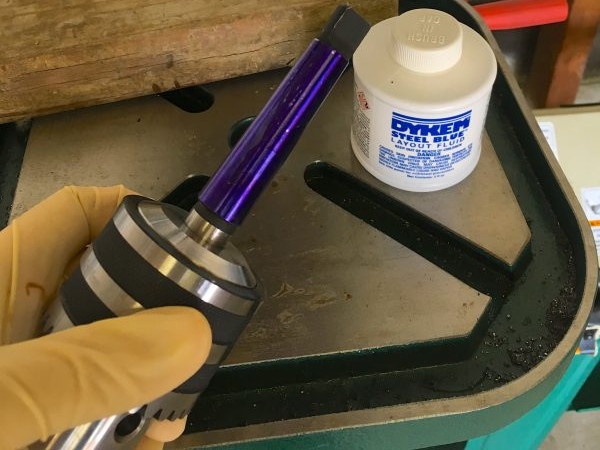
The first step after inspection and unpacking was to remove all the mysterious lubricants and protectants from the mill and replace them with quality alternatives. After the press is set-up she covers some problems that may be experience and their workarounds. For example, the Morse taper on the chuck had a few rough spots resulting in an incomplete fit. The chuck would work itself loose during heavier drilling operations. She works through the discovery and repair of this defect.

Full of useful tips like tramming the drill press and recommended maintenance, this is one of the best guides on this workshop staple that we’ve read.


Super Cheap Super Simple DRO

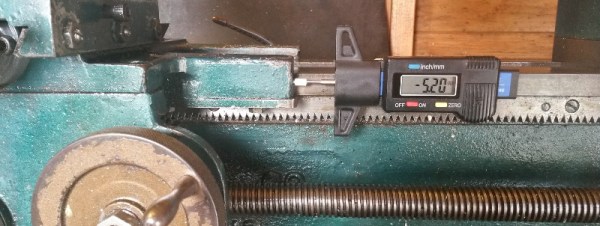
If you have an old manual lathe, mill, or even a drill press, a digital readout (DRO) is a very handy tool to have. A DRO gives you a readout of how far you’ve cut, milled, or drilled into a piece of work without having to stoop to caveman levels and look down at a dial. Here’s a stupidly cheap DRO for all your machine tools. It should only cost five bucks or so, and if you need it, you already have the tools to manufacture it.

This build is inspired by an earlier build using the same single component – a digital tread depth gauge. This digital tread depth gauge is commonly found in countries that don’t use the US penny as currency to measure the depth of tread on a tire. The throw isn’t that large – only about 27mm – but with a few modifications it can fit on any machine tool.

The modifications include a small bit of metal glued to the back and four tiny neodymium magnets.  For the ‘tool head’ of this DRO, only a tiny plastic collar and another deo magnet are needed.

This digital tire depth gauge looks like – and probably is – the same mechanism found in those super cheap calipers from the far east. In theory, it should be possible to extend this modification to those digital calipers, making for a simple DRO with a much larger throw.

Thanks [Ben] for sending this one in.

Building A Taller Drillpress

[BF38] bought a mid-range miniature drill-press, and discovered that it was just too short for some of his applications. “No problem,” he thought, “I’ll just measure the column and swap it out for a longer one.” It sounds foolproof on paper.

He discovered, after having bought a new 48.3 mm steel column, that the original was 48 mm exactly in diameter. He’d have to make it fit. But how do you bore out a 48 mm diameter hole, keeping it perfectly round, and only increase the diameter by 0.3 mm? A file is out because you’d never get it round. A lathe is out because [BF38] doesn’t have a lathe.

[BF38] ended up making a DIY honing head, which is a gadget that presses (in this case) two pieces of sandpaper evenly against the sides of the hole to be widened. The head in question is a little bit rough — it was made as a learning project, but it looks like it served the purpose admirably.

Rehabbing An Historic Tool From Champion Blower And Forge Co.

Here’s a tale that warms our hearts. [Gord] is helping out the local living-history museum by rehabbing a historic woodworking tool that they want to add to their live demo woodshop. It’s a hundred-year-old manual drill press that has seen a ton of use.

acme-rod-tig-repairThere are three things that [Gord] has going for him. First off, the Champion Blower and Forge Co. built them to last. Second, he’s not really working on a deadline; the museum doesn’t need it back until May. And third, [Gord] has the tools he needs to do this right.
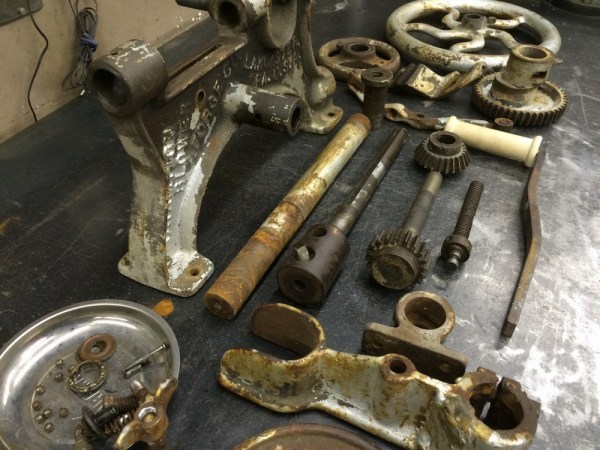
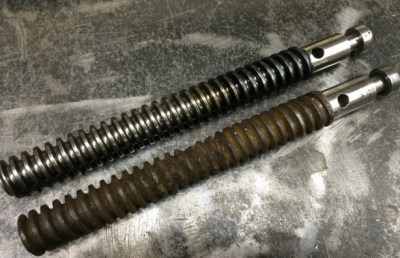
After cleaning and blasting [Gord] gets down to the really interesting repairs. First off, it wouldn’t be a drill press if someone hadn’t tried to drill through the table at some point. TIG welding filled it up and some milling brought it back. This same method was used again to make a beautiful custom replacement ACME rod. Throwing in a custom bushing replacement, turned wooden handle, and a several other fabricated parts, and [Gord] had the press working again. Check out the mechanism in the video below that shows the crank action turns the bit and a cam advances it through the work piece.

Continue reading “Rehabbing An Historic Tool From Champion Blower And Forge Co.”

Semi-Auto PCB Drill Press Makes Drilling Semi-Painless

DIY PCBs are the fastest and cheapest way to iteratively prototype circuits, and there’s a lot of great tricks to get the copper layer just the way you want it. But if you’re using through-hole parts, you eventually have to suffer the tedium of drilling a potentially large number of precisely aligned holes. Until now. [Acidbourbon] has built up a very nice semi-automatic PCB drill machine.

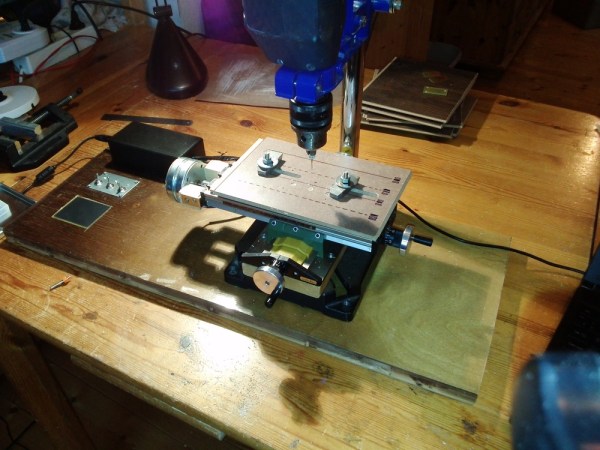
Semi-automatic? The CNC machine (with PC-side software) parses the drill file that most PCB design software spits out, and moves an X-Y table under your drill press to just the right spots. The user manually drills the hole and hits enter, and the table scoots off to the next drilling location. All of this is tied together with a simple calibration procedure that figures out where you’ve got the board using two reference drill locations; you initially jog the platform to two reference drill holes, and you’re set.

The CNC conversion of a relatively cheap X-Y table is nicely documented, and the on-board touchscreen and USB interface seem to make driving the machine around painless. Or at least a lot less painful than aligning up and drilling all the holes the old-fashioned way. Everything is open-source, so head on over and check it out.  (And while you’re there, don’t miss [Acidbourbon]’s tips and tricks for making PCBs using the toner transfer method.)

Seeing this machine in action, we can’t wait for the fully automatic version.

Continue reading “Semi-Auto PCB Drill Press Makes Drilling Semi-Painless”

Convert a Drill Press to a Mill

Bench Top Drill Press Converted To Milling Machine, Mounted To Lathe

Milling machines are nice to have around for precisely drilling holes or removing unwanted material from a part. However, they can be expensive and may not get a lot of use, two reasons why a mill purchase may not make sense for a home shop. [David] didn’t need a mill, he wanted one and he didn’t want to spend a lot of money. He did have an old bench top drill press and a lathe in his shop and thought it would be a good idea to combine them them into a DIY Milling Machine.

The problem with just throwing a milling bit in a drill press and trying to mill metal is that the drill press spindle ball bearings are not made for radial loading. [David] knew this and replaced the stock ball bearings with angular roller bearings. These new bearings would require an axial preload applied to keep the spindle in place. This was done by machining threads into the spindle’s shaft and adding a nut to secure and preload the new angular roller bearings.

[David] did not have an XY Table to donate to the project so he decided to mount the drill press to his lathe and use the lathe axes to move the work piece around underneath the mill. Thick plate steel was welded together to form a hefty bracket that bolted to both the lathe bed and drill press column. And yes, the lathe is still functional and the changeover process is simple. To go from Mill to Lathe; the work piece is removed from the lathe’s cross slide and replaced with the lathe tool holder. That’s it!

Overall, [David] is happy with his conversion. He doesn’t expect his project to be as precise or rigid as a proper milling machine but says he has no problem cutting 1mm deep passes in steel when using a 6mm diameter mill bit.