Hackaday Links: Sunday, April 21st, 2013

hackaday-links-chain

Regular reader and master hacker [Bill Porter] got married. Congratulations [Bill] and [Mara]! The two of them just couldn’t leave their soldering irons at home. The actually swore their vows by soldering together a circuit during the ceremony (blinky wedding dress, el wire tuxedo, and all).

[Kevin] sent in a link to [Red Fathom’s] hacked Wacom tablet. It’s the screen from a Wacom-enabled laptop brought back to life with a Teensy and an LVDS interface module.

The Neato XV-11 is able to find its charging station when the batteries run low. [Derek] figured out that you can make a second station using some reflective tape.

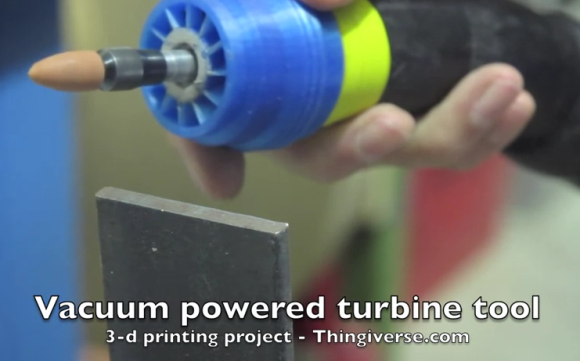
If you use your drill a lot you’ll eventually break the rubber thing that holds the key to the chuck. Here’s a way to 3D print a replacement.

[Torxe] put eight floppy drives to use as a polyphonic Arduino-controlled MIDI player. And while we’re on the subject of Arduino controlled projects you should take a look at this web-interface to tell you if the foosball table is being used.

And finally [Th3 Bad Wolf] sent in this link to a milling machine built out of LEGO. It is able to mill floral foam and uses a lathe-like setup for one of the table axes.

Human Powered Emergency Cell Phone Charger

Emergency-human-powered-cell-phone-charger

Power outage? For the average citizen it’s very easy to take electricity for granted. Go a few hours or more without it though, and you’ll suddenly be reminded just what a luxury it is. During an emergency situation, sometimes you have to come up with alternative methods to get the job done. This human powered cell phone charger is a great example.

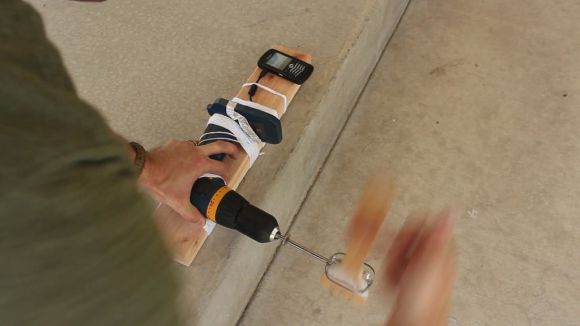
Using just a few ordinary around the house items, [The King of Random] turned a cordless electric drill into a human powered electrical generator. If the drill is run in reverse and cranked by hand, the generated energy can be transferred through the battery terminals to a connected device.  So, he cut a USB charger cable in half and wired it up to the terminals to be able to charge his cell phone. Some yarn, a salad fork, a mixing beater, a scrap 2″x4″, some aluminum foil, and scotch tape were the only other materials he used. Using this technique, a totally dead phone battery was charged in around 3 hours.

Remember that this method is only intended to be used in an emergency, not as every day practice. Using these methods could potentially overheat or damage your gear, so be careful.

Check out the MacGyver worthy video tutorial after the break.

[via Neatorama]

Continue reading “Human Powered Emergency Cell Phone Charger”

Toroid Winding Cheat

When you need a toroid the easiest source is often to wind it yourself. The problem being that placing a few hundred windings around a ferrite ring is a real drag, especially if you have to make several of them. This cheat developed by [Jim W.] will save a lot of time. He cuts the ring in half for the winding and reassembles it afterward.

Here you can see that he has half of the core mounted in a drill chuck. To get to this point he scored the ferrite before clamping half in a vice and whacking the extruding half with a block of wood and a hammer. He hasn’t found a perfect solution for scoring the material (a utility knife or a triangular file both work but have drawbacks). Leave a comment if you’ve got any bright ideas.

Once the core is in two pieces he used some copper pipe with one end flattened and bent to the shape of the ring segment. With it hot glued in place he takes it for a spin (shown in the clip after the break). Once the windings are done a bit of super glue recombines the halves. This sort of thing is great for monitoring power use.

Continue reading “Toroid Winding Cheat”

Motorized Binocular Chair Has You Stargazing In Comfort

motorized-binocular-chair-for-stargazing-in-comfort

It seems like something out of The Red Green Show but this motorized stargazing chair is a serious piece of astronomical hardware. It has a shelf that places a set of high-power binoculars directly in the user’s line of sight. The elevation is easy to adjust. And a power drill lets you take the whole thing for a spin.

The base has been outfitted with cogs and a chain from an old bicycle. The gear reduction lets a power drill rotate the platform. This worked well enough but [Gary] found that making fine adjustments was rather difficult and more often than not he ended up moving the binoculars to avoid overshooting when adjusting the platform with the drill. Luckily he didn’t give up on the idea. On the eighth and final page of his build log he refines the rotating setup with the help of an ice cream maker. It’s gear box is used as a speed reducer so that a very slow drill speed results in an extremely small heading correction. Now he can view the stars in peace, freed from frustration by a well-refined hack.

Tank Tread Robot Build Aims For A Smooth Ride

There’s all kinds of interesting things going into this tank robot build, but that beautiful suspension system immediately caught our eye. It helps to protect the body of the robot from being shaken apart when traveling over rough surfaces. Make sure to check out the four parts of the build log which are found on the left sidebar at the post linked above.

This a Master’s thesis project and has been built from common parts. The motors for the treads are pulled from a pair of cordless drills, with some capacitors added to help combat the draw when they start up. The treads themselves are each made from a pair of bicycle chains connected with numerous PVC pipe segments. The curved section of each PVC piece goes toward the chain, leaving the edges toward the ground for great traction. The tree wheels which support the middle of the tread each have a hinge and spring to absorb the shock of running full speed into concrete sidewalk corners like we see in the video after the break.

Continue reading “Tank Tread Robot Build Aims For A Smooth Ride”

Birth Of An Arduino

Hey look, an Arduino without its clothes on. This one’s just started its journey to becoming the ubiquitous prototyping tool. The image is from [Bunnie’s] recent tour of the fab house where Arduino boards are made.

As it says on every true Arduino board, they’re made in Italy. [Bunnie’s] trip to the factory happened in Scarmagno, on the outskirts of Torino. The process starts with large sheets of FR4 copper clad material, usually about 1 by 1.5 meters in size. The first task is to send the sheets through a CNC drill. With all of the holes done it’s time for some etch resist; the image above is just after the resist has been applied. A robotic system takes over from here, running the panels through the chemicals which first etch away the copper, then remove the resist and plate the remaining traces. From there it’s off to another machine for solder mask and silk screen.

There are videos of each step available. But our favorite piece is the image at the end that shows a pallet with stacks of completed PCB panels which are headed off to be populated with components.

[via Reddit]

Mouth-powered Tools That Will Make Your Dentist Cringe

Want to try your luck drilling out a PCB with this mouth-powered drill? [Cheng Guo] shows off one of his many mouth-powered tools above. It’s a tiny drill which spins with the opening and closing of your  jaw. The concept may seem a bit silly, but his ability to fabricate these machines is fantastic.

The clip after the break starts off with the drilling demo seen above. From there he shows off several different tools. One is a molding machine that uses your breathing to spin a mold, thereby forcing the material inside to conform to its shape. There’s also a wood lathe. You hold the cutting tool in the your mouth and spin the mechanism with a bow and string setup. If you’re good at sucking, his vacuum former is right up your alley. Just heat up the plastic stock in the microwave and suck with all your might. Finally he shows off an extruder. We’re not quite sure how that one works.

Continue reading “Mouth-powered Tools That Will Make Your Dentist Cringe”