An Easy Transparent Edge Lit Display

Displays are crucial to modern life; they are literally everywhere. But modern flat-panel LCDs and cheap 7-segment LED displays are, well, a bit boring. When we hackers want to display the progress of time, we want something more interesting, hence the plethora of projects using Nixie tubes and various incantations of edge-lit segmented units. Here is [upir] with their take on the simple edge-lit acrylic 7-segment design, with a great video explanation of all the steps involved.
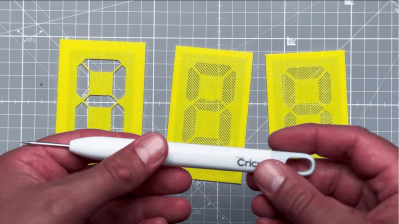
Engraving the acrylic sheets by hand using 3D printed stencils

The idea behind this concept is not new. Older displays of this type used tiny tungsten filament bulbs and complex light paths to direct light to the front of the display. The modern version, however, uses edge-lit panels with a grid of small LEDs beneath each segment, which are concealed within a casing. This design relies on the principle of total internal reflection, created by the contrast in refractive indices of acrylic and air. Light entering the panel from below at an angle greater than 42 degrees from normal is entirely reflected inside the panel. Fortunately, tiny LEDs have a wide dispersion angle, so if they are positioned close enough to the edge, they can guide sufficient light into the panel. Once this setup is in place, the surface can be etched or engraved using a CNC machine or a laser cutter. A rough surface texture is vital for this process, as it disrupts some of the light paths, scattering and directing some of it sideways to the viewer. Finally, to create your display, design enough parallel-stacked sheets for each segment of the display—seven in this case, but you could add more, such as an eighth for a decimal point.

How you arrange your lighting is up to you, but [upir] uses an off-the-shelf ESP32-S3 addressable LED array. This design has a few shortcomings, but it is a great start—if a little overkill for a single digit! Using some straightforward Arduino code, one display row is set to white to guide light into a single-segment sheet. To form a complete digital, you illuminate the appropriate combination of sheets. To engrave the sheets, [upir] wanted to use a laser cutter but was put off by the cost. A CNC 3018 was considered, but the choice was bewildering, so they just went with a hand-engraving pick, using a couple of 3D printed stencils as a guide. A sheet holder and light masking arrangement were created in Fusion 360, which was extended into a box to enclose the LED array, which could then be 3D printed.

If you fancy an edge-lit clock (you know you do) check out this one. If wearables are more your thing, there’s also this one. Finally, etched acrylic isn’t anywhere near as good as glass, so if you’ve got a vinyl cutter to hand, this simple method is an option.

Continue reading “An Easy Transparent Edge Lit Display”

Sign Detects RF To Show You Are On The Air

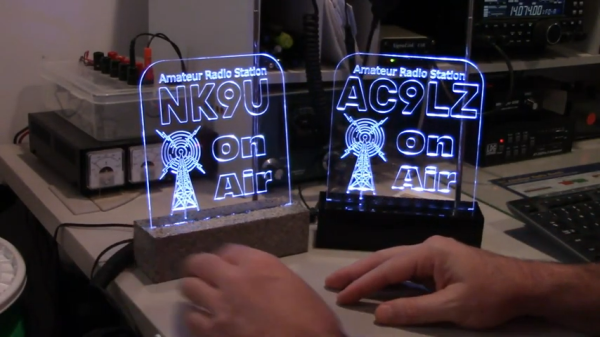
Like a lot of hams, [Stuart] wanted an “on the air” sign. These signs often connect to a PTT switch or maybe an output from the transmitter that also does things like switches antennas or switches in an amplifier. [Stuart’s] version, though, simply senses the radio frequency emissions from the transmitter and lights up that way. You can see two videos about the sign, below.

Honestly, we are a little worried that he might have too much RF at his operating position. Presumably, the device is pretty sensitive, especially if there’s any actual antenna on the sign. A comparator and a pot let you set the sensitivity so it doesn’t light up when your garage door opens.

Continue reading “Sign Detects RF To Show You Are On The Air”

Edge-Lit 7-Segments Clock The New Normal

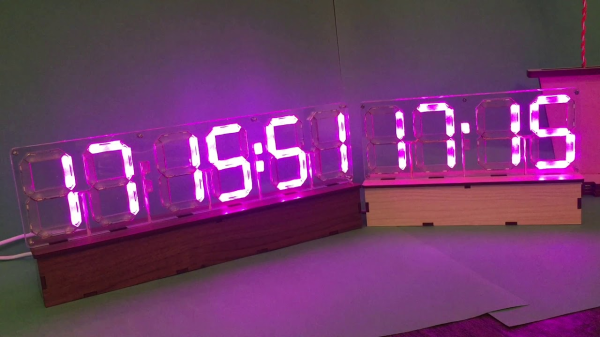
People keep saying that time has lost all meaning now, but we’re still over here divvying up the days with hacks. Most of the hacks you see here are open source. But if you want something even more transparent to meter out the meaninglessness, we invite you to make one of these clearly awesome see-through clocks, which happens to be both.

A word of warning though — according to [GeekMomProjects], this is an incredibly fiddly build with tight tolerances everywhere that acrylic meets acrylic or an LED strip. We can see how it might be like forcing fragile puzzle pieces together. Since the whole thing is crystal clear acrylic, light is going to go everywhere.

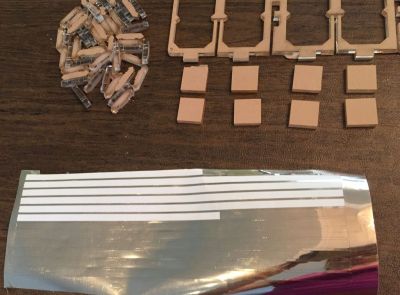
[GeekMomProjects] cleverly blocked the escaping light by painstakingly applying non-conductive adhesive foil to the edges of all the smaller pieces. In spite of all that work, we think it would be worth it to have such a fantastic timepiece glowing away the hours somewhere in the house.

Electronically speaking, this beauty is pretty simple. The lights run off of an ItsyBitsy M4 Express, and the time is separately fetched with an ESP8266. [GeekMomProjects] had so much fun that she made one with seconds and one without. Check out their RGB dance routine after the break.

If you prefer your blinky 7-segment clocks a bit more utilitarian, here’s a clock made of shelves.

Continue reading “Edge-Lit 7-Segments Clock The New Normal”

Foxie Clock Works In Two Ways

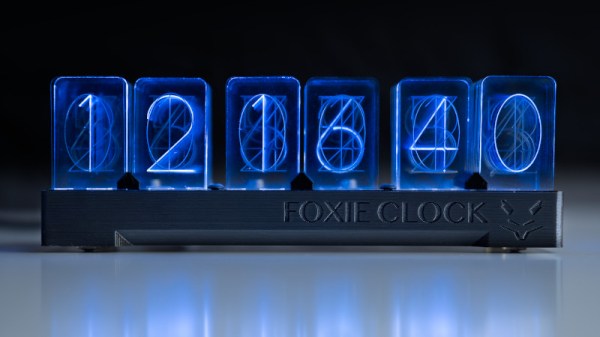
Nixie tubes are a hacker favorite for their warm glow and elegant, mid-century numerals. They’re also a pain to drive, demand high voltages, and aren’t exactly cheap and easy to come by. Never mind, for there are other ways to go – as [Alex Fox] demonstrates with the Foxie Clock.

The Foxie clock gets its name from its creator, in a portmanteau with the famous Nixie tubes. Rather than going with gas-filled extravagances, instead, acrylic pieces are engraved with similar numerals to the old technology. These are edge-lit by what appear to be WS2812 addressable LEDs, or similar. This led [Alex] to realise that the clock could also be configured to display in an alternate mode, instead creating numerals using the individual RGB LEDs as segments behind a frosted acrylic panel.

It’s a versatile project that ended up working as a clock in two unique yet appealing ways. We’re a sucker for a quality retro typeface, so are firmly on Team Edge-Lit, but sound off in the comments which you think is best. Others have attempted similar builds, too. And remember, if you can’t get your hands on one part, it always pays to experiment!

Vinyl Cut Your Way Into An Edge-Lit Glass Display

The chances are you’ve seen the myriad cheap copyright-infringing edge-lit acrylic displays from Chinese suppliers everywhere on the internet, and indeed, etching acrylic with a modest CNC laser cutter has become easily viable to a lot of us in more recent years. However, if you want to kick things up a notch, [Michael Vieau] shows us how to build a plaque from scratch using not acrylic, but rather etched glass to make the finished product look that much more professional.

There are a few different steps to this build and each one is beautifully detailed for anyone who wants to follow along. First, the electronics driving the WS2812 lights are designed from scratch based on an ATtiny microcontroller on a PCB designed in Fritzing, and the sources necessary for replicating those at home are all available on [Michael’s] GitHub. He even notes how he custom-built a pogo-pin header at the end of the USBASP programmer to be able to easily use the same ICSP pinout in future projects.

But since a lot of you are likely all too familiar with the ins and outs of your basic Arduino projects, you’ll be more interested in the next steps, detailing how he milled the solid wood base and etched the glass that fits onto it. The process is actually surprisingly simple, all you need is to mask out the design you want through the use of a vinyl cutter and then pouring some etching solution over it. [Michael] recommends double-etching the design for a crisper look, and putting everything together is just as simple with his fastener of choice: hot glue.

Much as there was an age when Nixie displays adorned every piece of equipment, it seems like ease of manufacture is veering us towards an age of edge-lit displays. From word clocks to pendants and badges, we’re delighted to see this style of decoration emerge, including in replacing Nixies themselves!

Word Clock Does The Job With Laser-Etched Acrylic

As far as telling the time, word clocks go out of their way to spell it out for you. As long as you know the language, they’re a stylish and effective way to get the message across. [Simon] built an elegant, stripped-back word clock of his own, with a laser cutter helping to get the job done.

The core of the build is an Arduino Nano, hooked up to a string of 22 WS2812B LEDs, driven via the FastLED library. An NXP PCF8563T serves as the real-time clock, to ensure stable and accurate timekeeping. The electronics are all housed inside an enclosure that appears to be constructed from PCBs, with instructions on operating the clock printed on the base.

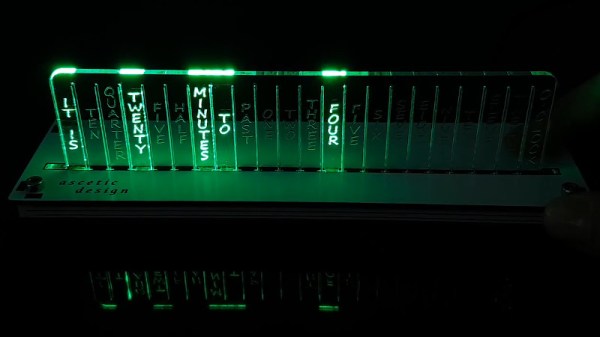
The actual display is via laser-cut and laser-etched acrylic. The display piece slides into the top of the clock, with the LEDs edge lighting various segments to display the relevant words that make up the current time. The clock is designed in such a way that these display slides can be easily switched out to change the look of the clock, with different fonts and designs.

It’s a quick and clean take on the popular word clock design, and one any makerspace could whip up in a weekend. As far as word clocks go, however, the sky really is the limit when it comes to complexity. Video after the break.

Continue reading “Word Clock Does The Job With Laser-Etched Acrylic”

Edge-Lit Ping Pong Paddle Lights Up The Fight

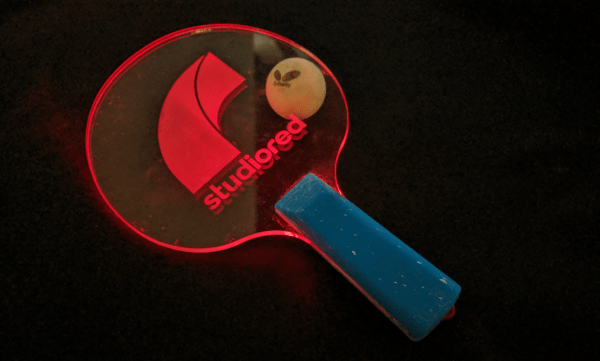
[George] and his coworkers like to blow off a little lunchtime steam on the company ping pong table. We might do the same, except it’d just be us versus the wall, and most of the exercise would consist of bending over to pick the ball up off the floor. When he found a scrap piece of acrylic out in their shop, [George] got the bright idea to make an edge-lit paddle featuring the company’s logo.

Not only does the paddle look cool, it works pretty well, too, even though it’s heavier and has smooth surfaces compared to a standard paddle. To begin, [George] found a regulation-size paddle outline and imported it into SolidWorks, then designed all the necessary cuts for the LEDs and other electronics. He also designed and printed ergonomic grips to protect the goods.

Continuing the stuff-on-hand theme, [George] used through-hole LEDs and dug into the abundance of battery clips and springs they have lying around for designing prototypes, instead of making it all fancy with SMT LEDs and a rechargeable battery pack. Slip on those sweatbands, because we’re serving up the build video after the break.

We see more ping pong balls than paddles around here, and that’s probably because they make great LED diffusers.

Continue reading “Edge-Lit Ping Pong Paddle Lights Up The Fight”