Test Your Signal With The WiFi Cup

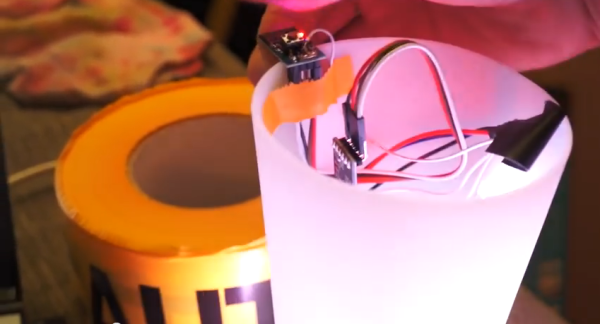
[CNLohr] wanted to test the WiFi range in his house. One look at his roommate’s cup and an unorthodox idea was born. The WiFi Cup used an ESP8266 to connect to his home network. For output, [CNLohr] also added a WS2812 LED strip to the cup. The ESP8266 was programmed to send UDP packets to [CNLohr’s] laptop. When the laptop responded back, the ESP8266 turned on the LEDs, lighting up the cup. The cup’s response to signal strength was very quick – about a second.

[CNLohr] took the WiFi Cup around the house. He was surprised to detect the connection in corners he didn’t expect; in fact, the signal wasn’t weakening at all! He proceeded to walk outside with it, hoping to see the signal strength decrease. As a testament to his roommate’s robust router, the cup merely flickered. Hoping for a better test, [CNLohr] switched out the router for a cheaper TP-Link with shorter antennas. While the initial ping test showed a slower response time, the cup detected WiFi around the house just fine. It only wavered for a couple of moments when it was placed inside a metal bucket. We have to wonder how thin [CNLohr’s] walls are. WiFi never works that well in our house!

Continue reading “Test Your Signal With The WiFi Cup”

Hackaday Links Column Banner

Hackaday Links: November 9, 2014

After many years of searching, [Dan Wood] finally got his hands on something he’s wanted for the past twenty-two years: an Amiga 4000. No, it’s not the queen bee of Amiga land – that honor would fall to the 68060-equipped 4000T, but [Dan]’s 4000 is decked out. It has a 256MB RAM expansion, Ethernet, USB, and a Picasso IV graphics card that gives it better resolution and color depth than most modern laptops.

[Pistonpedal] has a fully automatic pneumatic can crusher that is far too cool to be wasted on a case of Keystone. A funnel at the top guides the cans in to be crushed one at a time and ejected into a garbage can underneath. Great for recycling.

Coming over from ‘normal’ programming into the world of embedded development? [AndreJ] has the AVR C Macro for you. It’s a great way to get away from all those ~=, |=, and &=s that don’t make any sense at all.

[CNLohr] has a reputation for running Minecraft servers on things that don’t make any sense at all. The latest build is a light up redstone ore block equipped with an ESP8266 WiFi chip.

Oh, the Hackaday overlords and underlings are in Munich for this little shindig we’re doing. If you in town for Electronica come on down. If you have a copy of Neil Young’s Trans, bring it to the party.

A Development Board For The ESP8266

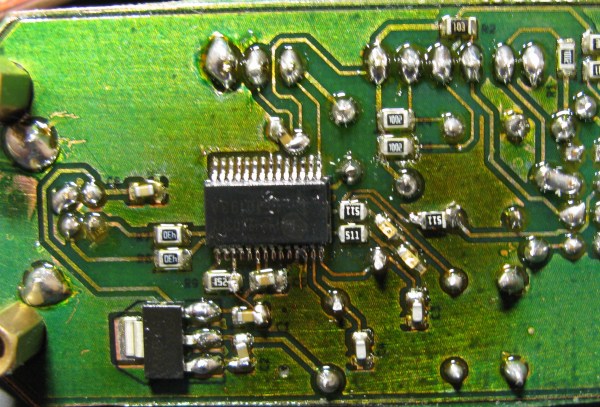
[Necromant] is ready to dip his toes into the world of firmware development for everyone’s favorite WiFi chip, the ESP8266. Before that begins, it would be a good idea to make a nifty little breakout board for this chip. Here it is, a board with a USB to UART converter with board art that’s compatible with a toner transfer process.

Since this is just a board that turns USB into something the ESP8266 can understand, the most reasonable course of action would be to throw an FTDI chip in there and call it a day. We wouldn’t suggest that. Instead, [necromant] is using a Prolific PL2303HX. The RTS/DTR pins on the serial chip aren’t used, but only because the ESP8266 forums haven’t yet decided on how to connect them to the WiFi chip. GPIOs on the Prolific are broken out for some other projects [necromant] has in mind, with a userspace driver to make everything work.

[Necromant] is the creator of Antares, a build system for microcontrollers and a Hackaday Prize entry. He intends to make his build system compatible with this WiFi chip, just as soon as everyone else figures out an easy way to make it work.

Checking Email With The ESP8266

Ever so slowly, everyone’s favorite WiFi adapter is making its way into Internet-enabled projects. [jimeer01] created a device that reads the subject and sender lines from the latest email in his inbox and displays it on an LCD using the ESP8266 WiFi chip.

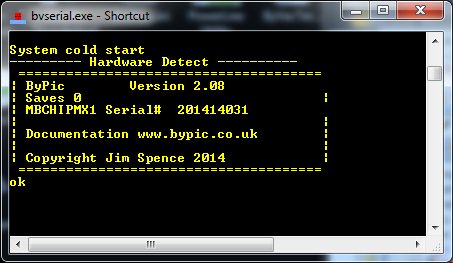
[jimeer] is using a ByPic for writing to the LCD and querying an inbox through an ESP8266 module. The ByPic is a board built around the BV_Basic firmware, stuffing a PIC microcontroller in an Arduino form factor and giving it a BASIC interpreter. Because this board isn’t ‘compile and flash’ like an Arduino, it’s perfectly suited for changing WiFi configurations and IMAP server credentials on the fly.

The device grabs the latest email in an inbox and displays the date, sender, and subject on the display. After scrolling through those lines, the PIC hits the ESP8266 to query the server again, grabbing the latest email, and repeating the whole process again, all without needing to connect the device to a computer. Video below.

Continue reading “Checking Email With The ESP8266”

An ESP8266 Based Smartmeter

During these last weeks we’ve been talking a lot about the ESP8266, a $4 microcontroller based Wifi module. As the SDK was recently released by Espressif a lot of cheap Internet of Things applications were made possible.

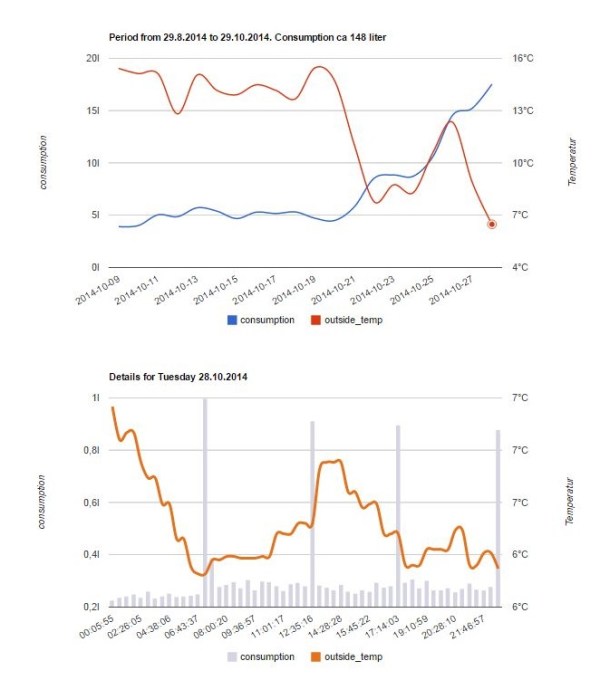
[Thomas] used one module to make a simple smartmeter measuring the active time of his heater together with the outside temperature. He added 2 AT commands starting/stopping the logging process and used one GPIO pin to monitor the heater’s oil pump state. The measurements are then periodically pushed via a TCP connection to his data collecting server, which allows him to generate nice graphs.

In the video embedded below you’ll see [Thomas] demoing his system. On his hackaday.io project page he put up a very detailed explanation on how to replicate his awesome project. All the resources he used and create can also be downloaded on the project’s GitHub page.

Continue reading “An ESP8266 Based Smartmeter”

An SDK For The ESP8266 WiFi Chip

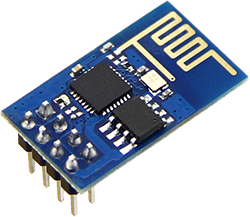
The ESP8266 is a chip that turned a lot of heads recently, stuffing a WiFi radio, TCP/IP stack, and all the required bits to get a microcontroller on the Internet into a tiny, $5 module. It’s an interesting chip, not only because it’s a UART to WiFi module, allowing nearly anything to get on the Internet for $5, but because there’s a user-programmable microcontroller in this board. If only we had an SDK or a few libraries…

The ESP8266 SDK is finally here. A complete SDK for the ESP8266 was just posted to the Expressif forums, along with a VirtualBox image with Ubuntu that includes GCC for the LX106 core used in this module.

Included in the SDK are sources for an SSL, JSON, and lwIP library, making this a solution for pretty much everything you would need to do with an Internet of Things thing. As far as LX106 core is concerned, there’s example code for using the spare pins on this board as GPIOs, I2C and SPI busses, and a UART.

This turns the ESP8266 into something much better than a UART to WiFi module; now you can create a Internet of Things thing with just $5 in hardware. We’d love to see some examples, so put those up on hackaday.io and send them in to the tip line.

Breadboard Circuit of a Funduino, a DS18B20 Temperature Sensor, and an ESP8266 module.

Keep An Eye On Your Fermenting Beer With BrewMonitor

The art of brewing beer is as old as civilization itself. Many people enjoy brewing their own beer at home. Numerous steps must be taken before you can take a swig, but fermentation is one of the most critical. [Martin Kennedy] took up the hobby with his friends, and wanted a convenient way to monitor the fermentation temperature remotely. He started working on the BrewMonitor, a cloud-based homebrewing controller powered by an Arduino clone.

His goal was to create something cheap, convenient, and easy to set up. Traditional fermentation monitoring equipment is very expensive. The typical open-source alternative will set you back 80 euros (roughly $101), using the Arduino-sensor with a Raspberry Pi gateway via the BrewPi webserver. [Martin] did not want to go through the hassle of viewing BrewPi remotely, since it requires a home network and all of the configuration that would entail. Instead, he coupled an Arduino clone with a DS18B20 temperature sensor while using an ESP8266 module for wireless communication, all for less than 18 euros ($23). This connects to a simple webpage based on Scotch.io with a PHP backend (Laravel with RESTful API), a MySQL database, and an AngularJS frontend to display the graph. Once the sensor is placed into the fermenter bucket’s thermowell, the temperature is transmitted once a minute to the REST API. You can see the temperature over time (in Celsius). The design files are available on GitHub.

[Martin] would like to expand the functionality of BrewMonitor, such as adding the ability to adjust the temperature remotely by controlling a heater or fridge, and lowering its cost by single boarding it. Since the information is stored on the cloud, upgrading the system is much easier than using a separate gateway device. He doesn’t rule out crowdfunding campaigns for the future. We would like to see this developed further, since different yeast species and beer styles require very stringent conditions, especially during the weeks-long fermentation process; a 5-degree Celsius difference can ruin an entire brew! Cloud-based temperature adjustment seems like the next big goal for BrewMonitor. DIY brewers salute you, [Martin]!

[via Dangerous Prototypes]