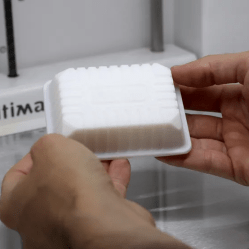
Digital Taxidermy Spool Recycling concept art.

Spool Tower: Empty Filament Spool Or Base For Miniature Civilizations

While churning through rolls of FDM filament, there are these empty spools that remain at the end. These can be thrown out with the trash, or be used as a standard base for miniatures, for use with Dungeons & Dragons tabletop gaming or similar, or just as a display piece. The latter is what the blokes over at Digital Taxidermy ran with when they started their first Spool Tower Kickstarter campaign. Now they’re back with Spool Tower 2: The Re-Spoolening.

These are STL bundle packs that should contain all that’s needed to turn an empty filament spool into an art piece, minus of course the painting. To get a free taste of what the experience is like, Digital Taxidermy provides a few free STLs, such as for the Ye Olde Taxidermee Shoppee and the Hab Block from the new crowdfunding campaign.

This effort raises the interesting question of what other standard (plastic) shapes of packaging could conceivably be used in a similar manner. After all, why print the whole thing when half the model could be made from something you’d otherwise just toss into the trash bin?

Thanks to [scat happens] for the tip.

A profile view of a medical training mannequin with a tube down its "throat." A ventillation bag is in the gloved hand of a human trainee.

Making Medical Simulators Less Expensive With 3D Printing And Silicone

Medical training simulators are expensive, but important, pieces of equipment. [Decent Simulators] is designing simulators that can easily be replicated using Fused Deposition Modeling (FDM) printers and silicone molds to bring the costs down.

Each iteration of the simulators is sent out for testing by paramedics and doctors around the world, and feedback is integrated into the next revision. Because the trainers are designed to be easily replicated, parts can easily be replaced or repaired which can be critical to keep personnel trained, especially in remote areas.

While not open source, some models are freely available on the [Decent Simulators] website like wound packing trainers or wound prostheses which could be great if you’re trying to get a head start on next year’s Halloween costumes. More complicated models will be on sale starting in January as either just the design files or a kit containing the files and the printed and/or silicone parts.

Interested in more medical hacks? Check out this Cyberpunk Prosthetic Eye or this Arduino Hearing Test Device.

The Filamentmeter: For When You Absolutely Want To Count Every Meter Used

[ArduinoNmore] took an interesting approach to designing a counter intended to accurately display how many meters of filament a 3D printer has used. The Filamentmeter looks a little bit like a 3D printed handheld tally counter (or lap counter) but instead of a button to advance each digit, the readout represents how many meters of filament have gone through the extruder.

Driving the digit rotation from the extruder motor itself means that even retractions are accounted for.

At first glance it may look like there is a motor hidden inside, or that the device is somehow sensing the filament directly. But it’s actually the movement of the extruder motor that drives the device. A small spur gear attached to the printer’s extruder drives a series of gears that advance the digits. This means that retractions  — small reverses of the extruder motor during printing — are properly accounted for in the total, which is a nice touch.

[ArduinoNmore] designed this for the Ender 3, and the Filamentmeter relies on a specific extruder design and orientation to work properly. Of course, since it’s 3D printed, modifying the design for your own purposes should be pretty straightforward.

Curious? The design is being sold for a few bucks, and there is a free test piece one can print and use to confirm whether the design will work before mashing the buy button. Non-free printable 3D models can be a world of buyer beware, but test pieces and solid documentation are good ways to give buyers confidence in your work.

The insides of the unit are really quite intricate, with a clockwork-type elegance to them. You can see it all in the short video, embedded below.

Continue reading “The Filamentmeter: For When You Absolutely Want To Count Every Meter Used”

Extruded Resin FDM Printing (With Lasers!)

At this point, 3D printers are nearly everywhere. Schools, hackerspaces, home workshops, you name it. Most of these machines are of the extruded-filament variety, better known as FDM or Fused Deposition Modelling. Over the last few years, cheap LCD printers have brought resin printing to many shops as well. LCD printers, like their DLP and SLA counterparts, use ultraviolet light to cure liquid resin. These machines are often praised for the super-high detail they can achieve, but are realllly slow. And messy —  liquid resin gets everywhere and sticks to everything.

We’re not exactly sure what [Jón Schone] of Proper Printing was thinking when he set out to convert a classic printer to use resin instead of filament, but it had to be something along the lines of “Can you make FDM printing just as messy as LCD printing?”

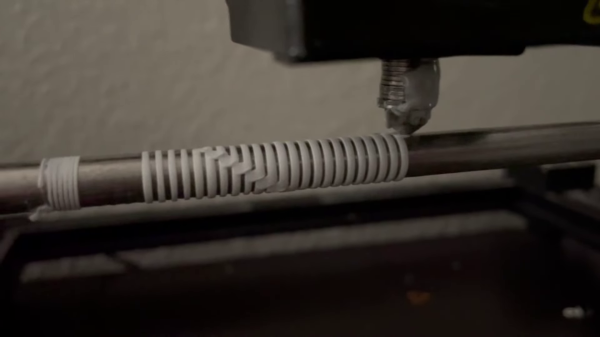
It turns out you can. His extremely well-documented research is shown in the video below, and logs his design process, from initial idea to almost-kinda-working prototype. As you may expect, extruding a high-viscosity liquid at a controlled rate and laser-curing it is not an easy task, but [Jón] made a fantastic attempt. From designing and building his own peristaltic pump, to sending a UV laser through fiber-optic cables, he explored a ton of different approaches to making the printer work. While he may not have been 100% successful, the video is a great reminder that not all projects have to go the way we hope they will.

Even so, he’s optimistic, and said that he has a few ideas to refine the design, and welcomes any input from the community. This isn’t even the only new and interesting approach to resin printing we’ve seen in the last few weeks, so we share [Jón]’s optimism that the FDM Resin Printer will work (someday, at least).

Continue reading “Extruded Resin FDM Printing (With Lasers!)”

3D Print Finishing By Spraying Glazing Putty

Finishing off 3D prints is a labour-intensive process, and getting a good looking, smooth surface suitable for painting takes a lot of time and plenty of practice. Deeper printing layer lines or minor surface defects can be smoother over with a variety of materials, from putties to resins, but the deeper the defect, the thicker the filler and that takes it toll on the surface details – smoothing those out and making fine details less distinct. [Darkwing dad] has another solution that looks pretty easy to achieve, by mixing acetone with glazing putty it can be airbrushed over the print surface in one go. After a little experimentation with the ratio of putty to acetone, a wide open nozzle and a low pressure, it was found that a nice even spray could be achieved. Importantly it dries in just a few minutes, enabling multiple coats to be applied in a short space of time.

Once sufficient thickness has been applied, the coating can easily sanded to get a smooth result with the worst of the gaps filled, and the layer lines nicely hidden. The final part of the filling process is more typical, with a few coats of filler primer applied straight from a rattle can, followed by a light sand and you’re good for painting.

We’ve covered smoothing 3D prints practically as long as we’ve been covering 3D printing itself, and there are multiple ways to do this, depending on the filament material, your budget and you tolerance for noxious fumes. Here’s a guide for smoothing using UV curable resins, using a special smoothable filament with IPA, and finally if this is just too fancy, smelly or expensive, just whip out the old butane torch and smooth those prints with good old fashioned fire.

Continue reading “3D Print Finishing By Spraying Glazing Putty”

G10 Is The 3D Print Surface You Crave

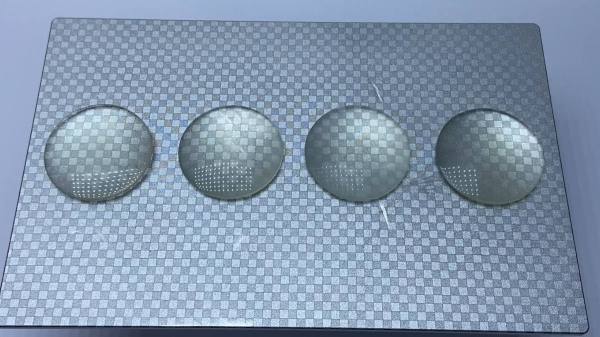
Print surfaces have been a major part of 3D printer development and experimentation since the beginning. [Makers Muse] has been experimenting with G10, a cheap high-pressure fiberglass laminate, and found that it’s an excellent candidate for most of your FDM printing needs. (Video embedded after the break.)

You’re probably more familiar with the fire-resistant version of G10, FR-4, the fiberglass substrate used for most PCBs. It’s also known by the brand name Garolite. [Makers Muse] tested with PLA, PETG (on his headphone build), ABS, ASA, PET, PCTG, and nylon. All the materials displayed excellent bed adhesion when heated to the appropriate temperature, and would often self-release the part as it cooled down. For TPU, the bed was left unheated to prevent it from sticking too well. 0.5 mm, 1.5 mm, and 3 mm G10 sheet thicknesses were tested, and [Makers Muse] found 1.5 mm to be the perfect balance between rigidity, and flexibility for removing particularly sticky prints.

G10 has been used in some commercial 3D printers, but there is very little information regarding its use beyond high-temperature materials like nylon. It leaves an excellent surface finish on the bottom of parts, as long as you take care not to scratch the bed. Compared to glass, its lower weight is advantageous for printers where the bed moves for the Y-axis. Another major advantage is the low cost, especially compared to some of the more exotic bed materials.

The results certainly look very promising, and we are keen to get our hands on some G10 for our own printers. If you have trouble finding it for sale, check out your local knife-making suppliers, who sell it as handle materials.

Continue reading “G10 Is The 3D Print Surface You Crave”

Strangest Upside-Down 3D Printer Fits In A Filament Box

It’s rare these days for a new FDM printer to come along that sparks our interest, but the [Kralyn]’s Positron managed to do it. (Video, embedded below.) It prints upside down and packs down into a filament box while still boasting a print volume of 175 mm x 176 mm x 125 mm.

Unlike most 3D printers, the hotend and XY-gantry is mounted below the build plate, directly onto the base. You might assume that a printer needs to extrude plastic with gravity to work properly, but the real action is in the smooshing of the plastic layers. It appears that it might even improve bridging since the hotend is supporting the plastic as it gets extruded. A clear glass build plate is used, with the same heating strips found on the rear windows of most cars. This also allows the user still see the part, and provides the added advantage of being able to quickly spot bed leveling and adhesion problems.

Another interesting side effect of this arrangement is rigidity. There is no need to suspend the XY gantry with the heavy hotend in the air, so it can be mounted directly on the thick aluminum base plate. It uses an H-bot style gantry, with Synchromesh timing cables instead of belts, which eliminates the concern of belt twist. To get the best possible print volume within the size of a filament box, the gantry axes are arranged diagonally across the base plate. The Z-axis can disconnect and lay flat on top of the printer and uses the linear rails to keep it perfectly straight and perpendicular when mounted. Continue reading “Strangest Upside-Down 3D Printer Fits In A Filament Box”