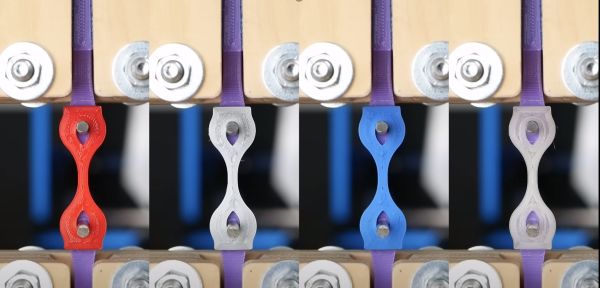
Art of 3D printer in the middle of printing a Hackaday Jolly Wrencher logo

Make Better 3D Printed Molds, For Thermoforming Plastics

Thermoforming — which includes vacuum-forming — has its place in a well-rounded workshop, and Mayku (makers of desktop thermoforming machines) have a short list of tips for getting the best results when 3D printing molds on filament-based printers.
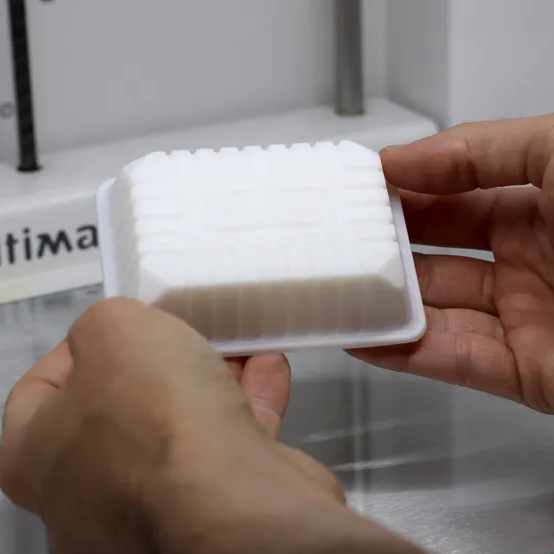
A mold is put into direct, prolonged contact with a hot sheet of semi-molten plastic. If one needs a mold to work more than once, there are a few considerations to take into account. The good news is that a few simple guidelines will help get excellent results. Here are the biggest ones:

  1. The smoother the vertical surfaces, the better. Since thermoforming sucks (or pushes) plastic onto and into a mold like a second skin, keeping layer heights between 0.1 mm and 0.2 mm will make de-molding considerably easier.
  2. Generous draft angles. Aim for a 5 degree draft angle. Draft angles of 1-2 degrees are common in injection molding, but a more aggressive one is appropriate due to layer lines giving FDM prints an inherently non-smooth surface.
  3. Thick perimeters and top layers for added strength. The outside of a mold is in contact with the most heat for the longest time. Mayku suggests walls and top layer between 3 mm to 5 mm thick. Don’t forget vent holes!
  4. Use a high infill to better resist stress. Molds need to stand up to mechanical stress as well as heat. Aim for a 50% or higher infill to make a robust part that helps resist deformation.
  5. Ensure your printer can do the job. 3D printing big pieces with high infill can sometimes lift or warp during printing. Use enclosures or draft shields as needed, depending on your printer and material.
  6. Make the mold out of the right material. Mayku recommends that production molds be printed in nylon, which stands up best to the heat and stress a thermoforming mold will be put under. That being said, other materials will work for prototyping. In my experience, even a PLA mold (which deforms readily under thermoforming heat) is good for at least one molding.

Thermoforming open doors for an enterprising hacker, and 3D printing molds is a great complement. If you’re happy being limited to small parts, small “dental” formers like the one pictured here are available from every discount overseas retailer.  And of course, thermoforming is great for costumes and props. If you want to get more unusual with your application, how about forming your very own custom-shaped mirrors by thermoforming laminated polystyrene?
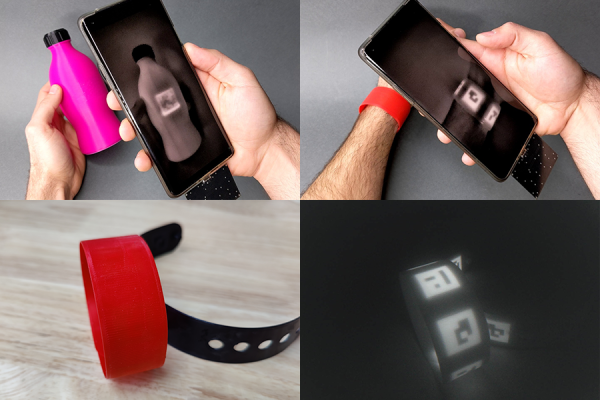
Four images in as many panes. Top left is a fuchsia bottle with a QR code that only shows up on the smartphone screen held above it. Top right image is A person holding a smartphone over a red wristband. The phone displays a QR code on its screen that it sees but is invisible in the visible wavelengths. Bottom left is a closeup of the red wristband in visible light and the bottom right image is the wristband in IR showing the three QR codes embedded in the object.

Fluorescent Filament Makes Object Identification Easier

QR codes are a handy way to embed information, but they aren’t exactly pretty. New work from MIT’s Computer Science and Artificial Intelligence Laboratory (CSAIL) have a new way to produce high contrast QR codes that are invisible. [PDF]

If this sounds familiar, you may remember CSAILs previous project embedding QR codes into 3D prints via IR-transparent filament. This followup to that research increases the detection of the objects by using an IR-fluorescent filament. Another benefit of this new approach is that while the InfraredTags could be any color you wanted as long as it was black, BrightMarkers can be embedded in objects of any color since the important IR component is embedded in traditional filament instead of the other way around.

One of the more interesting applications is privacy-preserving object detection since the computer vision system only “sees” the fluorescent objects. The example given is marking a box of valuables in a home to be detected by interior cameras without recording the movements of the home’s occupants, but the possibilities certainly don’t end there, especially given the other stated application of tactile interfaces for VR or AR systems.

We’re interested to see if the researchers can figure out how to tune the filament to fluoresce in more colors to increase the information density of the codes. Now, go forth and 3D print a snake with snake in a QR code inside!

Continue reading “Fluorescent Filament Makes Object Identification Easier”

Clear PLA Diffuses LEDs

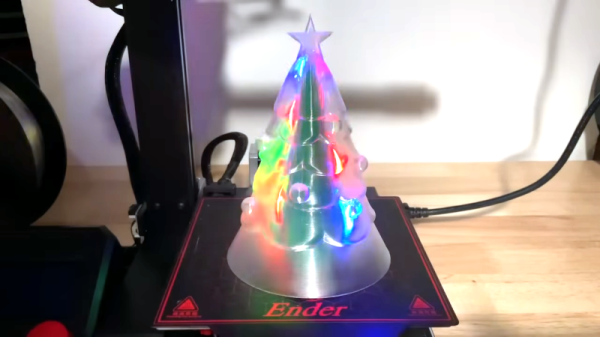
[Chuck] often prints up interesting 3D prints. But we enjoyed his enhancement to a cheap LED Christmas tree kit. The original kit was simply a few green PCBs in the shape of a tree. Cute, but not really something a non-nerd would appreciate. What [Chuck] did, though, is printed a clear PLA overcoat for it and it came out great. You can see how great in the video below.

You might think transparent PLA would be really clear, but because of the layers, it is more translucent than transparent. For an LED diffuser, though, it works great. There are a few things to consider when printing for this purpose. First, you’d think vase mode would be perfect for this, but he found out it didn’t work well — possibly due to something in the model, which was a download from Thingiverse.

Continue reading “Clear PLA Diffuses LEDs”

The Effect Of Filament Color On Print Strength And More

What is an FDM filament coloring’s purpose but to be an aesthetic choice? As it turns out, the additives that create these changes in coloring and transparency also affect the base properties of the polymer, whether it’s PLA, PETG, or another material. This is where a recent video by [CNC Kitchen] is rather illustrative, using a collection of colored PLA filaments from a single filament manufacturer.

[CNC Kitchen] ran a range of tests including tensile strength, ductility, layer adhesion, impact resistance, and annealing performance. The results showed no clear overall winner between plain PLA polymer and any specific color. Perhaps most fascinating was just how much these color additives change the material’s response to annealing. Baking the PLA at 100°C for 30 minutes generally improves material properties, but also can cause warping and shrinking. The effective warping and shrinking differed wildly between the filament.

The general conclusion would seem to be that the natural polymer isn’t necessarily the optimal choice, but that you should test and pick the filament from a specific manufacturer to fit your project’s needs.

Continue reading “The Effect Of Filament Color On Print Strength And More”

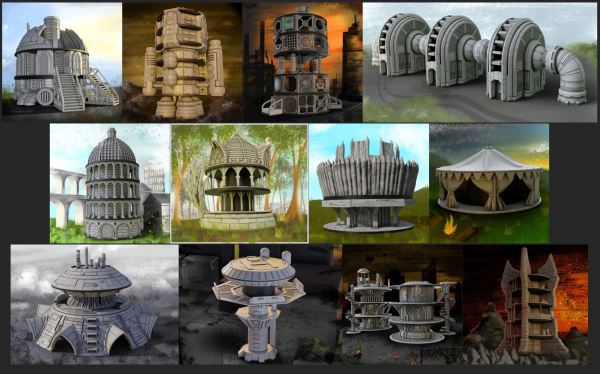
Digital Taxidermy Spool Recycling concept art.

Spool Tower: Empty Filament Spool Or Base For Miniature Civilizations

While churning through rolls of FDM filament, there are these empty spools that remain at the end. These can be thrown out with the trash, or be used as a standard base for miniatures, for use with Dungeons & Dragons tabletop gaming or similar, or just as a display piece. The latter is what the blokes over at Digital Taxidermy ran with when they started their first Spool Tower Kickstarter campaign. Now they’re back with Spool Tower 2: The Re-Spoolening.

These are STL bundle packs that should contain all that’s needed to turn an empty filament spool into an art piece, minus of course the painting. To get a free taste of what the experience is like, Digital Taxidermy provides a few free STLs, such as for the Ye Olde Taxidermee Shoppee and the Hab Block from the new crowdfunding campaign.

This effort raises the interesting question of what other standard (plastic) shapes of packaging could conceivably be used in a similar manner. After all, why print the whole thing when half the model could be made from something you’d otherwise just toss into the trash bin?

Thanks to [scat happens] for the tip.

A profile view of a medical training mannequin with a tube down its "throat." A ventillation bag is in the gloved hand of a human trainee.

Making Medical Simulators Less Expensive With 3D Printing And Silicone

Medical training simulators are expensive, but important, pieces of equipment. [Decent Simulators] is designing simulators that can easily be replicated using Fused Deposition Modeling (FDM) printers and silicone molds to bring the costs down.

Each iteration of the simulators is sent out for testing by paramedics and doctors around the world, and feedback is integrated into the next revision. Because the trainers are designed to be easily replicated, parts can easily be replaced or repaired which can be critical to keep personnel trained, especially in remote areas.

While not open source, some models are freely available on the [Decent Simulators] website like wound packing trainers or wound prostheses which could be great if you’re trying to get a head start on next year’s Halloween costumes. More complicated models will be on sale starting in January as either just the design files or a kit containing the files and the printed and/or silicone parts.

Interested in more medical hacks? Check out this Cyberpunk Prosthetic Eye or this Arduino Hearing Test Device.

The Filamentmeter: For When You Absolutely Want To Count Every Meter Used

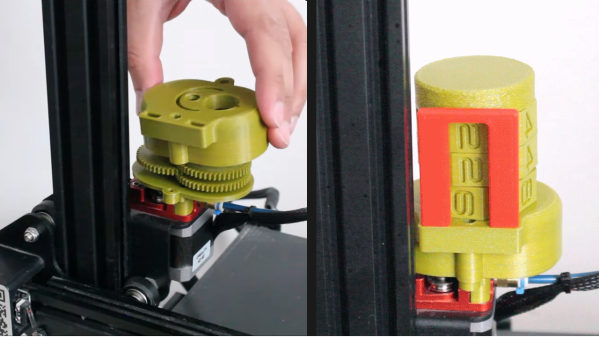
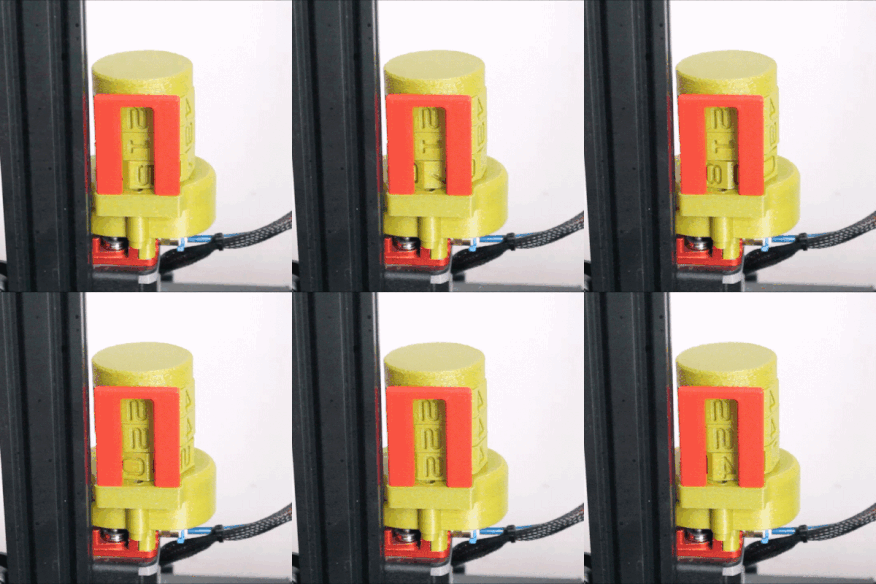
[ArduinoNmore] took an interesting approach to designing a counter intended to accurately display how many meters of filament a 3D printer has used. The Filamentmeter looks a little bit like a 3D printed handheld tally counter (or lap counter) but instead of a button to advance each digit, the readout represents how many meters of filament have gone through the extruder.

Driving the digit rotation from the extruder motor itself means that even retractions are accounted for.

At first glance it may look like there is a motor hidden inside, or that the device is somehow sensing the filament directly. But it’s actually the movement of the extruder motor that drives the device. A small spur gear attached to the printer’s extruder drives a series of gears that advance the digits. This means that retractions  — small reverses of the extruder motor during printing — are properly accounted for in the total, which is a nice touch.

[ArduinoNmore] designed this for the Ender 3, and the Filamentmeter relies on a specific extruder design and orientation to work properly. Of course, since it’s 3D printed, modifying the design for your own purposes should be pretty straightforward.

Curious? The design is being sold for a few bucks, and there is a free test piece one can print and use to confirm whether the design will work before mashing the buy button. Non-free printable 3D models can be a world of buyer beware, but test pieces and solid documentation are good ways to give buyers confidence in your work.

The insides of the unit are really quite intricate, with a clockwork-type elegance to them. You can see it all in the short video, embedded below.

Continue reading “The Filamentmeter: For When You Absolutely Want To Count Every Meter Used”