Remoticon Video: How To 3D Print Onto Fabric With Billie Ruben

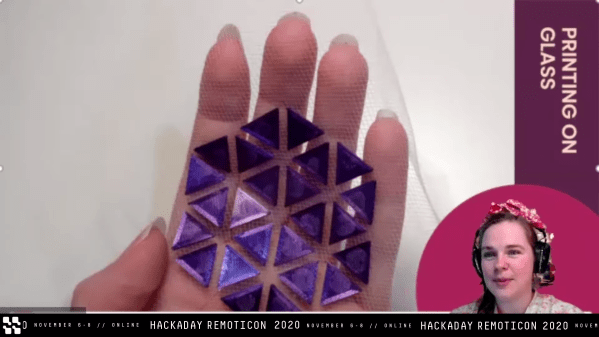
We’re impressed to see the continued flow of new and interesting ways to utilize 3D printing despite its years in the hacker limelight. At the 2020 Hackaday Remoticon [Billie Ruben] came to us from across the sea to demonstrate how to use 3D printing and fabric, or other flexible materials, to fabricate new and interesting creations. Check out her workshop below, and read on for more detail about what you’ll find.

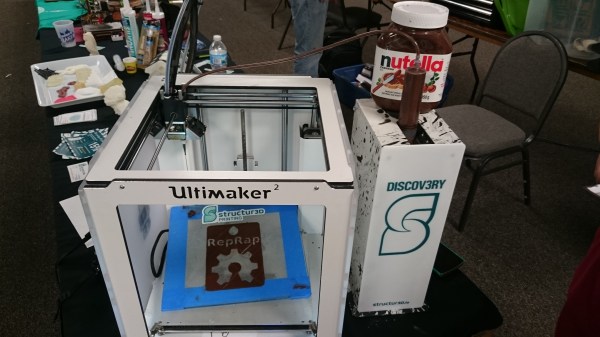
The workshop is divided into two parts, a hands-on portion where participants execute a fabric print at home on their own printer, and a lecture while the printers whirr away describing ways this technique can be used to produce strong, flexible structures.

The technique described in the hands on portion can be clumsily summarized as “print a few layers, add the flexible material, then resume the printing process”. Of course the actual explanation and discussion of how to know when to insert the material, configure your slicer, and select material is significantly more complex! For the entire process make sure to follow along with [Billie]’s clear instructions in the video.

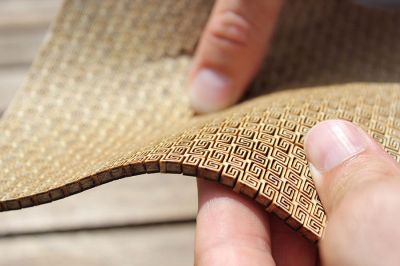
The lecture portion of the workshop was a whirlwind tour of the ways which embedded materials can be used to enhance your prints. The most glamourous examples might be printing scales, spikes, and other accoutrement for cosplay, but beyond that it has a variety of other uses both practical and fashionable. Embedded fabric can add composite strength to large structural elements, durable flexibility to a living hinge, or a substrate for new kinds of jewelry. [Billie] has deep experience in this realm and she brings it to bear in a comprehensive exposition of the possibilities. We’re looking forward to seeing a flurry of new composite prints!

3D Printing Flexible Surfaces Out Of Non-Flexible Material

Here’s some interesting work shared by [Ben Kromhout] and [Lukas Lambrichts] on making flexible 3D prints, but not by using flexible filament. After seeing a project where a sheet of plywood was rendered pliable by cutting a pattern out of it – essentially turning the material into a giant kerf bend – they got interested in whether one could 3D print such a thing directly.

Inspiration for the project was this laser-cut plywood.

The original project used plywood and a laser cutter and went through many iterations before settling on a rectangular spiral pattern. The results were striking, but the details regarding why the chosen pattern was best were unclear. [Ben] and [Lukas] were interested not just in whether a 3D printer could be used to get a similar result, but also wanted to find out what factors separated success from failure when doing so.

After converting the original project’s rectangular spiral pattern into a 3D model, a quick proof-of-concept showed that three things influenced the flexibility of the end result: the scale of the pattern, the size of the open spaces, and the thickness of the print itself. Early results indicated that the size of the open spaces between the solid elements of the pattern was one of the most important factors; the larger the spacing the better the flexibility. A smaller and denser pattern also helps flexibility, but when 3D printing there is a limit to how small features can be made. If the scale of the pattern is reduced too much, open spaces tend to bridge which is counter-productive.

Kerf bending with laser-cut materials gets some clever results, and it’s interesting to see evidence that the method could cross over to 3D printing, at least in concept.

MRRF: Flexible 3D Printing

The concession stand at the Midwest Rep Rap Festival did not disappoint when it came to the expected fare: hot dogs, walking tacos, and bananas for scale. But the yummiest things there could not be bought—the Nutella prints coming off the Ultimaker² at the structur3D booth.

3D printed gasket
Flexible gasket printed in silicone atop a rigid 3D printed engine block.

Hey, what? Yes, an Ultimaker² that can print in Nutella, icing sugar, silicone, latex, wood filler, conductive ink, polyurethane, peanut butter, and a growing list to which you should contribute. This is possible because of their Discov3ry Universal Paste Extruder add-on, which is compatible with most filament printers, especially those that use a RAMPs or Arduino control board.

A large syringe containing the substance of your choice is loaded business end up in the Discov3ry. It gets pushed through tubing that runs to the print head and out through one of many commonly available polypropylene or stainless steel tips. The structur3D team has found that printing on waxed paper works best for the materials they’ve proven out. Each syringe holds 60cc of stuff, and the Discov3ry comes with three of them. They are currently available for pre-order, with a shipping forecast of early summer.