Fluke Meter Fails With A Simple Problem

[TheHWcave] found a Fluke 27 multimeter that looked like it had had quite a rough life. At first, the display flashed an overload indicator until he gave it a good smack—or, as he likes to call it, percussive maintenance. Even then, it would not give good readings, so it was time to open it up.

The display did work, so the obvious theory was something wrong with the analog board. Removing the shields showed what looked like a normal enough PCB. Or at least, the components looked fine. But on the solder side of the board, there was some corrosion on two contacts, so some careful cleaning and resoldering fixed the meter to be as good as new on at least some scales.

Tracing the pins, the corrosion put a resistor between two pins of an op-amp. The only remaining problem was the milliamp scale, but that was a simple blown fuse in the line. Since it was working, it was worth some time to clean up the ugly exterior, which is only cosmetic but still worth a little effort. He left the plastic case cracked and beaten, but he put a lot of effort into clearing up the display window.

You might wonder why you’d fix a meter when you can get one so cheap. However, these name-brand meters are high-quality and new, quite expensive. Even older ones can be worth the effort. While you usually don’t need an X-ray machine to fix something like this, it can’t hurt.

Continue reading “Fluke Meter Fails With A Simple Problem”

Fixing A Busted Fluke While Fighting A Wonky Schematic

Fluke meters have been around for a long, long time. Heck, we’ve got a Fluke 73 that we bought back in 1985 that’s still a daily driver. But just because they’ve been making them forever doesn’t mean they last forever, and getting a secondhand meter back in the game can be a challenge. That’s what [TheHWCave] learned with his revival of a wonky eBay Fluke 25, an effort that holds lessons for anyone in the used Fluke market.

Initial inspection of the meter showed encouragingly few signs of abuse, somewhat remarkable for something built for the military in the early 1980s. A working display allowed a few simple diagnostics revealing that the ammeter functions seemed to work, but not the voltmeter and ohmmeter functions. [TheHWCave]’s teardown revealed a solidly constructed unit with no obvious signs of damage or blown fuses. Thankfully, a service schematic was available online, albeit one with a frustrating lack of detail, confusing test point nomenclature, and contradictory component values.

Despite these hurdles, [TheHWCave] was able to locate the culprit: a bad fusible power resistor. Finding a direct replacement wasn’t easy given the vagaries of the schematic and the age of the instrument, but he managed to track down a close substitute cheap enough to buy in bulk. He searched through 40 units to find the one closest to the listed specs, which got the meter going again. Fixing the bent pin also gave the meter back its continuity beeper, always a mixed blessing.

If you’re in the market for a meter but can’t afford the Fluke name, picking up a busted meter and fixing it up like this might be one way to go. But are they really worth the premium? Well, kinda yes.

Continue reading “Fixing A Busted Fluke While Fighting A Wonky Schematic”

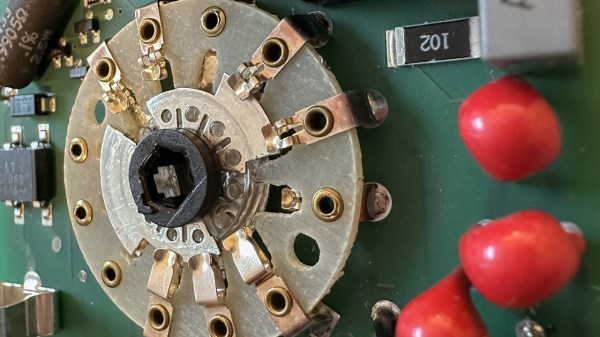
A closeup of the faulty section of the dial - you can spot the plastic rivets that broke off

The Tale Of Two Broken Flukes

Some repairs happen as if by pure luck, and [Sebastian] shows us one such repair on Hackaday.io. He found two Fluke 175 meters being sold on eBay, with one having a mere beeper issue, and another having a “strange error”. Now, theoretically, swapping beepers around would give you one working meter and a kit of spare parts – but this is Fluke we’re talking about, and [Sebastian] wasn’t satisfied leaving it there.

First, he deduced that the beeper issue could be fixed by repositioning the piezo disk – and indeed, that brought the meter number one to working order. This left the mysterious error – the meter would only power up in certain rotations of the dial, and would misbehave, at that. Disassembly cleared things up – the dial mechanics failed, in that a half of the metal contacts came detached after all the plastic rivets holding the metal piece in place mysteriously vanished. The mechanics were indeed a bit intricate, and our hacker hoped to buy a replacement, but seeing the replacement switch prices in three-digit range, out came the epoxy tube.

An epoxy fix left overnight netted him two perfectly working Fluke meters, and while we don’t know what the listing price was for these, such a story might make you feel like taking your chances with a broken Fluke, too. The tale does end with a word of caution from [Sebastian], though – apparently, cleaning the meters took longer than the repairs themselves. Nevertheless, this kind of repair is a hobbyist’s dream – sometimes, you have to design a whole new case for your meter if as much as a wire breaks, or painstakingly replace a COB with a TQFP chip.

A Homebrew AC Upgrade For The Fluke 8840A

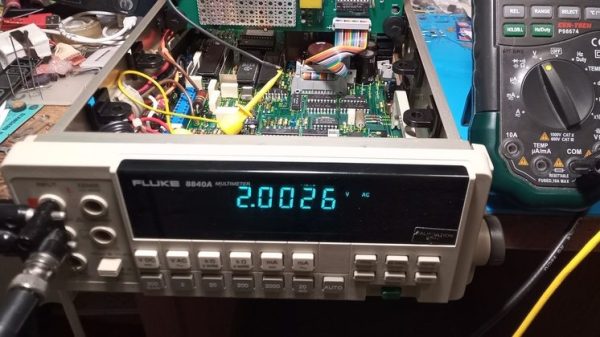
[William Dudley] picked up a Fluke 8840A bench multimeter at an auction, but was sad to find out that it was reading resistances inaccurately. It was also missing the optional board to enable AC measurements. Desiring to use the otherwise lovely meter, he set about repairing and upgrading the device.

Thankfully, the 8840A was from a time when Fluke used to openly publish schematics in its manuals. Thus, combined with taking a look at some photos online, it was straightforward for [William] to recreate the original AC “Option 09” board to enable the desired functionality. As is usually the way, his efforts didn’t work first time, but after some bodge wires were installed, all was well. [William] reports the measurements are “reasonable, maybe even sufficient” with no calibration undertaken.

Repairing the resistance issue was easy. It turned out to be corrosion on the selector switches, revealed when high-resistance measurements were accurate, but low-resistance measurements weren’t. A bit of flick-flacker with some contact cleaner sprayed into the switches got things working again nicely.

It’s nice to see old hardware restored to full functionality, particularly when it’s as attractive and well-built as an old Fluke meter. Bringing back old tools from the dead? You know we wanna hear about it!

Hacking A New Display Into A Fluke 8050A Multimeter

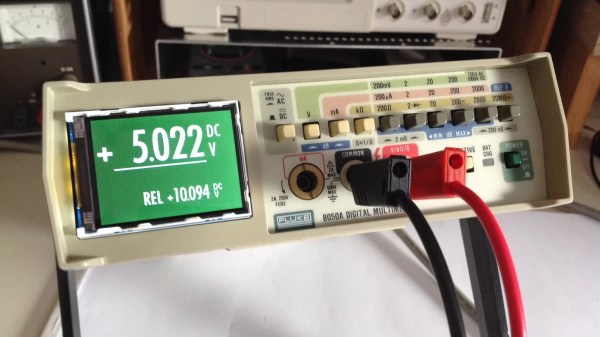
Old lab equipment was often built to last, and can give decades of service when treated properly. It’s often so loved that when one part fails, it’s considered well worth repairing rather than replacing with something newer. [Michael] did just that, putting in the work to give his Fluke 8050A multimeter a shiny new display.

The Fluke 8050A is a versatile device, capable of measuring voltage, current, and resistance in addition to decibels at various impedences and conductance, too. The original display doesn’t show some of the finer details so well, so [Michael] elected to improve on that when he installed a new 2.2″ graphical LCD to replace the basic 7-segment LCD that originally came with the hardware.

To achieve the install, the original LCD display module was removed from the chassis. A piggyback device that sits under the Fluke’s microcontroller was then used to break out signals for the new graphical LCD without requiring modification to the meter’s PCB itself. An Atmega32u4 microcontroller then takes in these signals, and then drives the graphical LCD accordingly.

It’s a great hack that makes the old multimeter easier to use, and the new white-on-green display is far kinder on the eyes, too. We’ve seen other multimeters get screen transplants before, too. Of course, if you’re new to the world of segmented LCDs and want to learn more about how they work, [Joey Castillo]’s talk from last year’s Remoticon will get you up to speed!

Fluke DMM Hack Adds One Digit To Model Number

Among his many interests, [Dave Jones] likes test and measurement equipment. He recently posted a few videos on his EEVblog exploring the reasons why Fluke voltmeters are so expensive. In the process, he stumbled upon an interesting hack for the Fluke 77.

The Fluke 77 was introduced in 1983, and is an average responding meter in the AC modes. This model has become a de-facto standard for use in maintenance depots and labs for equipment which has very long lifespans — think military and industrial gear, for example. Many test procedures and training materials have been designed around the use of the the Fluke 77. The cost to change them when a new and better meter comes along is usually so prohibitive they might as well be cast in stone — or at least hammered into 20 pound fanfold paper by a WordStar-driven daisy-wheel printer. But for those unburdened by such legacy requirements, Fluke has the 17x series of True RMS reading meters from since the beginning of this century. These meters bear a strong visual resemblance to their siblings in the 7x family and are substantially interchangeable but for their AC measurement methods. Continue reading “Fluke DMM Hack Adds One Digit To Model Number”

Cloned Memory Module Fixes Broken Scopemeter

Finding broken test gear and fixing it up to work again is a time-honored tradition among hackers. If you’re lucky, that eBay buy will end up being DOA because of a popped fuse or a few bad capacitors, and a little work with snips and a soldering iron will earn you a nice piece of test gear and bragging rights to boot.

Some repairs, though, are in a class by themselves, like this memory module transplant for a digital scopemeter. The story began some time ago when [FeedbackLoop] picked up a small lot of broken Fluke 199C scopemeters from eBay. They were listed as “parts only”, which is never a good sign, and indeed the meters were in various states of disassembly and incompleteness.

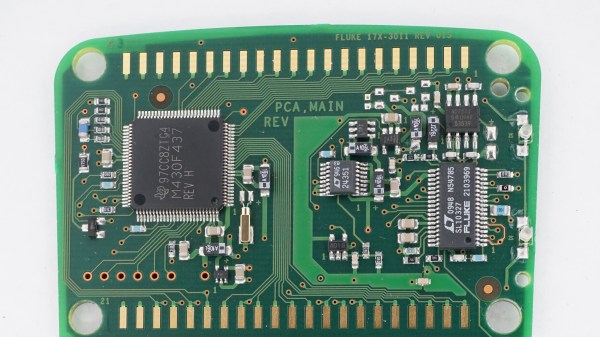
The subject of the video below was missing several important bits, like a battery and a power connector, but most critically, its memory module. Luckily, the other meter had a good module, making reverse engineering possible. That effort started with liberating the two RAM chips and two flash chips, all of which were in BGA packages, from the PCB. From there each chip went into a memory programmer to read its image, which was then written to new chips. The chip-free board was duplicated — a non-trivial task for a six-layer PCB — and new ones ordered. After soldering on the programmed chips and a few passives, the module was plugged in, making the meter as good as new.

While we love them all, it’s clear that there are many camps of test gear collectors. You’ve got your Fluke fans, your H-P aficionados, the deep-pocketed Keithley crowd — but everyone loves Tektronix.

Continue reading “Cloned Memory Module Fixes Broken Scopemeter”