UV Laser Projector Shines With Glow-in-the-Dark Vinyl

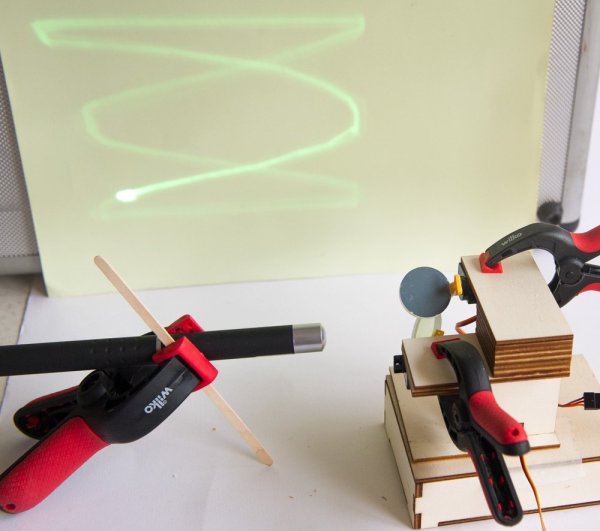
Mirror galvanometers were originally developed in the 17th century to precisely measure very small changes in current. Unlike other instruments of the day, a mirror galvanometer could clearly show minute current variations by translating tiny movements of the mirror into large movements of the light reflected off of the mirror. Before clean electrical amplification became possible, this was the best means of measuring tiny differences in current. True mirror galvanometers are very sensitive instruments, but hobby servos can be used as a low-fidelity alternative, like with this project on Hackaday.io created by [robives].

Using a mirror galvanometer is by far the most common technique for laser projection shows – it’s really the only way to move the laser’s beam quickly enough to create the visual illusion of a solid line in real time. A mirror galvanometer works by using coils to attract magnets attached to the mirror, allowing the angle of the mirror to change when current is applied to the coils. This movement is extremely small, but is amplified by the distance to the projection surface, meaning the laser’s beam can move huge distances in an instance. If you’ve ever seen a laser show, it almost certainly used this technique. But driving galvos requires a beefy DAC, so we can’t blame [robives] for wanting to keep it digital.

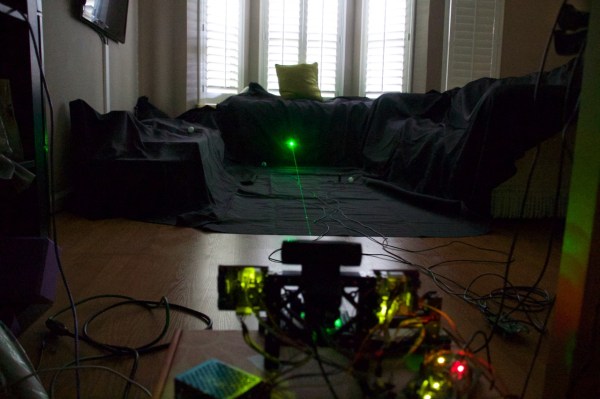
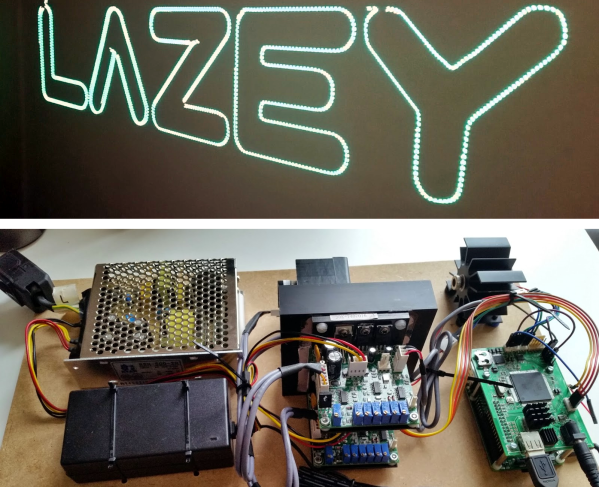
[robives’s] project side-steps the need for galvanometers by using glow-in-the-dark vinyl and a UV laser. The result is a laser beam trail which lasts much longer, which means that solid lines are visible without the need for high-speed galvos. A build like this lets you experiment with laser projections without dealing with sensitive mirror galvos, and instead use components that you probably already have sitting on your workbench.

Continue reading “UV Laser Projector Shines With Glow-in-the-Dark Vinyl”
Retrotechtacular: Weston Electrical Instruments

A ‘meter is one of the most important tools on any electronics bench. After you’ve exhausted your five senses trying to figure out what’s happening in a circuit, firing up the old ‘meter is usually the next step. Meters are largely digital nowadays, but their analog ancestors are still widely available. We have a chemist and inventor named [Edward Weston] to thank for the portability and ubiquity of DC measuring equipment.

After immigrating to the United States from England with the degree in medicine his parents wanted him to earn, [Edward Weston] asserted that he was more interested in chemistry. His career began in electroplating, where he soon realized that he needed a reliable, constant current source to do quality plating. This intense interest in power generation led him to develop a saturated cadmium cell, which is known as the Weston cell. Its chemistry produces a voltage stable enough to be used for meter calibration. The Weston cell is also good for making EMF determinations.

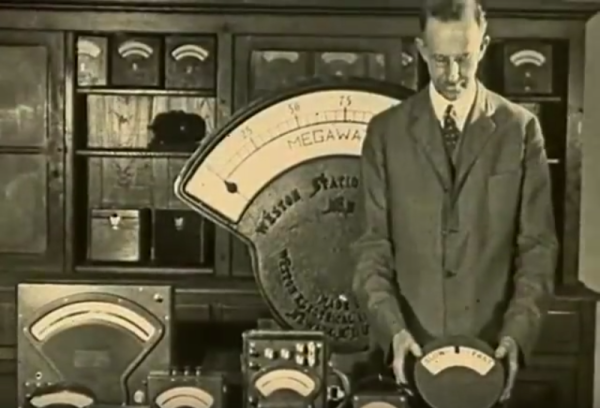
Within a few years, he co-founded the Weston Electrical Instrument Corporation. The company produced several types of meters along with transformers and transducers known for their portability and accuracy. In 1920, [Weston & Co.] created this 1920 educational film in cooperation with the United States Navy as part of a series on the principles of electricity.

The viewer is invited to consider the importance of measurement to civilization, most notably those fundamental measurements of length, mass, and time. [Weston] positions his electrical measuring instruments at this level, touting them as the international favorite. We get the full tour of a Weston meter, from the magnet treated for permanence to the specially designed pole pieces that correctly distribute lines of magnetic force. What education film about electromagnetism would be complete without an iron filings demonstration? This one definitely delivers.

Continue reading “Retrotechtacular: Weston Electrical Instruments”

Automated laser turret

Building An Automated Laser Turret Targeting System

Last year, [Alvaro] built a laser turret robot for the DEFCONBOTs competition. It worked pretty well, but this year, he decided to step it up a notch. Now instead of moving the entire robot laser array, he’s using galvanometers to move only the laser — he’s essentially built a mini laser projector.

A galvanometer is basically a very sensitive ammeter that moves — it can also be used as a very precise electro-mechanical actuator, for say, moving a tiny mirror. As you can imagine, you can actually build home-made galvanometers — but it’s really not that easy. Instead, [Alvaro] opted to order a few laser show controllers on eBay, and hack his way to a solution — we approve.

Wiring up the galvanometers and making some circuitry for them was the easy part. The tricky part is automating the system.

Continue reading “Building An Automated Laser Turret Targeting System”

How To Weigh An Eyelash

So you’re a boxer, and you’re weighing in just 80 micrograms too much for your usual weight class. How many eyelashes do you need to pluck out to get back in the ring? Or maybe you’re following the newest diet fad, “microcooking”, and a recipe calls for 750 micrograms of sugar, and you need to know how many grains that is. You need a microgram scale.

OK, we can’t really come up with a good reason to weigh an eyelash, except to say that you did. Anyway, not one but two separate YouTube videos show you how to build a microgram balance out of the mechanism in a panel meter. You know, the kind with the swinging pointer that they used to use before digital?

Panel meters are essentially an electromagnet on a spring in the field of a permanent magnet (a galvanometer). When no current flows through the electromagnet, the spring pulls the needle far left. As you push current through the electromagnet, it is attracted to the fixed permanent magnet, fighting the spring, and tugs the pointer over to the right. More current equals more pull.

Continue reading “How To Weigh An Eyelash”

Vector Laser Projector Is A Lesson In Design Processes

After two years of EE coursework, [Joshua Bateman] and [Adam Catley] were looking for a fun summer project. Instead of limping along with the resources they could put together themselves, they managed to get their school — Bristol University — to foot the bill!

Now Uni’s aren’t in the habit of just forking over funding for no reason, and we thing that’s why the two did such a great job of documenting their work. We’re used to seeing blogs devoted to one project, but this one has a vast portfolio of every piece of work that went into the build. Before any assembly started they drew out design diagrams to form the specification, laid out the circuit and the board artwork, and even worked out how the software would function in order to make sure the hardware met all their needs.

When the parts arrived the work of hand-populating the surface mount boards began. This is reflected in the fast-motion video they recorded including this clip which features a 176 pin LQFP. The driver board is a shield for a Raspberry Pi which drives the Galvanometers responsible for the X and Y movements of the mirror.

The video below shows off their success and the blog makes a great resource to point to when applying for work once a freshly minted diploma is in hand.

What do you think the next step should be? We’d advocate for a trip to crazy-town like this RGB laser projector we saw several years ago. Of course the same classic vector games we saw on Thursday would be equally awesome without alerting this hardware at all.

Continue reading “Vector Laser Projector Is A Lesson In Design Processes”

[Fran] & [Bil]’s Dinosaur Den

DinosaurI suppose I can take credit for introducing the super awesome [Fran Blanche] to Hackaday’s very own crotchety old man and Commodore refugee [Bil Herd]. I therefore take complete responsibility for [Fran] and [Bil]’s Dinosaur Den, the new YouTube series they’re working on.
The highlight of this week’s episode is a very vintage Rubicon mirror galvanometer. This was one of the first ways to accurately measure voltage, and works kind of like a normal panel meter on steroids. In your bone stock panel meter, a small coil moves a needle to display whatever you’re measuring. In a mirror galvanometer, a coil twists a wire that is connected to a mirror. By shining a light on this mirror and having the reflected beam bounce around several other mirrors, the angle of the mirror controlled by the coil is greatly exaggerated, making for a very, very accurate measurement. It’s so sensitive the output of a lemon battery is off the scale, all from a time earlier than the two dinosaurs showing this tech off. Neat stuff.

One last thing. Because [Bil] and [Fran] are far too proud to sink to the level of so many YouTube channels, here’s the requisite, “like comment and subscribe” pitch you won’t hear them say. Oh, [Bil] knows the audio is screwed up in places. Be sure to comment on that.

Continue reading “[Fran] & [Bil]’s Dinosaur Den”

Laser Spirograph Exhibit Repair And Upgrade

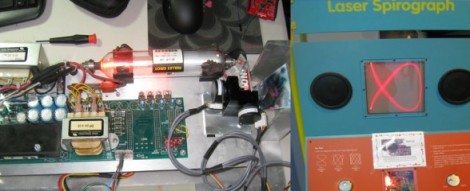
[Bill Porter] continues finding ways to help out at the local museum. This time he’s plying his skills to fix a twenty-year-old exhibit that has been broken for some time. It’s a laser spirograph which had some parts way past their life expectancy.

He started by removing all of the electronics from the cabinet for further study in his lair. He examined the signal generator which when scoped seemed to be putting out some very nice sine waves as it should. From there he moved on to the galvos which tested way off of spec and turned out to be the offending elements.

A bit of searching around the interwebs and [Bill] figured out an upgrade plan for the older parts. But since he was at it, why not add some features at the same time? He rolled in a port so that just a bit of additional circuitry added later will allow shapes and logos to be drawn on the screen. One of his inspirations for this functionality came from another DIY laser projector project.

Take a look at the results of the repair process in the clip after the break.

Continue reading “Laser Spirograph Exhibit Repair And Upgrade”