Using A Headphone Jack As A UART

We’ve seen audio ports being used to establish a communications channel between a computer and a microcontroller before, but nothing quite as slick as this. [Gordon] is using a webpage running on a tablet to send Javascript to a microcontroller where the entire program is interpreted.

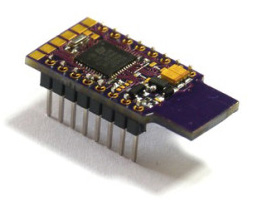
[Gordon] is using the Espruino Pico, a board that’s on Kickstarter right now. This tiny board is built around a javascript interpreter, allowing code to be written and updated on the fly without mucking around with bootloaders.

This technique can be expanded to provide bidriectional communication between a microcontroller and a computer. On the project Github, [Gordon] used the microphone pin on a TRRS jack to sent data to a computer. It needs two more resistors, but other than that, it’s as simple as the one-way communications setup.

[Gordon] put together a few demos of the program, including one that will change the color of some RGB LEDs in response to input on a webpage.

Continue reading “Using A Headphone Jack As A UART”

DIY Custom Molded Earbud Roundup

Headphones have become ubiquitous these days. Thanks to the iPod and the smartphone, it’s become commonplace to see someone wearing a pair of earbud style headphones. Earbuds aren’t always comfortable though. On some people they are too loose. On others, the fit is so tight that they cause pain.To that end, we’ve found a few great solutions for this problem.

[cptnpiccard] has documented his custom molded Sugru earbuds in an Imgur gallery. He’s molded a pair of standard earbuds into a cast of his ear. He uses them both for hearing protection and tunes while skydiving. Sugru’s FAQ states that while the cured material is safe for skin contact (and in ear use) some people are sensitive to the uncured material.

While discussing his project on Reddit, a few users chimed in and mentioned they’ve made custom molded earbuds using Radians custom earplug kits. The Radians material hardens up in only 10 minutes, which beats waiting an hour for Sugru.

The absolute top of the food chain has to be building your own triple driver in ear monitors, which is exactly what [marozie] has done. Professional custom molded monitors can cost over $1000, which puts them in the realm of professional musicians and audiophiles. [marozie] discovered that mouser stocks quite a few transducers from Knowles. These tiny speakers don’t come cheap, though; you can spend upwards of $70 just for a single driver.

[marozie] took a cast of his ear using an earmold impression kit. He used this cast to create a mold. From there it was a matter of pouring resin over his carefully constructed driver circuits and audio tubes. The resulting monitors look and sound incredible.

It goes without saying that making custom in ear monitors involves putting chemicals into you ears. The custom earmold kits come with tiny dams to keep the mold material from going in too far and causing damage. This is one of those few places where we recommend following the instructions. Click past the break to see a demo video of the ear molding process.

Continue reading “DIY Custom Molded Earbud Roundup”

Headphone Hack Makes Wireless An Option

headphone-wireless-option

If you have a favorite pair of over-the-ear headphones you may want to consider upgrading them with a wireless option. The key word here is “option” because these still retain their functionality as a wired headphone. This is nice if you only want to deal with battery life when you’re actually roaming around.

Of course the thing that makes this type of hack work is the extra room inside the body of the earpieces. [Tony] cracked them open and decided there was just enough room to fit the internals of a Bluetooth audio adapter. It has it’s own Li-ion battery (boasting 12 hours of use) which is why there is an added charging port. To fit the board he had to remove some of the aluminum body from the enclosed part of the headphones. He also wired up a tactile switch to act as the power button for the Bluetooth module.

Details are scarce on how the speakers are wired between the module and the jack. But we think he simply wired them in parallel rather than using a switched jack. You can see a quick demo after the break but it really doesn’t augment the build details at all.

Continue reading “Headphone Hack Makes Wireless An Option”

Letting Bluetooth Take The Wires Out Of Your Headphones

bt-wireless-headphones

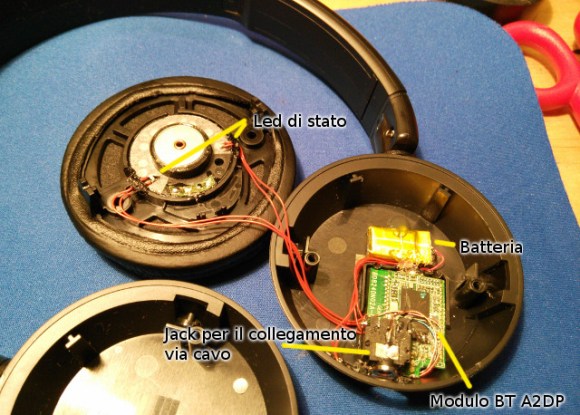
This picture shows the gist of [Alan’s] hack to transition his wired headphone to internalize a Bluetooth audio receiver (translated).

He starts with a pair of wired “ear muff” style headphones and an aftermarket Bluetooth audio adapter that he’s been using with them. But if you’re not going to plug them into the audio source why have six feet of extra wire hanging about? [Alan] ditched the plastic case surrounding the Bluetooth hardware and cracked open the earpieces to find room for it. It’s a tight fit but there was just enough room.

It is unfortunate that the headphone design doesn’t already have a wired crossover hidden in the arc connecting the earpieces. Alan strung some of that red wire himself to connect the two speakers. The board is mounted so that the USB port is located where the wires used to enter the plastic body. This makes it a snap to plug them in when they need a recharge.

You can play a little “Where’s Waldo” with this one by trying to spot the Raspberry Pi in his build log.


Put That Headphone Jack Anywhere You Want It

yamaha-keyboard-headphone-jack-hack

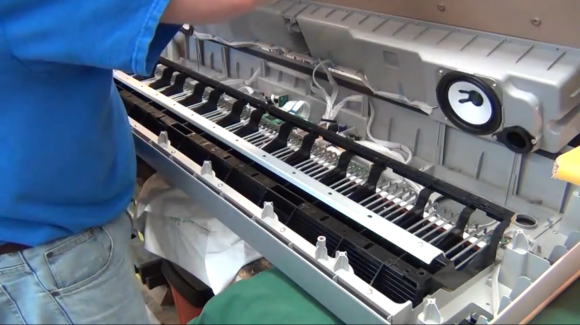
Check out this brand new Yamaha keyboard. The fact that we’re seeing the guts means that [Todd Harrison] can kiss his warranty goodbye. But by now you should know that he doesn’t look to others when something goes wrong with his electronics. This time around he’s not repairing anything. He didn’t like having to plug in headphones on the rear of the keyboard. He cracked it open and relocated the headphone jack to a more convenient location.

As you can see, there’s a ton of room inside once the MDF base which holds the speakers and some sounding boxes has been removed. While he’s in there he takes a good look at the mechanics of the keys. They’re weighted with metal rods (seen above) to help the electronic instrument feel more like an acoustic version to the player. But he doesn’t neglect the chance to gawk at all the electronics as well.

After pulling out the PCB that has the headphone jack on it he goes to work with a solder sucker. With the solder gone he cuts through the glue that holds the jack on the board. All that’s left is to solder some wire in its place and give it a nice project box as an enclosure. To complete the hack he mounts the box on the MDF base and now the headphones connect on the front. See the entire process in the video after the break.

Continue reading “Put That Headphone Jack Anywhere You Want It”

Very Clean Android Headphone Controller Project

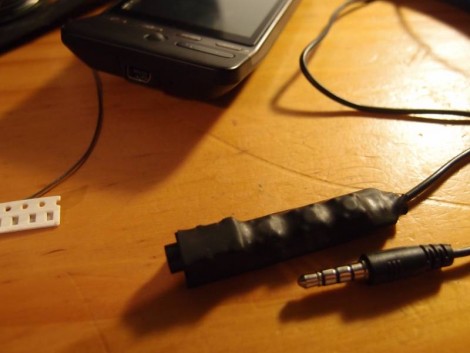
Here’s an Android headphone add-on so clean that most people won’t know you built it yourself. [Will Robertson] was unsatisfied with the stock headphones that came with his HTC phone, but didn’t want to lose the control interface when upgrading. He built this add-on that lets him control the Android music player.

He was inspired to do this after reading about the control interface in one of our previous features. That hack detailed how to add control based on the 4-conductor headphone jack, but didn’t see us through to a clean finished product. [Will] picked up where it left off by designing a sleek surface mount board that hosts a headphone jack and three tactile switches. A patch cable is soldered opposite the jack, making this work as a pass-through device. The icing on the cake is the shrink tubing that masks the fact that this is a diy dongle.

If you want to follow his lead, [Will] posted his EagleCAD design files and footprints for the components he used in the post linked at the top.

Macro Lens For A Nexus One

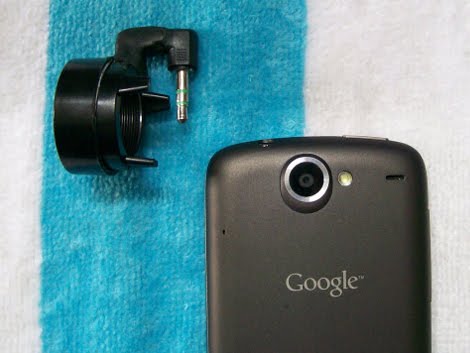
[Thomas] tipped us off about a macro lens attachment for his Nexus One. As you’d expect, adding the lens helps the phone’s camera bring tiny details into focus. He re-purposed a lens from a pair of mini binoculars, using epoxy putty to make a mounting bracket. Now the last time we saw this putty used with a phone it was for a snap-in bracket that cradled the phone and included a lens adapter. Rather than go that route [Thomas] made use of the headphone jack just above the camera lens. An old headphone plug has been epoxied to the macro lens ring, holding it in place securely while remaining easily removable.