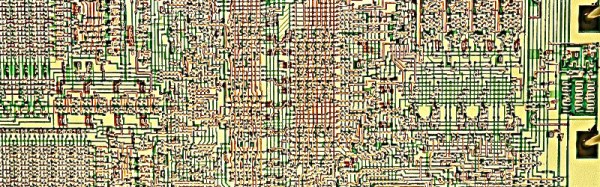
[Ken Shirriff] has seen the insides of more integrated circuits than most people have seen bellybuttons. (This is an exaggeration.) But the point is, where we see a crazy jumble of circuitry, [Ken] sees a riddle to be solved, and he’s got a method that guides him through the madness.
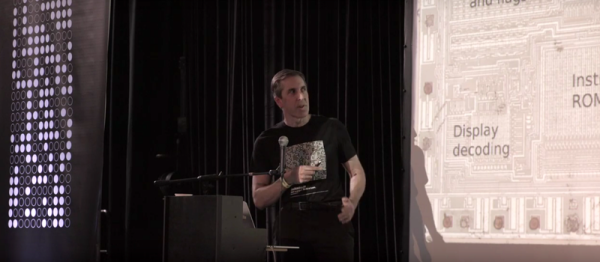
In his talk at the 2016 Hackaday SuperConference, [Ken] stepped the audience through a number of famous chips, showing how he approaches them and how you could do the same if you wanted to, or needed to. Reading an IC from a photo is not for the faint of heart, but with a little perseverance, it can give you the keys to the kingdom. We’re stoked that [Ken] shared his methods with us, and gave us some deeper insight into a handful of classic silicon, from the Z80 processor to the 555 timer and LM7805 voltage regulator, and beyond.
If you maintain an interest in vintage computers, you may well know something of the early history of the microprocessor, how Intel’s 4-bit 4004, intended for a desktop calculator, was the first to be developed, and the follow-up 8008 was the first 8-bit device. We tend to like simple stories when it comes to history, and inventions like this are always conveniently packaged for posterity as one-off events.
The world’s most excellent conference on hardware creation, the Hackaday SuperConference, is back. Get your tickets now for two magical days in Pasadena this November.
This exclusive gathering of hackers, designers, and engineers is where brilliant people geek out with their peers. Talks tell the story of research, prototyping, product design, manufacturing, and getting that new hardware out into the world. Nowhere else can you get such a concentrated dose of Sistine-Chapel-like details about what is being built in businesses small and large, basements, University labs, and everywhere else.
Early tickets are $128, get your pass to the conference now! This ticket gets you in the door for talks, breakfast and lunch on both days, a conference badge, and the party on Saturday night. SuperCon also includes hands-on workshops — these have limited capacity and some have material costs, more about this next week.
If you have ever spent a while delving into the bare metal of talking to the I/O pins on a contemporary microprocessor or microcontroller you will know that it is not always an exercise for the faint-hearted. A host of different functions can be multiplexed behind a physical pin, and once you are looking at the hardware through the cloak of an operating system your careful timing can be derailed in an instant. For these reasons most of us will take advantage of other people’s work and use the abstraction provided by a library or a virtual filesystem path.
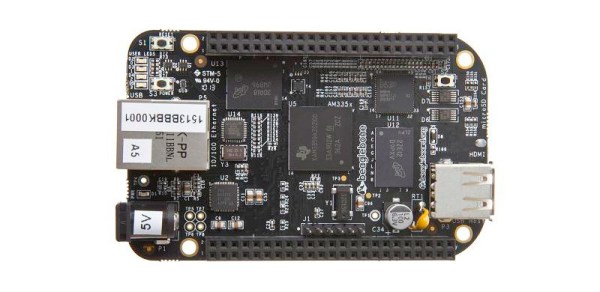
If you have ever been curious enough to peer under the hood of your board’s I/O then you may find [Ken Shirriff]’s latest blog post in which he explores the software stack behind the pins on a BeagleBone Black to be of interest. Though its specifics are those of one device, the points it makes have relevance to many other similar boards.
He first takes a look at the simplest way to access a Beagle Bone’s I/O lines, through virtual filesystem paths. He then explains why relying so heavily on the operating system in this way causes significant timing issues, and goes on to explore the physical registers that lie behind the pins. He then discusses the multiplexing of different pin functions before explaining the role of the Linux device tree in keeping operating system in touch with hardware.
For some Hackaday readers this will all be old news, but it’s safe to say that many users of boards like the BeagleBone Black will never have taken a look beyond the safely abstracted ways to use the I/O pins. This piece should therefore provide an interesting education to the chip-hardware novice, and should probably still contain a few nuggets for more advanced users.
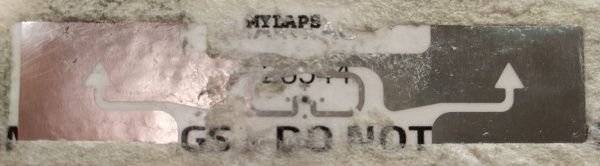
A mass participation sporting event such as a road race presents a significant problem for its record keepers. It would be impossible to have ten thousand timekeepers hovering over stopwatches at the finish line, so how do they record each runner’s time? The answer lies in an RFID chip attached to the inside of the bib each runner wears, which is read as the runner crosses the line to ensure that their time is recorded among the hundreds of other participants.
Stripping away the foam covering of the RFID assembly revealed a foil antenna for the 860-960MHz UHF band with the tiny RFID chip at its centre. The antenna is interesting, it’s a rather simple wideband dipole folded over with what looks like a matching stub arrangement and an arrow device incorporated into the fold that is probably for aesthetic rather than practical purposes. He identified the chip as an Impinj Monza 4, whose data sheet contains reference designs for antennas we’d expect to deliver a better performance.
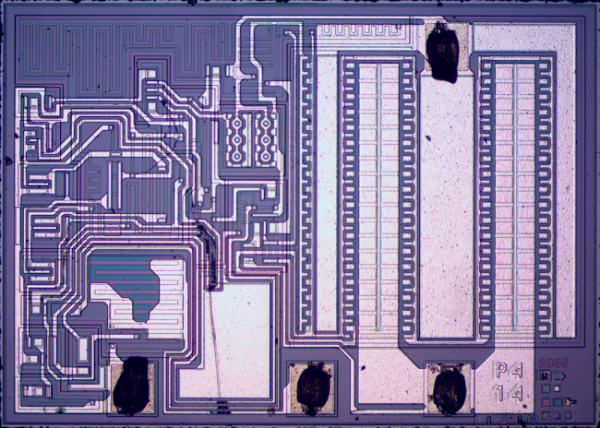
After some trial-by-fire epoxy removal the tiny chip was revealed and photographed. It’s a device of three parts, the power scavenging and analog radio section, the non-volatile memory that carries the payload, and a finite-state logic machine to do the work. This isn’t a proper processor, instead it contains only the logic required to do the one task of returning the payload.
He finishes off with a comparison photograph of the chip — which is about the size of a grain of salt — atop a 1980s 8051-series microcontroller to show both its tiny size and the density advancements achieved over those intervening decades.
Since RFID devices are becoming a ubiquitous part of everyday life it is interesting to learn more about them through teardowns like this one. The chip here is a bit different to those you’ll find in more mundane applications in that it uses a much higher frequency, we’d be interested to know the RF field strength required at the finish line to activate it. It would also be interesting to know how the system handles collisions, with many runners passing the reader at once there must be a lot of RFID chatter on the airwaves.
Old mainframe computers are interesting, especially to those of us who weren’t around to see them in action. We sit with old-timers and listen to their stories of the good ol’ days. They tell us about loading paper tape or giving instructions one at a time with toggle switches and LED output indicators. We hang on every word because its interesting to know how we got to this point in the tech-timeline and we appreciate the patience and insanity it must have taken to soldier on through the “good ol’ days”.
[Ken Shirriff] is making those good ol’ days come alive with a series of articles relating to his work with hardware at the Computer History Museum. His latest installment is an article describing the strange implementation of the IBM 1401’s qui-binary arithmetic. Full disclosure: It has not been confirmed that [Ken] is an “old-timer” however his article doesn’t help the argument that he isn’t.
Ken describes in thorough detail how the IBM 1401 — which was first introduced in 1959 — takes a decimal number as an input and operates on it one BCD digit at a time. Before performing the instruction the BCD number is converted to qui-binary. Qui-binary is represented by 7 bits, 5 qui bits and 2 binary bits: 0000000. The qui portion represents the largest even number contained in the BCD value and the binary portion represents a 1 if the BCD value is odd or a 0 for even. For example if the BCD number is 9 then the Q8 bit and the B1 bit are set resulting in: 1000010.
The qui-binary representation makes for easy error checking since only one qui bit should be set and only one binary bit should be set. [Ken] goes on to explain more complex arithmetic and circuitry within the IBM 1401 in his post.
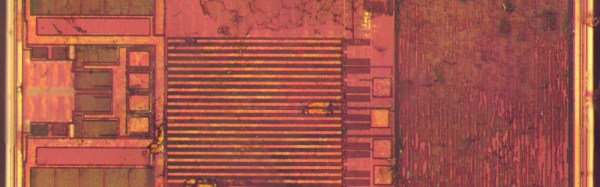
We’re quite sure that all hobbyists have used the 7805 voltage regulator at least once in their lives. They are a simple way to regulate 7V+ voltages to the 5V that some of our low power projects need. [Ken Shirriff] wrote an amazingly detailed article about its theory of operation and implementation in the silicon world.
As you may see in the picture above such a regulator is composed of very different elements: transistors, resistors, capacitors and diodes, all of them integrated in the die. [Ken] provides the necessary clues for us to recognize them and then explains how the 7805 can have a stable output even when its temperature changes. This is done by using a bandgap reference in which the difference between transistor base-emitter voltages for high and low current is used to counter the effects of temperature. As some elements looked a bit odd during [Ken]’s reverse engineering process, he finally concluded that what he purchased on Ebay may be a counterfeit (read this Reddit comment for another opinion).