Friction Differential Drive Is A Laser-Cut Triumph

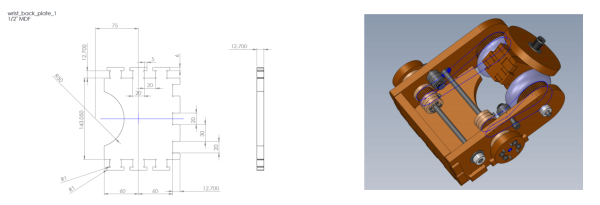
Here on Hackaday, too often do we turn our heads and gaze at the novelty of 3D printing functional devices. It’s easy to forget that other techniques for assembling functional prototypes exist. Here, [Reuben] nails the aspect of functional prototyping with the laser cutter with a real-world application: a roll-pitch friction differential drive built from just off-the shelf and laser-cut parts!

The centerpiece is held together with friction, where both the order of assembly and the slight wedged edge made from the laser cutter kerf keeps the components from falling apart. Pulleys transfer motion from the would-be motor mounts, where the belts are actually tensioned with a roller bearing mechanism that’s pushed into position. Finally, the friction drive itself is made from roller-blade wheels, where the torque transferred to the plate is driven by just how tightly the top screw is tightened onto the wheels. We’d say that [Reuben] is pushing boundaries with this build–but that’s not true. Rather, he’s using a series of repeatable motifs together to assemble a both beautiful and complex working mechanism.

This design is an old-school wonder from 2012 uncovered from a former Stanford course. The legendary CS235 aimed to teach “unmechanically-minded” roboticists how to build a host of mechanisms in the same spirit as MIT’s How-to-make-almost-Anything class. While CS235 doesn’t exist anymore, don’t fret. [Reuben] kindly posted his best lectures online for the world to enjoy.

Continue reading “Friction Differential Drive Is A Laser-Cut Triumph”

Reuleaux Coaster

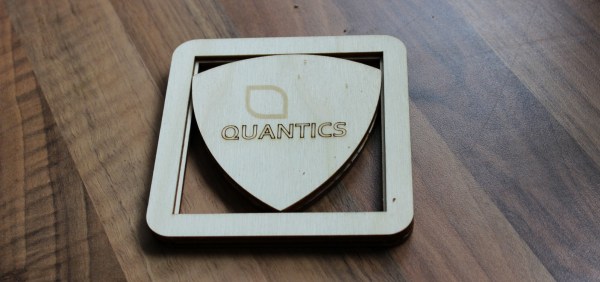
What’s better than a cool build? A cool build with valuable advice! Add a few flashy pictures and you have [Martin Raynsford]’s Reuleaux triangle coasters blog post. [Martin Raynsford] wanted to share his advice about the importance of using jigs and we’re sold. He was able to make 100 coasters in a single day and if he’s like us, after number ten, the work gets a little hurried and that is when mistakes are made.

Jig is a broad term when it comes to tooling but essentially, it holds your part in place while you work on it. In this case, a jig was made to hold the coaster pieces while they were glued together. [Martin Raynsford] didn’t need any registration marks on the wood so even the back is clean. If you look closely, the coaster is two parts, the frame and the triangle. Each part is three layers and they cannot separated once the glue dries. If any part doesn’t line up properly, the whole coaster is scrap wood.

This robot arm engraved 400 coasters in a day but maybe you would prefer if you simply had your beer delivered to your new coasters.

Continue reading “Reuleaux Coaster”

Milling A Flow Sensor To Safeguard A Laser Tube

Powerful lasers get powerfully hot and if you don’t keep them cool you’ll pay the price. After two such experiences [NixieGuy] got smart and milled this flow sensor as a failsafe.

Laser cutters are awesome. But acquiring one can be expensive, and keeping them in working order is no small feat. From the gunk that builds up as a byproduct of vaporizing the cutting stock, to keeping the optics focused correctly, it’s a game that forces you to become a laser cutter operator and not merely a user. One of the worst things to deal with is having to replace a burnt out laser tube. They do have a life to them but in this case the filter on the water cooling system clogged and the tube cooked itself. Twice.

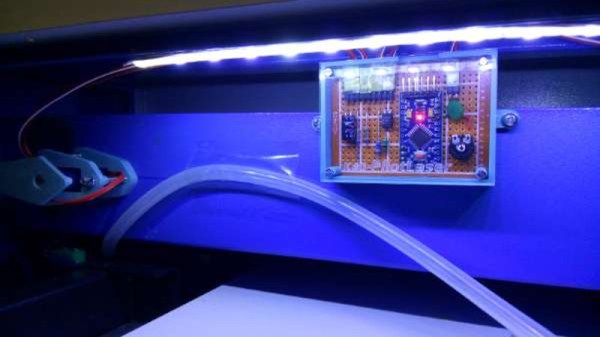
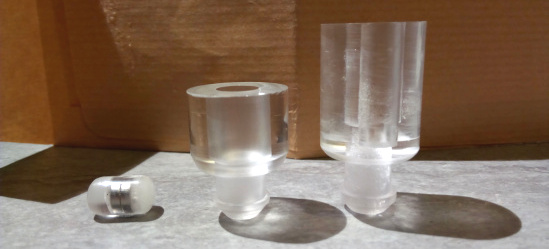
Flow sensor shown in the upper right.

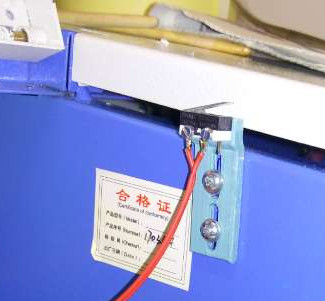
This flow sensor now acts as an interconnect with the laser enable line. Starting with an acrylic rod, [NixieGuy] machined out a center hole for a magnetic stopper, then milled three channels for water to pass around it. Each end of the rod was turned on a lathe to interface with plastic tubing of the water cooling system, and a slot was milled on the outside for a reed switch.

The demo video is below. You can see that when water flows it pushes the magnetic stop up (against gravity) where it engages the reed switch, allowing the laser to operate. If something impedes the flow of water (even if the pump still runs) the laser will be disabled and (hopefully) prevent future tube loss.

Want to see some of the oops moments faced by many a laser cutter operator? Check our guide on how to fail at laser cutting.

Continue reading “Milling A Flow Sensor To Safeguard A Laser Tube”

Laser Smoothies At Maker Faire

This year at Maker Faire, laser cutters were all the rage. Dremel announced a 40W laser cutter, but it won’t be available for purchase until this time next year, there is no price yet, and therefore doesn’t deserve further mention. Glowforge was out in full force, but the most interesting aspect of the Glowforge — a compact filter system that sits right underneath the laser — was not to be found. It looks like lasers are the next 3D printer.

Of course, those in the know have already been using laser cutters for years, and there are options for desktop CO2 laser cutters that cost less than a kilobuck. I speak, of course, of the ubiquitous K40 laser, a machine you can get off of eBay or AliExpress for the price of a generic, off-brand 3D printer. There is a downside to the K40, though: the control electronics and software are notoriously terrible. Fix that, though, and you have something really spectacular.

The Cohesion3D Mini

This year at Maker Faire, [Ray Kholodovsky] of Cohesion3D brought out his Smoothie-derived control boards for CNC machines and laser cutters. Of note is his K40 upgrade that turns the eBay special laser cutter into a 32-bit professional machine. This is the cheapest way to start lasing in your workshop.

We saw [Ray] at the Faire last year when he was demoing his Smoothie-derived boards for 3D printers and CNC machines. These are tiny, relatively low-cost boards that use Smoothieware, an Open Source, 32-bit CNC control system that is extremely extensible and very powerful. Basically, if you’re building a normal, ordinary DIY 3D printer, a RAMPS or RAMBO will do. If you’re doing something weird, like a 3D printer with strange kinematics, a 5-axis milling machine, or you’d like awesome engraving on a laser cutter, Smoothie is the way to go.

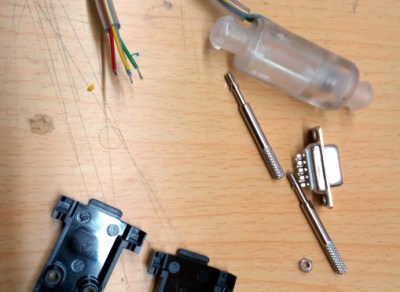
The stock board found in a K40 (left) and the Cohesion3D Mini (right). The Cohesion3D Mini is a drop-in replacement for the stock K40 board.

The Cohesion3D board is a direct, drop-in replacement for the control board found in the K40 laser. Since all of the K40 laser cutters are the same, and they’re really only a power supply and a CNC gantry, this is the one-stop-shop of K40 upgrades. The terrible electronics are gone, you don’t have to use Corel, and for a hundred bucks, you have something resembling a professional laser cutter.

The K40 laser has been around for several years now, but only recently have a few very interesting hacks and mods come out that push this blue light special laser cutter into semi-professional territory for people willing to get their hands dirty. A few months ago [Scorch] published K40 Whisperer, a piece of software that makes the stock electronics tolerable and able to accept normal SVGs and DXFs. The K40 has also been modified for a larger bed, and LaserWeb has been handling the software side of things for about two years now. Things are looking great for the K40 hacking scene, and Hackaday already has a, ‘I just bought a K40, now what?’ series in the works. Things are looking up for cheap laser cutters, and a Smoothie upgrade is just the cherry on top.

Modular Storage With Peanut Butter And Lasers

I have storage on the mind, and it comes from two facts in my life:

First, I have tons of stuff in my workshop, far too much for the amount of space I have. A lot of this material is much easier to use if it’s well-organized. Think electronics, robotics, building sets. Modular parts that need to go together a certain way for them to be useful. It is imperative, therefore, that I come up with some sort of organization system to keep the chaos in check.

Second, my favorite tool is the laser cutter, born from my love for building vector designs. I can do art on the computer and have it manufactured in front of my eyes, and share my designs with someone else who can remix it into something even cooler.

So with those two facts in mind, I set about creating a modular storage system in Inkscape and cutting out the design from pine boards using a laser cutter. Let us go on a journey through my thought process:

Continue reading “Modular Storage With Peanut Butter And Lasers”

Laser Etching PCBs

A while ago, [Marco] mounted a powerful laser diode to a CNC machine in an attempt to etch copper clad board and create a few PCBs. The results weren’t that great, but the technique was promising. In a new experiment, [Marco] purchased a very cheap laser engraver kit from China, and now this technique looks like it might be a winner.

[Marco] sourced his laser engraver from Banggood, and it’s pretty much exactly what you would expect for a CNC machine that costs under $200. The frame is aluminum extrusion, the motors are off-the-shelf steppers, the electronics are just Pololu-like drivers, and the software is somewhere between abysmal and terrible. Nevertheless, this machine can cut wood, leather, fabric, and can remove spray paint with a big blue laser diode.

To create his PCBs, [Marco] is first cleaning a piece of copper clad board, coating it with spray paint, then blasting it with a laser. The preferred software for this is LaserWeb, and the results are pretty good for a cheap machine.

There are a few extra steps to creating the PCB once the board has been coated with paint and blasted with a laser. This process still requires etching in either ferric chloride or some other mess of acid, but the results are good. So good, in fact, that [Marco] is experimenting with copper foil and Kapton to create flexible circuit boards. You can check out the video of these experiments below.

Continue reading “Laser Etching PCBs”

Laser Cut Enclosures From Eagle Files

Once a project is finished, it might still need a decent enclosure. While it’s possible to throw a freshly soldered PCB in a standard enclosure, or piece of Tupperware, or cardboard box, these options don’t have the fit and finish of something custom-made. If you have a laser cutter sitting around, it’s a simple matter to cut your own enclosure, but now that process is much easier thanks to [Ray]’s latest project.

Since [Ray] was already using Eagle to design his PCBs, it seemed like a short step to using the Eagle files to design the enclosure as well. The script runs from those files and creates everything necessary to send to the laser cutter for manufacturing. Right now, [Ray] points out that the assembly time for each enclosure can be high, and this method might not be suited for large numbers of enclosures. Additionally, some of the calculations still need to be done by hand, but there are plans to automate everything in the future.

For single projects, though, this script could cut a lot of time off of designing an enclosure and building it from scratch, and could also help improve aesthetics over other options like 3D printed enclosures. Of course, if you have a quality 3D printer around but no laser cutter, there are options for custom enclosures as well.