The Miracle Of Injection Molding: How Does It Work?

Pretty much any household item nowadays has an involved, extremely well-thought-out manufacturing method to it, whether it’s a sheet of paper, an electrical outlet, a can of tuna, or even the house itself. Some of the stories of how these objects came to be are compelling, though, as one of the recent videos from [This Old Tony] shows as he takes a deep dive into a $5 ball valve, and uses it to talk about all of the cool things you can do with injection molding.

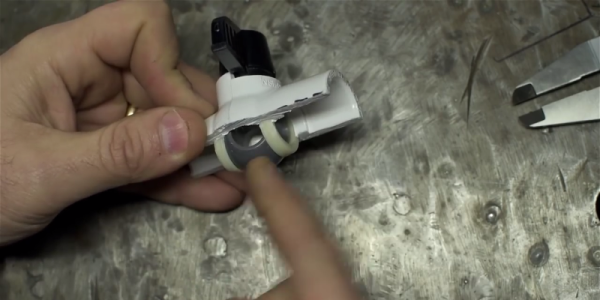
Injection molding is the process of casting molten plastic into more useful pieces of plastic. In this case it’s a plumbing valve which might seem simple on the surface, but turns out to be much more involved. These ball valves are extremely reliable but have a very small price tag, meaning that a lot of engineering must have gone into their design. What is unearthed in the video is that injection molding allows parts to be cast into the molds of other parts, and the means by which those parts don’t all melt together, and how seals can be created within the part itself. All of this happens with a minimal number of parts and zero interaction from a human, or from any robot that isn’t the injection mold itself.

The video goes into exceptional detail on these valves specifically but also expounds on various techniques in injection molding. Similar to the recognition the seemingly modest aluminum can deserves, the injection molded ball valve deserves a similar amount of respect. While [This Old Tony] usually focuses on metalworking, he often tackles other interesting topics like this and this video is definitely worth checking out.

Continue reading “The Miracle Of Injection Molding: How Does It Work?”

DIY Cable Chain Looks Great, Stays Cheap

If you’ve built a 3D printer, CNC, laser cutter, or basically any piece of electrical equipment that moves around, then you’ve run into the problem of securing the bundle of wires that such machines always require. The easy way out is to zip tie them all up into a tight harness or put them in commercially available wraps or sleeves, but these don’t really impart any mechanical strength on the wires. With repetitive motion it’s not unheard of to break a conductor or two, causing intermittent failures and generally leading to a painful diagnostic session trying to isolate the broken wire.

An alternative are what are generally referred to as “cable chains”. These are rigid enclosures for your wiring that not only keep things tidy, but give the wires the mechanical support necessary to prevent fatigue. Unfortunately, they are often many times more expensive than a simple wire wrap or pack of zip ties. But [Brad Parcels] has written into our tip line to share with us a sort of hybrid approach to wire management that has many of the same advantages as a traditional cable chain, but at a greatly reduced cost.

The key to the design is using the metallic tape from a cheap tape measure to give the bundle of wires some mechanical strength. As anyone who’s ever played around with a tape measure knows, if you bend the tape over into a U shape it will hold the bend even if you extend and retract it. Thanks to this principle, [Brad] realized that all he need to do was add some wire sleeves and he would have a cheap and effective way to keep his wiring neat and sag-free.

[Brad] punches holes in the tape to secure it to his 3D printed mounting arms, but really any method of securing the tape to the frame of your machine will work just as well. He then slides a cable sleeve over the tape itself to protect from any possibility of the edge of the tape nicking a wire, and then finally a larger wire sleeve over the entire assembly.

After running the wires between the two sleeves, heatshrink can be used on the ends to neatly close everything up. Just make sure you remember all your wires before you seal it, [Brad] learned that one the hard way. But overall, he reports this DIY cable chain arrangement has been working wonderfully in his machine, providing smooth and silent movement for only a few bucks.

Cable management for projects that move is one of those things that doesn’t always get the attention it deserves. Not only can it keep your project looking professional, but it just might save you some time down the road by preventing failures.

Hackaday Links Column Banner

Hackaday Links: December 17, 2017

Where do you go if you want crazy old electronic crap? If you’re thinking a ham swap meet is the best place, think again. [Fran] got the opportunity to clean out the storage closet for the physics department at the University of Pennsylvania. Oh, man is there some cool stuff here. This room was filled to the brim with old databooks and development boards, and a sample kit for the unobtanium Nimo tube.

The Gigatron is a Hackaday Prize entry to build a multi-Megahertz computer with a color display out of TTL logic. Now, all this work is finally paying off. [Marcel] has turned the Gigatron into a kit. Save for the memories, this computer is pretty much entirely 74-series logic implemented on a gigantic board. Someone is writing a chess program for it. It’s huge, awesome, and the kits should cost under $200.

What’s cooler than BattleBots, and also isn’t Junkyard Wars? BattleBots, but in drone form. Drone Clash was originally announced in March, but now they’re moving it up to February to coincide with the TUS Expo. What could be better than flaming piles of lithium?

The Atari Lynx went down in history as the first portable console with a color LCD. There was a problem with the Lynx; the display was absolutely terrible. [RetroManCave] found someone selling an LCD upgrade kit for the Lynx, and the results are extremely impressive. The colors aren’t washed out, and since the backlight isn’t a fluorescent light bulb (yes, really), this Lynx should get a bit more run time for each set of batteries.

Like dead tree carcasses? You need to butcher some dead tree carcasses. The best way to do this is on a proper workbench, and [Paul Sellers] is working on a video series on how to make a workbench. He’s up to episode 3, where the legs are mortised. This is all done with hand tools, and the videos are far more interesting than you would think.

If you need some very small, very blinky wearables, here’s an option. This build is literally three parts — an LED matrix, an ATtiny2313, and a coin cell battery. Seems like this could be an entry for the Coin Cell Challenge we have going on right now.

An Mbed In Your Browser

If you have dabbled in the world of ARM microcontrollers, you might be familiar with the Mbed platform, a software abstraction layer for a range of ARM-based small dev boards. If you don’t have an Mbed board but fancy giving it a go, you might imagine that you’d be out of luck, but [Jan Jongboom] could have an answer to your problem in the form of an Mbed simulation in your browser.

We’re not high-end ARM microcontroller developers here at Hackaday so beyond observing that it brings the Mbed abstraction layer binaries to the browser through the magic of Emscripten it’s best to point the curious at its GitHub repository. But we can see its attraction as a means to take a look at Mbed, and given that [Jan] describes himself as “a developer and evangelist currently working on the Internet of Things for ARM“, it’s safe to say this one comes as they say, from the horse’s mouth.

The Mbed board that is probably most famous is the education-focused micro:bit, but there are plenty of others on the market. Back in 2015 we published a getting started guide, if you are new to the Mbed.

Via Hacker News.

Cryptanalyse Your Air Con

Infrared remote controls are simple and ubiquitous. Emulating them with the aid of a microcontroller is a common project that hackers use to control equipment as diverse as televisions, cable boxes, and home stereos. Some air conditioners can be a little more complicated, however, but [Ken]’s here to help.

The root of the problem is that the air conditioner remote was using a non-obvious checksum to verify if commands received were valid. To determine the function generating the checksum, [Ken] decided to bust out the tools of differential cryptanalysis. This involves carefully varying the input to a cryptographic function and comparing it to the differences in the output.

With 35 signals collected from the remote, a program was written to find input data that varied by just one bit. The checksum outputs were then compared to eventually put together the checksum function.

[Ken] notes that the function may not be 100% accurate, as they’re only using a limited sample of data in which not all the bytes change significantly. However, it shows that a methodical approach is valuable when approaching such projects.

Thirsty for more checksum-busting action? Check out this hacked weather station.

Powering Your Mining Rig The Right Way

It happens to the best of us. We power up our project and immediately run into issues. Be it spotty communication or microcontroller reset or any number of bugs that have us mystified and picking though our code… only to find that it’s a power supply issue. Anyone who has tried doing Raspberry Pi stuff and depended on the USB power from their PC has certainly been bit by this.

It’s the same with larger, more power hungry projects as well. [Nerd Ralph] has been running a mining rig for a few years now, and has learned just how important proper power supply management can be. His strategy involves using interlocks to ensure everything powers up at the same time to avoid feedback problems, running a separate ground wire between all GPU cards and the PSU and running the supplies at 220 for the NA folks.

Be sure to check out [Nerd Ralph’s] blog for more details and tips to power your own mining rig.

Final Project For Better Sleep

It’s that time of year again, and students around the world are scrambling (or have already scrambled) to finish their final projects for the semester. And, while studying for finals prevents many from sleeping an adequate amount, [Julia] and [Nick] are seeking to maximize “what little sleep the [Electrical and Computer Engineering] major allows” them by using their final project to measure sleep quality.

To produce a metric for sleep quality, [Julia] and [Nick] set out to measure various sleep-related activities, specifically heart rate, motion and breath frequency. During the night, an Arduino Nano mounted to a glove collects data from the various sensors mounted to the user, all the while beaming the data to a stationary PIC for analysis and storage. When the user awakes, they can view their sleep report on a TFT display at the PIC base station. Ideally, users would use this data to test different habits in order to get the best nights sleep possible.

Interestingly, the group chose to implement their own heart rate sensor. With an IR transmitter, IR phototransistor and an OP amp, the group illuminates user’s fingers and measure reflection to detect heartbeats. This works because the amount of IR reflected from the user’s finger changes with blood pressure and blood oxygen level, which also happen to change when the heart is beating. There were some bumps along the road when it came to the heartbeat sensor (the need to use a finger instead of the wrist forced them to use a glove instead of a wristband), but we think it’s super cool and totally worth it. In addition to heart rate, motion is measured by an accelerometer and breath is measured by a flex sensor wrapped around the user’s chest.

With all of their data beamed back by a pair of nRF24L01s, the PIC computes the sleep “chaos” which is exactly what it sounds like: it describes just how chaotic the user slept by looking for acyclic and sudden movement. Using this metric, combined with information from breathing and heart rate, the PIC computes a percentage for good sleep where 100% is a great night and 0% means you might have been just as well off pulling an all-nighter. And, to top it all off, the PIC saves your data to an SD card for easy after-the-fact review.

The commented code that powers the project can be found here along with a parts list in their project write-up.

This device assumes that sleeping is the issue, but if waking up if your problem, we’ve already got you covered, aggressive alarm clock style. For those already on top of their sleep, you might want some help with lucid dreaming.

Video of the project explained by [Julia] and [Nick] after the break.

Continue reading “Final Project For Better Sleep”