Better 3D Graphics On The Arduino

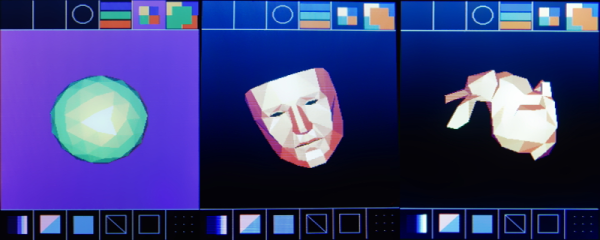
There are cheap LCDs available from China, and when plugged into an Arduino, these displays serve as useful interfaces or even shinier baubles for your latest project. [Michael] picked up a few of these displays in the hope of putting a few animated .GIFs on them. This is an impossible task with an ATMega microcontroller – the Arduino does not have the RAM or the processing power to play full-screen animations. It is possible to display 3D vector graphics, with an updated graphics library [Michael] wrote.

The display in question uses the ILI9341 LCD driver, found in the Adafruit library, and an optimized 3D graphics driver. Both of these drivers have noticeable flicker when the animation updates, caused by the delay between erasing a previous frame and when a new frame is drawn.

With 16-bit color and a resolution of 320×240 pixels, there simply isn’t enough memory or the processing power on an ATMega microcontroller to render anything in the time it takes to display a single frame. There isn’t enough memory to render off-screen, either. To solve this problem, [Michael] built his render library to only render pixels that are different from the previous frame.

Rendering in 3D presents its own problems, with convex surfaces that can overlap themselves. To fix this, [Michael]’s library renders objects from front to back – if the pixel doesn’t change, it doesn’t need to be rendered. This automatically handles occlusions.

In a demo application, [Michael]’s LCD and Arduino can display the Stanford bunny, a low-poly 3D face, and geometric object. It’s not a video game yet, but [Michael] thinks he can port the classic game Spectre to this platform and have it run at a decent frame rate.

Video of the demo below.

Continue reading “Better 3D Graphics On The Arduino”

Brewdoo Helps Keep The Office Coffee Fresh

Until about lunch time, the coffee goes pretty fast in our office. Only a few of us drink it well into the afternoon, though, and it’s anyone’s guess how long the coffee’s been sitting around when we need a 4:00 pick-me-up. It would be great to install a coffee timer like [Paul]’s Brewdoo to keep track of these things.

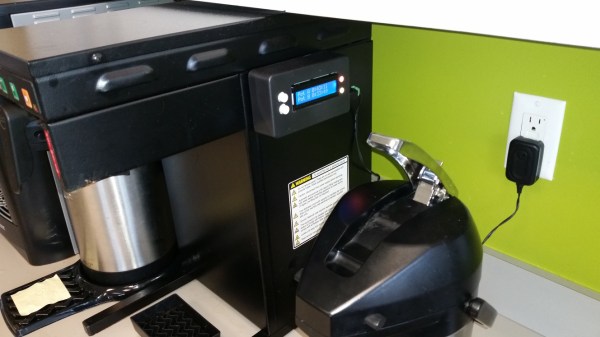
The Brewdoo’s clean and simple design makes it easy for anyone in the office to use. [Paul]’s office has two carafes, so there’s a button, an RGB LED, and a line on the LCD for each. Once a pot is brewed, push the corresponding button and the timer is reset. The RGB LED starts at green, but turns yellow and eventually red over the course of an hour. Brewdoo has a failsafe in place, too: if a timer hasn’t been reset for four hours, its LED turns off and the LCD shows a question mark.

[Paul] knew he couldn’t touch the existing system since his company leases the equipment, so the Brewdoo lives in an enclosure that [Paul] CNC’d with custom g-code and affixed to the brewing machine with hard drive magnets. Although [Paul] designed it with an Arduino Uno for easy testing and code modification, the Brewdoo has a custom PCB with a ‘328P. The code, Fritzing diagram and Eagle files are up at [Paul]’s GitHub.

DeBrew Delta Coffee Robot

Delta Coffee-Brewing Bot

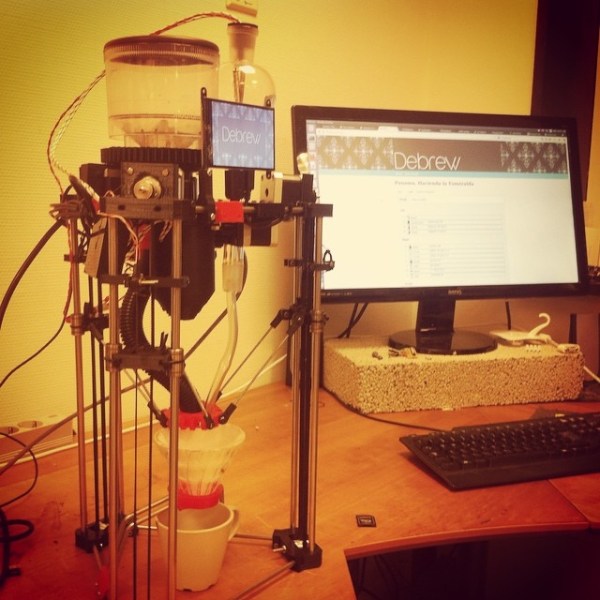
Pour-over coffee brewing is a simple and cheap hands-on alternative to using an automatic coffee maker. Although coffee aficionados often choose pour-over just for the manual brewing experience, this didn’t stop [Elias] from automating his pour-over coffee setup with an elaborate delta-robot: the DeBrew.

The coffee-brewing robot is built around a delta assembly from a 3d printer controlled by a BeagleBone Black. The BeagleBone drives stepper motors, displays information on a small open-source hardware HDMI LCD display, and serves up a web interface to control the machine. The radius of the pouring pattern, water temperature, and grind coarseness of the DeBrew can all be customized though its web interface.

For those who want to build their own pour-over robot, [Elias] has made a SketchUp drawing of the design and all of his Python source code available as open-source. Check out the video after the break where [Elias] explains how his delta pour-over bot works.

Continue reading “Delta Coffee-Brewing Bot”

Master Clock Keeps Time For All Other Clocks

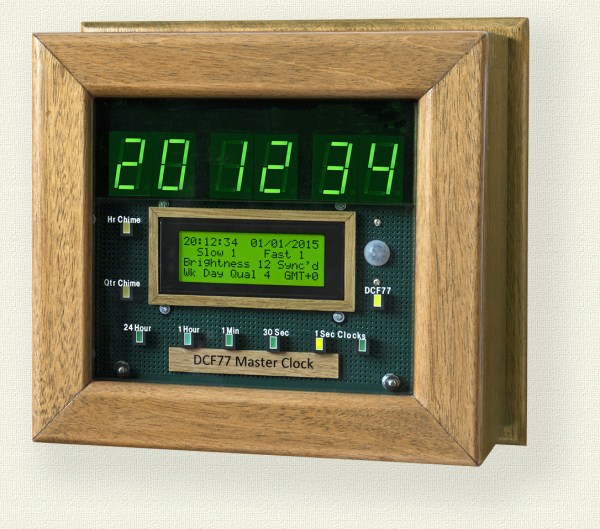
[Brett] just finished construction and long-term testing of this extremely accurate timepiece. It keeps such great time by periodically syncing with the atomic clock in Mainflingen, Germany.

The core of the project is an ATMega328 which uses the new DCF77 library for decoding the signal broadcast by an atomic clock. The libraries written by Udo Klein significantly increase the noise tolerance of the device reading the signal, but they will not work with any project that use a resonator rather than a crystal.

In the event of a complete signal loss from the atomic clock, the micro driving the clock also has a backup crystal that can keep the clock running to an accuracy of within 1 second per day. The clock can drive slave clocks as well, using pulses with various timings depending on what [Brett] needs them to do. The display is no slouch either: six seven-segment displays show the time and an LCD panel reads out data about the clock. It even has chimes for the hour and quarter hour, and is full of many other features to boot!

One of the most annoying things about timekeeping is daylight savings time corrections, and this clock handles that with a manual switch. This can truly take care of all of your timekeeping needs!

Working With Very Cool LCD Modules From Sharp

LCD

Here’s some interesting hardware for you: Sharp came out with a very cool series of LCD displays, gong by the name Sharp Memory LCD. Not only are these displays very low power – on the order of about 5 microAmps to keep the display alive – but some of the smaller displays are reflective, making them eminently readable even in daylight. [Mike] decided he’d take a look at these displays and liked what he found.

While these displays are still pretty new, there are a few breakout boards available to make them accessible to desktop tinkerers. The folks at MakerDyne have a breakout board available and there’s one by kuzyatech over on Tindie.

While these displays are readable in daylight and are extremely low power, don’t expect to display LCD video on them anytime soon. The refresh rate is still fairly slow, but you might be able to get away with simple animations with interlacing and so forth. Still, outside of eink, you’re not going to find a better display in terms of power consumption and daylight readability.

Continue reading “Working With Very Cool LCD Modules From Sharp”

Tiny MAME Cabinet Built From Raspberry Pi

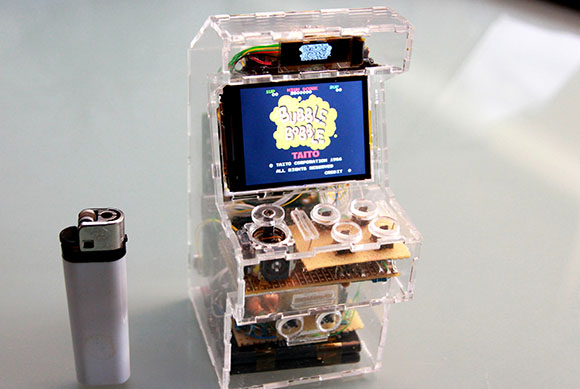
It’s been a while since we’ve seen [Sprite_tm] pull a project from thin air, and we haven’t seen him do anything with a Raspberry Pi yet. All things must pass, and finally [Sprite] has unleashed his tiny, pocket-sized MAME machine to the world.

The build uses a Raspi for all the Linux-ey and MAME goodness, but [Sprite_tm] didn’t want to fiddle around with the HDMI or analog video output. Instead, he chose to use an SPI-controlled TFT display that is only 2.4 inches across. This isn’t a new hack for [Sprite] – he figured out how to connect this display over GPIO pins with a Carambola earlier this year.

To make his cabinet portable, [Sprite] opted for using old cell phone batteries with a cleverly designed charging circuit. When the power supply is connected to +5V, the batteries charge. When this power is removed, an ATtiny85 provides 5V of power to the Raspi and display.

No arcade cabinet is complete without a marquee of some sort, so [Sprite] used an extremely tiny 128×32 white OLED to display the logo of the game currently being played. Everything in the Raspi is set up to be completely seamless when switching between games, automatically configuring the controls and marquee for the currently selected game.

You  can check out [Sprite]’s mini MAME booting straight into Bubble Bobble after the break along with some gameplay footage and finally switching it over to Nemesis. A very awesome build from an exceedingly awesome maker.

Continue reading “Tiny MAME Cabinet Built From Raspberry Pi”

An Adafruit Raspberry Pi Extravaganza

The folks at Adafruit are busy as a bee working on bringing some of their really cool boards to the Raspberry Pi platform. Here’s a few that came in over the last few days:

16 servos is almost too many

Servos require a PWM output but the Raspi only has hardware support for PWM on a single GPIO pin; certainly not enough to build a gigantic, city-leveling robot. [Kevin] over at Adafruit put together a tutorial for using this 16 channel servo driver with the Raspi.

12 bit DAC

With only one PWM pin and no analog out, it was only a matter of time before someone hooked up the Adafruit 12 bit DAC to the Raspberry Pi.

16×2 LCD displays

Both the servo and DAC builds use the Adafruit I2C library and a bit of Python. Of course it’s possible to treat the GPIO pins on the Raspberry Pi as digital outs, just as [Mikey] did with his Raspi LCD display tutorial.

So, what distro are you using?

Of course all these builds use Adafruit’s Occidentalis distro, a maker-friendly Linux distro we’ve posted about before. It’s too useful to languish as a single Hackaday post, so here it is again.