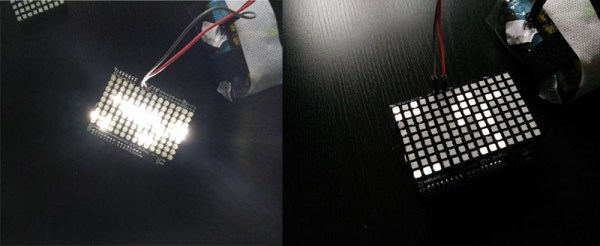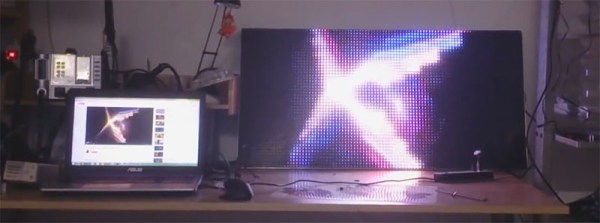
A few years ago, [Frans-Willem] bought a few RGB LED panels. Ten 32×16 panels is a lot of LEDs, and to drive all of these panels requires some sufficiently powerful hardware. He tried working with an FPGA development board, but that didn’t have enough memory for 24-bit color. The microcontroller du jour – a TI Stellaris – couldn’t get more than 16 bits of color without flickering. With a bunch of LEDs but no way to drive them, [Frans-Willem] put the panels in a box somewhere, waiting for the day they could be used to their fullest capacity.
This day came when [Frans-Willem] was introduced to the STM32 series of chips with the F1 Discovery board. While looking for some electronic playthings to use with this board, he stumbled upon the LED panels and gave them one more try. The results are spectacular, with 33 bits of color, with animations streamed over a router over WiFi.
The panels in question are HUB75 LED panels. In the 32×8 panels, there are six data pins – two each for each color – four row select pins, and three control pins. The row select pins select which row of pixels is active at any one time. Cycle through them fast enough, and it will seem like they’re all on at once. The control pins work pretty much like the control pins of a shift register, with the data pins filling in the obvious role.
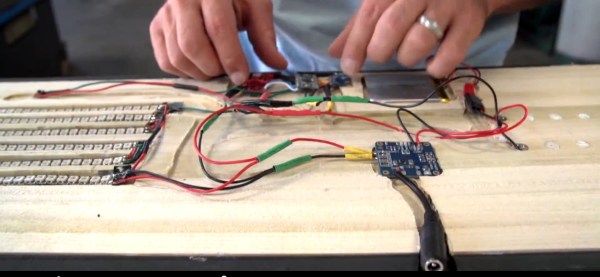
The code that actually drives the LEDs all happens on an STM32F4 with the help of DMA and FSMC, or the Flexible Static Memory Controller found on the chip. This peripheral takes care of the control lines found in memory, so when you toggle the write strobe the chip will dump whatever is on the data lines to a specific address in memory. It’s a great way to take care of generating a clock signal.
For sending pixels to this display driver, [Frans-Willem] is using the ever-popular TP-Link WR703N. He had originally planned to send all the pixel data over the USB port, but there was too much overhead, a USB 1.1 isn’t fast enough. That was fixed by using the UART on the router with a new driver and a recompiled version of OpenWRT.
All the software to replicate this project is available on Github, and there’s a great video showing what the completed project can do. You can check that out below.