Microcontroller Gives You More Control Of Your Camera Lens

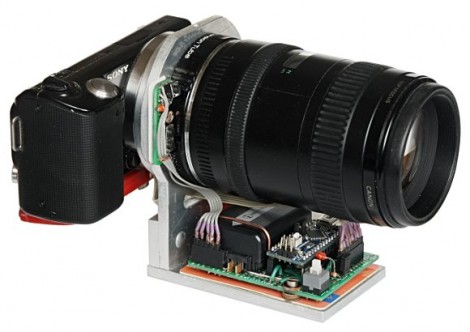
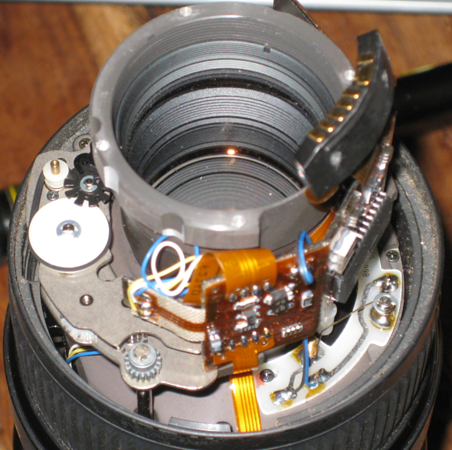
Here’s one way to get more control of your camera lenses. [Vladimir] built an Arduino-based pass-through ring (translated) which intercepts automatic lens controls. It’s meant for use with the Canon EOS lenses which have their own electronics allowing control of things like focus and zoom.

It seems like part of the motivation here was to uses the lenses with other brands of cameras. But [Vladimir] does also talk about the possibility of improving on some of the sensors that don’t perform well in certain climate conditions (think of how crystal oscillators will drift as temperature changes).

The machine translation is a bit rough to follow, but it seems the adapter ring still uses the settings sent in from the camera but has the Arduino clone to translate them into a format that the lens is expecting. In addition to this there is a set of buttons on that small PCB beside the lens which allow for fine tuning the aperture.

This is a lengthy writeup, but there’s two more on the way that will help fill in the gaps of how this hack works with different lens models, and some more tips on how to use it.

[Thanks Vasily]

Lens Adapter From A Plastic Soda Bottle

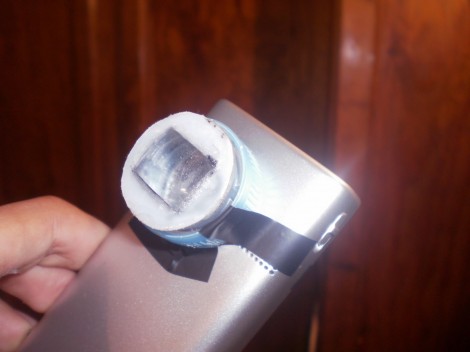
This lens adapter makes a lot of sense if you’re looking to interface with cameras that don’t have an in-built mounting option. It uses the cap and threaded neck from a soda bottle (translated) to make the lens adjustable and removable.

In the past we’ve seen this hack using a lens cap with a hole drilled in it as the mounting bracket. But that’s only useful if the lens you’ve chosen actually has a cap to use. This method lets you cut the top off of a the soda cap and mount it on the camera. Now each lens can be affixed to the threaded neck of the bottle, allowing for some adjustment of the focal point by screwing the add-on in or out.

Obviously this would work well for macro or fish-eye lenses. But there’s all kinds of other options out there like adding a microscope lens adapter, or actually attaching quality optics to your device.

DSLR Bellows-mounted Lens Retrofit

dslr_lens_retrofit

While digging through a pile of old camera equipment, [Jake] stumbled upon a camera that belonged to his grandfather and was curious to see what sorts of images the old lens would produce. He wasn’t interested in messing around with a film-based camera for his experiments, so he needed to find a way to mount the vintage lens on his newer Canon DSLR.

After considering several options including custom machined adapters and mounting rings built from old Canon lenses, he found a much cheaper solution. He purchased a lens adapter made to mount a particular type of lens to a modern DSLR, and then modified it to fit his lens. It worked perfectly, though he admits the resulting images are not that different than those taken with his regular lens.

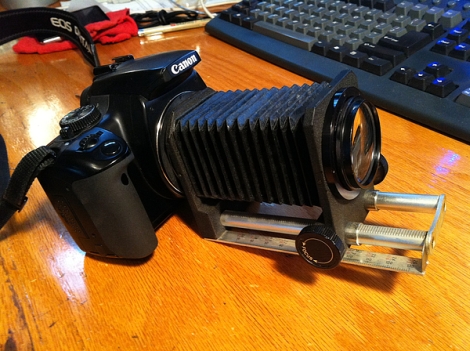
Underwhelmed with the images, he decided to mount the lens on a set of bellows he picked up at the local dump. It looks pretty neat, but he has yet to get a chance to take any pictures with his new setup. Hopefully we’ll see some test shots soon.

If anyone has experience with using bellows lenses on a modern DSLR, we’re always up for seeing some sample pictures. In the meantime, check out this other DSLR/bellows hybrid project we featured a short while back.

[via BoingBoing]

A Different Take On A Laser Projection Microscope

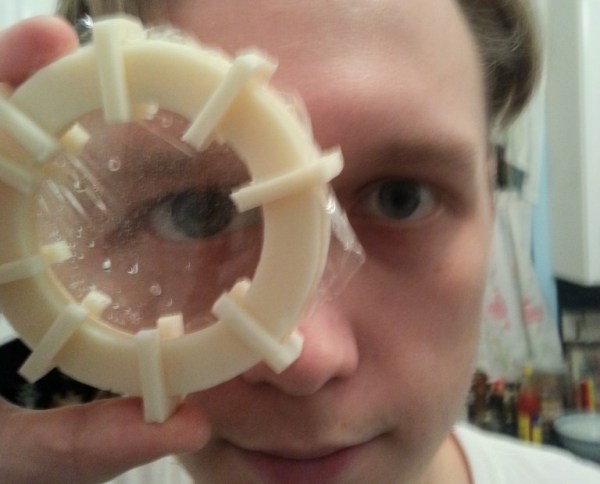
[Dusjagr] has another take on building a laser projection microscope. Last year we saw a laser-based microscope that shined the beam of light through a water droplet which contained the subject to be magnified. The droplet bent the focused beam of light and projected the magnified contents onto a screen. Now that’s pretty neat and [Dusjagr] has used that method himself. But most traditional microscopes use glass slides to contain the subject and this new version now makes that possible.

A bit of experimentation led [Dusjagr] to the discovery that a lens re-purposed from a webcam can achieve similar focus results as a water droplet. The video after the break shows the apparatus seen above in action. The laser shines through the lens, then through a slide that contains a water sample from a nearby pond. The image is clear, albeit completely bathed in green.

For us the most interesting part of [Dusjagr’s] writeup is his discussion of the limits of laser amplification based on the wavelength of light the diode puts out.

Continue reading “A Different Take On A Laser Projection Microscope”

Disco Death Ray

Wielding the power to melt glass or instantly ignite most day to day materials can be intoxicating pretty fun. With a little math, a lot of patience, and 5,800  1cm pieces of mirror, this build requires welding glasses just to look at the 1-2cm focal point. With an idea rumored to date back to Archimedes, this more portable parabolic project is perfect for your home burning needs. Unfortunately, this setup seems to have burnt itself to death at some point, though that makes room for version two, which will reportedly bump the mirror count to 32,000 or so.

There are plenty of other ways to make a death ray out there as well, including using lasers or lenses. Think you have a better tool of destruction? Be sure to tell us about it.

You Know That They Say About Guys With Big Lenses?

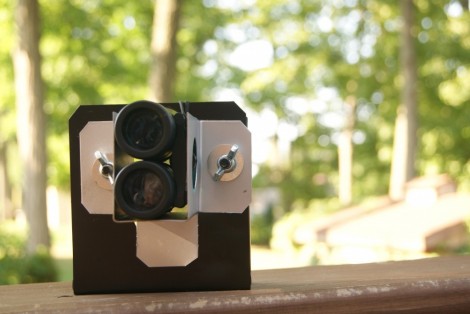
[Tony Lovell] and [dkpeterborough] built a sizable camera lens using optics from a flight simulator projector. What they ended up with is a 900mm lens that can make a beautiful photo of the moon, or capture distant landscapes in great detail. The body of the lens was designed in CAD and sent off for fabrication out of aluminum, as seen above. The concentric baffles help to prevent lens flare but it can’t be used in its bare-aluminum condition. The internals were coated using a stippling finish that leaves a sandy texture. That was covered with matte black barbecue paint, doing a great job of preventing optical interference, and the outside received a glossy white coat. Finished weight: 59 pounds, but once you see the pictures you’ll agree it’s worth lugging the bulky instrument around to grab that killer shot.

[via Make]

Build A Cutting Laser From An Old PC

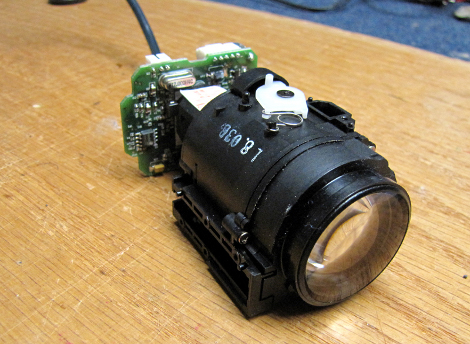
[Drake Anthony] makes building a cutting laser from a PC look easy, and it seems like it actually is. Almost everything you need can be found in a dead desktop unit. The diode is pulled from a DVD writer (16x or faster), with the power supply unit, and heat sinks from the processor and GPU being used as well. You’ll also need a focusing lens (just a few dollars), some thermal glue, an LM317, a resistor, and a pair of protective goggles matching the laser diode’s wavelength.

He fits the diode into the lens, then glues the assembly into a hole drilled through the processor heat sink. A driver is built using the LM317 variable regulator, resistor, power supply, and the GPU heat sink to keep things cool. Check out the video after the break to see the laser cutting tape, burning plastic, and lighting matches. Continue reading “Build A Cutting Laser From An Old PC”