Canon Pixma Printer Frontpanel Library

Re-Using The LCD & Button Assembly From A Broken Inkjet Printer

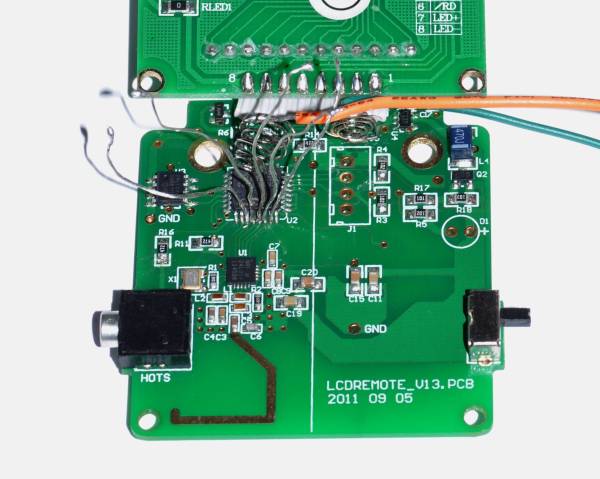
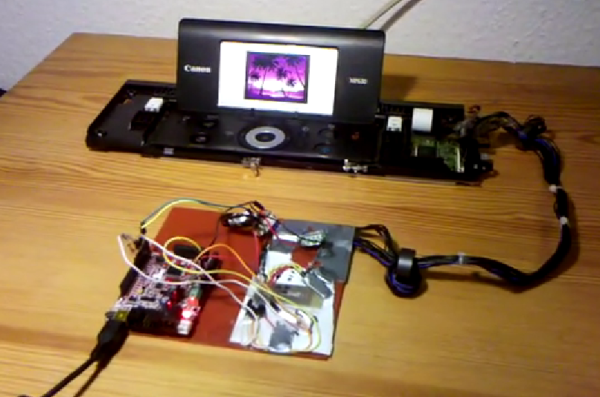
Inkjet printers are a dime a dozen. You probably have taken old printers apart to scavenge parts like motors, pulleys, belts, switches, linear rods, power supply, etc. These parts are easy to reuse in other projects, unlike the controller portion of the printer which not as easy to make use of. [Blaupause] has done something very interesting, and it probably ranks in the ‘extreme difficulty’ category for most tinkerers. He has taken the front panel off an otherwise non-working Canon Pixma inkjet printer and has figured out a way to interface with it.

The front panel of this printer has the standard buttons that you would find on any ole printer, but the Pixmas also has a small LCD screen. [Blaupause] has written a library for the Olimexino microcontroller that can communicate with and make use of the repurposed front panel. And the neat part of this project is that the front panel’s on-board processor does the heavy lifting when it comes to displaying images on the LCD screen or checking button states which frees up your microcontroller to do whatever else. Right now, the LCD screen can display bitmaps and supports image transparency. The library can not display video as of yet, but that option is being worked on.

[Blaupause] makes all his hard work available to the public on the project’s Sourceforge page. In addition to the library, he also includes printer panel pinouts and detailed information on how to communicate with the buttons and LCD screen. Video after the break…

Continue reading “Re-Using The LCD & Button Assembly From A Broken Inkjet Printer”

Arduino SPI Library Gains Transaction Support

Transaction SPI Timing

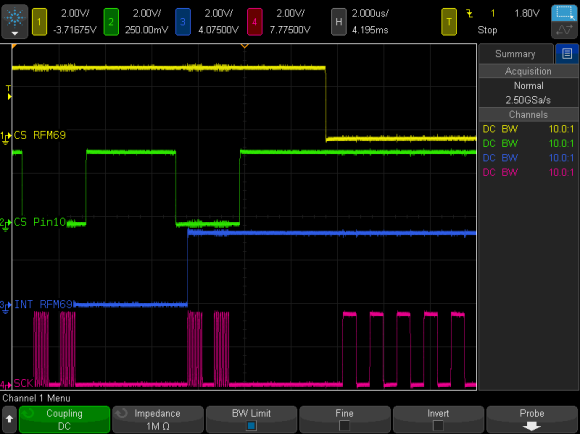
To prevent data corruption when using multiple SPI devices on the same bus, care must be taken to ensure that they are only accessed from within the main loop, or from the interrupt routine, never both. Data corruption can happen when one device is chip selected in the main loop, and then during that transfer an interrupt occurs, chip selecting another device. The original device now gets incorrect data.

For the last several weeks, [Paul] has been working on a new Arduino SPI library, to solve these types of conflicts. In the above scenario, the new library will generate a blocking SPI transaction, thus allowing the first main loop SPI transfer to complete, before attempting the second transfer. This is illustrated in the picture above, the blue trace rising edge is when the interrupt occurred, during the green trace chip select. The best part, it only affects SPI, your other interrupts will still happen on time. No servo jitter!

This is just one of the new library features, check out the link above for the rest. [Paul] sums it up best: “protects your SPI access from other interrupt-based libraries, and guarantees correct setting while you use the SPI bus”.

Build A Sensorless Brushless DC Motor Controller

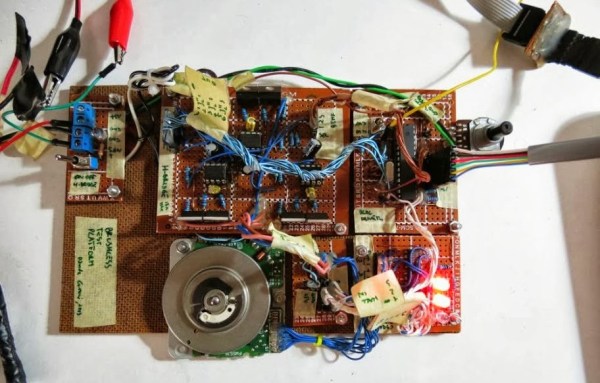
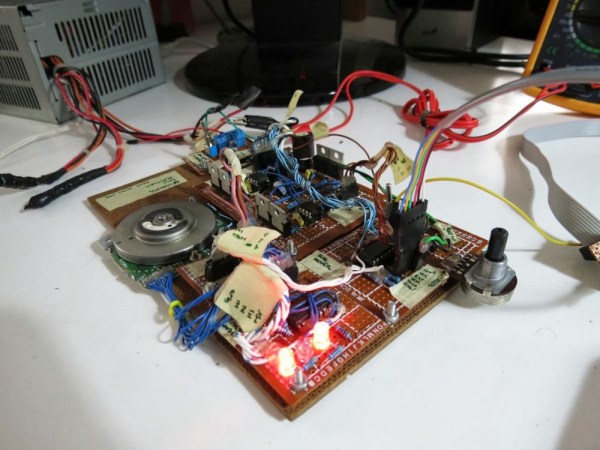
[Davide Gironi] shows us how to implement a sensorless brushless DC motor controller (sensorless BLDC) using an ATmega8 microcontroller. In order to control a BLDC motor you need to know its rotational sequence position and speed so you can calculate and apply the correct current phase sequence to the motor windings at just the right time.

Simply said, sensorless BLDC means you’re not using a purpose built sensor to determine the motor’s position and speed, however, you are sensing the motor’s sequence position using the back EMF signal coming from one of motor’s coils that is not currently receiving power. When this back EMF signal crosses zero voltage a microcontroller can calculate the rotational speed and when to switch to the next power sequence. This technique is not good for position control motors but is great for continuous motors like computer fans and drives were the slightly reduced wiring costs make this type of BLDC control favored.

If you want to build a BLDC controller we recommend starting with [Davide’s] last project on sensor controlled BLDC motors. You can also checkout these interactive demonstrations for more understanding on the different BLDC configurations.

Follow along after the break to watch the video demonstration of [Davide’s] sensorless BLDC controller controlling a motor from CD-ROM drive.

Continue reading “Build A Sensorless Brushless DC Motor Controller”

Building A Brushless Motor Controller Around An ATmega Chip

You know when you see something like this it’s just going to be awesome, and we weren’t disappointed by our first impression. [Davide Gironi] built a brushless motor controller from the ground up using an ATmega8 as the brain. If you want to understand every aspect of a subject this is how to do it. Lucky for us he explains what each portion of the prototype does.

Brushless motors have no brushes in them (duh). But what does that really mean? In order to spin the motor a very carefully crafted signal is sent through the motor coils in the stationary portion (called the stator), producing a magnetic field that pushes against permanent magnets in the rotor. A big part of crafting that signal is knowing the position of the rotor. This is often accomplished with Hall Effect sensors, but can also be performed without them by measuring the back EMF in the coils not currently being driven. The AVR-GCC compatible library which [Davide] put together can be tweaked to work with either setup.

Get a good look at the system in action after the break.

Continue reading “Building A Brushless Motor Controller Around An ATmega Chip”

Microcontroller Statistics With A Small SRAM Footprint

statistics-library-for-microcontrollers

You may know your way around the registers of that favorite microcontroller, but at some point you’ll also need to wield some ninja-level math skills to manage arrays of data on a small device. [Scott Daniels] has some help for you in this arena. He explains how to manage statistical calculations on your collected data without eating up all the RAM. The library which he made available is targeted for the Arduino. But the concepts, which he explains quite well, should be easy to port to your preferred hardware.

The situation he outlines in the beginning his post is data collected from a sensor, but acted upon by the collection device (as opposed to a data logger where you dump the saved numbers and use a computer for the heavy lifting). This can take the form of a touch sensor, which are known for having a lot of noise when looking at individual readings. But since [Scott] is using the Mean and Standard Deviation to keep running totals of collected data over time it is also very useful for applications like building your own home heating thermostat.

Stellaris Launchpad Library To Drive The TM1638 UI Board

For those that grabbed one of these TM1638 UI boards you can now easily use it with your Stellaris Launchpad. [Dan O] took it upon himself to publish an ARM library for the UI board.

There’s not a lot of new stuff to talk about here. We’ve already seen this being driven by an FPGA. [Dan] also links to both an Arduino and an MSP430 library for the board. The one thing that is good to know is that the board seems to run fine from the 3.3V supplied by the Stellaris Launchpad.

The ARM chip has four different hardware SPI modules which could have been used to drive this display. But [Dan] opted to bit bang instead. This give him more flexibility, like easily changing the pin mapping and foregoing the need for external components. All it takes is direct connections from three I/O pins which are used for clock, data in, and data out. We’ve embedded the obligatory demo video after the break.

Continue reading “Stellaris Launchpad Library To Drive The TM1638 UI Board”

Library For Driving SSD1289 LCD Displays With Small Microcontrollers

[H. Smeitink] got his hands on a 320×240 color TFT LCD screen. He set out to drive it with a small PIC microcontroller but didn’t find a lot of help out there to get up and running quickly. This is surprising since it’s a really nice display for quite a low price (under $16 delivered on eBay at the time of writing). He decided to write his own library and support tools to help others.

The display includes an SPI touch screen, but since that works separately from the LCD controller, touch input is not supported in this package. The driver that he wrote is coming from a mikroC toolchain point of view, but it shouldn’t be too hard to port to your platform of choice. We took a quick look at the code and it seems all you need to do is tweak the defines to match your hardware registers, and implement your own delay_ms() function.

But he didn’t stop with the driver. You’ll also find a C# program which converts images to an array for easy use on the display. Incidentally, this is the same display which [Sprite_TM] got working with the Raspberry Pi.