Complete Guide To Compiling OpenWRT

Regular reader [MS3FGX] recently wrote a guide to compiling OpenWRT from source. You may be wondering why directions for compiling an open source program warrant this kind of attention. The size and scope of the package make it difficult to traverse the options available to you at each point in the process, but [MS3FGX] adds clarity by discussion as much as possible along the way.

OpenWRT is an open source alternative firmware package that runs on may routers. It started as a way to unlock the potential of the Linksys WRT54G. But the versatility of the user interface, and the accessibility of the Linux kernel made it a must-have for any router. This is part of what has complicated the build process. There are many different architectures supported and you’ve got to configure the package to build for your specific hardware (or risk a bad firmware flash!).

You’ll need some hefty hardware to ease the processing time. The source package is about 300 MB but after compilation the disk usage will reach into the Gigabyte range. [MS3FGX] used a 6-core processor for compilation and it still took over 20 minutes for a bare-bones distribution. No wonder pre-built binaries are the only thing we’ve ever tried. But this is a good way to introduce yourself to the inner workings of the package and might make for a frustrating fun weekend project.

Simple Low Toner Workaround Squeezes Out A Few Extra Pages When Your Printer Refuses

low-ink-hacking

[Andrew] was getting ready to print out an assignment when his Samsung printer suddenly started blinking a red error light at him. Unable to find any documentation explaining the issue, he called Samsung directly and found that it was indicating the toner cartridge was nearly empty.

He held down the button that prints a test page, which came out just fine despite the printer’s insistence that there was not enough toner left. Annoyed at the fact that he felt Samsung was trying to strong arm him into buying another pricey toner cartridge, he looked for a way around the restriction.

He discovered that his printer’s software allowed him to specify a custom test page document, though it required that the document be in PostScript format. After a few shell commands, he had his document converted and was on to bigger and better things.

While a bit time consuming, his workaround should let him get by on this toner cartridge at least for a little while longer. We imagine that since he’s using Linux, the process could probably be scripted to save time, though we’re not sure if the same can be said for Windows-based PCs.

NES Controller Is A Slick Way To Carry Around Your Portable OS

nes-controller-linux-drive

[Oliver] had an old NES controller laying around, and without any other use for it, he decided to repurpose it as a portable storage device.

He gutted most of the controller, removing the plastic standoffs, leaving the D-pad and remaining buttons intact. He crammed a 32 GB flash drive inside, along with the guts from an SD card reader. Using a Dremel he cut several openings into the controller, one for the flash drive and SD card reader’s USB ports, as well as for the SD card itself. When the physical modifications were finished, he installed a small Linux distro on the flash drive, which can be run by any PC that supports booting from USB.

While some might argue, we think it’s a neat way to reuse an old gaming peripheral that he might have otherwise thrown out. The portable OS is something that would certainly come in handy, though we can’t wait until the Raspberry Pi is finished – it would be awesome to have a complete computer packed in there too.

A Kinect Primer

Yes, the Kinect is over one year old now, and after some initial unhappiness from [Microsoft], it’s become a hacker’s best friend. [Eric] decided to celebrate this with an Article all about how it works.  If you’re new to this piece of hardware and want to get into working with it, this should be a good hacking introduction.  If you’ve been reading [HAD] lately, you will have noticed this information being used to “build a Kinect bot for 500 bones.”

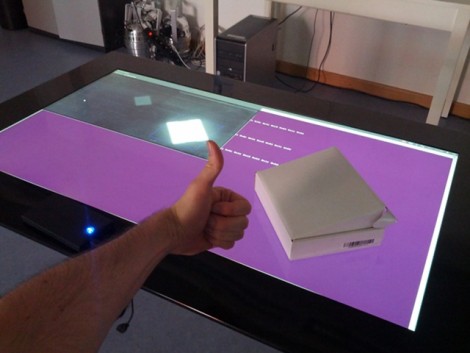
Some interesting facts in this article include that the Kinect measures 307200 distance point, known as a “point cloud” in the gaming area. From this, it’s able to construct a 3D image of the environment around it and allow interaction. Such interesting hardware didn’t take long to hack after Adafruit announced a $3000.00 bounty to open it up to the masses.  This only took four days to do, making one wonder why, with their incredible resources, [Microsoft] wouldn’t either more effectively lock it down or officially open it to be hacked and modified to begin with. Our vote would be to officially open it up, but no one consulted us on the decision.

How To Develop For STM32 Discovery Boards Using Linux

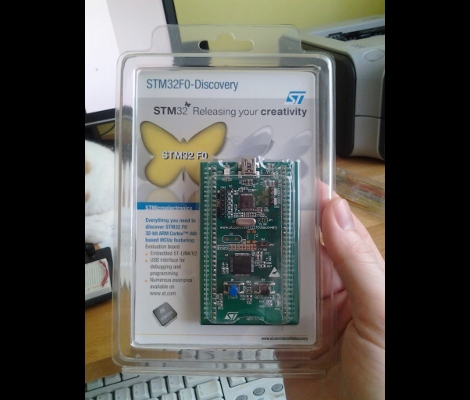
Some hard work has gone into making it possible to develop for the STM32 Discovery board using a Linux system. The board boasts an ARM Cortex-M3 processor, which can be programmed via the mini-USB port on the side. But the company only supports development through their IDE’s which don’t run natively on Linux. The stlink project aims to solve this, providing a toolchain, and making it possible to flash the microcontroller via the USB connection.

The github project linked above also includes a tutorial to get you started (pdf). In addition to a walk through on compiling the software packages, it includes a simple blink program that you can use to test out your hardware. GDB, the familiar open-source debugger, is used to flash the chip. This is a bare-bones tutorial so if you end up posting about your experiences using this toolchain with the Discovery boards we’d love to hear about it.

[Thanks Texane]

Have You Got What It Takes To Code Android Apps Using Assembly?

Do you have a rooted Android device and a computer running Linux? If so, you’re already on your way to coding for Android in Assembly. Android devices use ARM processors, and [Vikram] makes the argument that ARM provides the least-complicated Assembly platform, making it a great choice for those new to Assembly programming. We think his eight-part tutorial does a great job of introducing the language and explaining how to get the development tools up and running. You’ll need to know some basic programming concepts, but from what we saw you don’t need any prior experience with ARM or Android.

So why learn Assembly at all? We took a stab at Assembly for AVR a few months ago and really learned a lot about the hardware that we just never needed to know writing in C. It’s a great way to optimise functions that waste too much time because of quirks with higher-level language compilers. That means you don’t need to write your entire application in Assembly. You can simply use it to streamline hairy parts of your code, then include those Assembly files at compile time.

Installing Linux On A 386 Laptop

The “cheap” and “easy” way in about an hour! A question that pop’s up from time to time is “I somehow ended up with an archaic old laptop / computer, can it run Linux?” Well of course it can, but that totally depends! On what? Well machine CPU, CPU speed, hard disk space, RAM and most importantly what you are expecting it to do.

Okay, why a Intel 386? Well number one I own a 386, but more importantly its the absolute bottom Intel CPU you can run Linux on. While it wont be able to do much, it will give you a basic system to kick around and “get to know” the insides of Linux without a million things installed and the worry of breaking it.

Unfortunately a 386 requires some special moves as the actual chip was dropped from almost all distributions long ago. All of the modern distributions I have looked at require at least a 486 CPU. This tutorial will be strictly for installing a basic bare bones Linux on a 386. Have a 486? Pentium? Faster? Never fear I will be covering that in a part II later this week.

Linux on a 386 in about an hour? Madness you might think, it probably takes Linux longer to boot on a 386 (and in some cases you are correct)! Want to know the trick? Simple, cheat!

Join me after the break for the parts and steps needed to get you started.

Continue reading “Installing Linux On A 386 Laptop”