Building A Solar Powered Game Boy Pocket

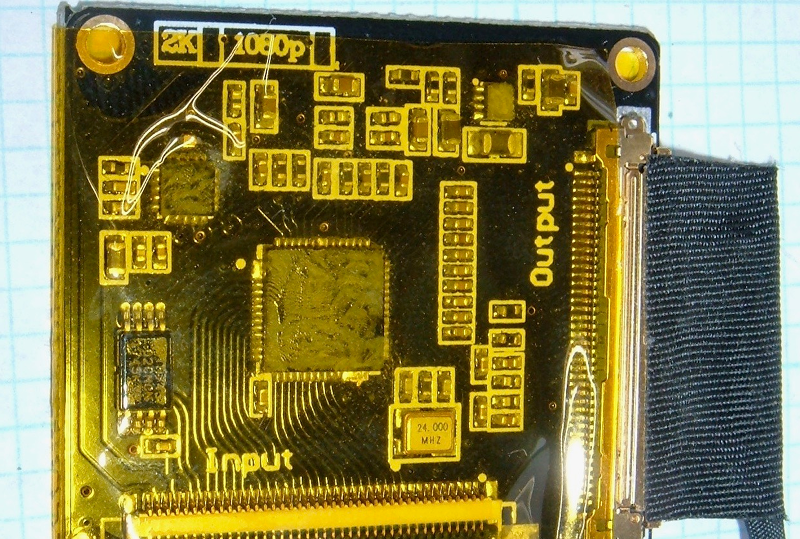
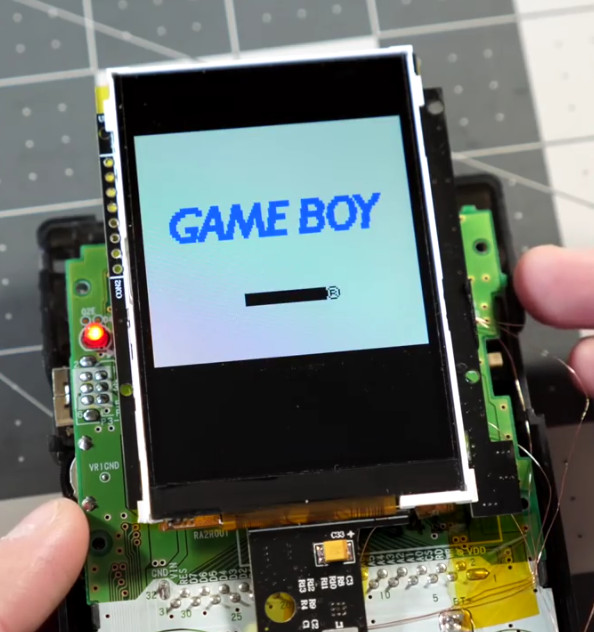
Light has always been a key part of the classic Game Boy experience. Some of us have fond memories of riding along in the back seat of a car at night, pausing and unpausing the game as the street lights overhead briefly give enough light to see the unlit display. The availability of third party IPS displays for these classic handhelds has largely eradicated this problem today, but as you might expect, the increased power requirements of the more modern screen reduces the system’s runtime.

Installing the USB-C charge controller.

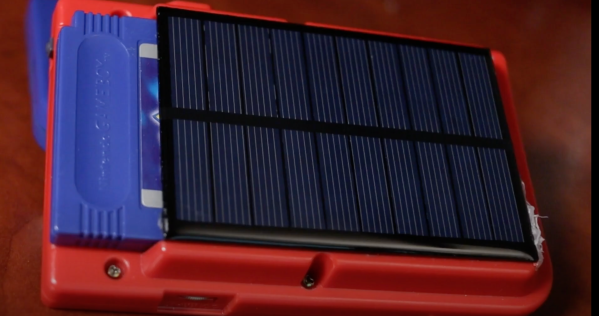
As part of their examination into energy production, the [Houston Museum of Natural Science] set out to see if they could improve things by adding a solar panel to the back of a Game Boy Pocket that had already been modified with an IPS display. The Pocket version of the Game Boy was selected as it has a nice flat back that made it easy to attach a solar panel, and in fact the panel sourced for this mod is so well dimensioned, it almost looks like the device came that way.

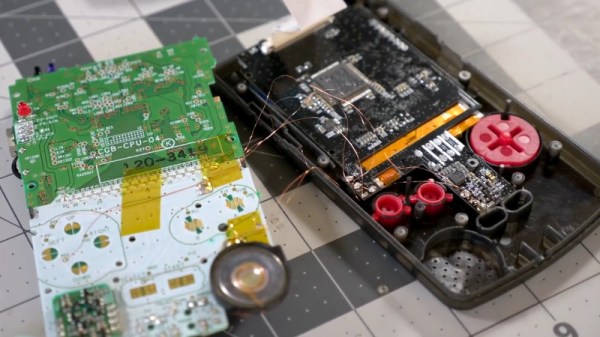
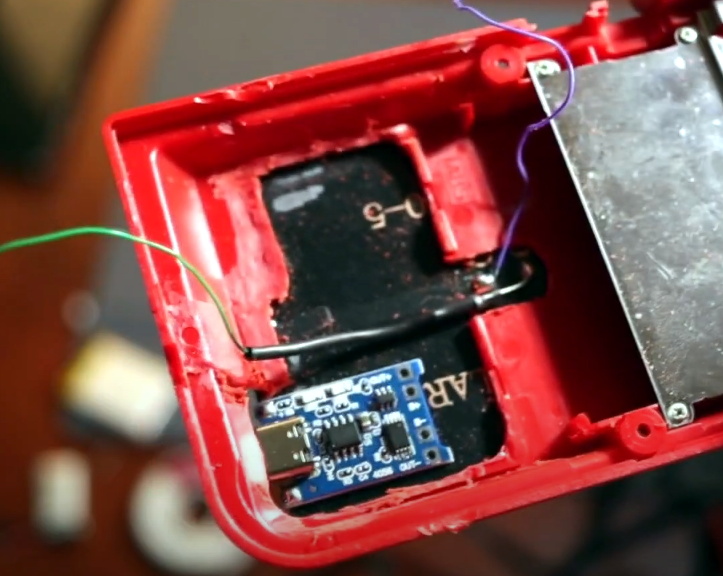
In the video below, you can see the modification starts by cutting away a large section of the Game Boy’s rear panel to fit the 1000 mAh LiPo battery. The solar panel is then affixed over the back with super glue. A diode is soldered onto the solar cell, and then wired into a charge controller that came with USB-C input. The placement of the charge controller ended up being trickier than expected, but with a little hot glue, it works just fine. Overall this is a simple mod but a brilliant idea.

This isn’t the first solar-powered handheld game system we’ve seen, but it’s nice to see the idea revisited and expanded on, particularly regarding ergonomics. In addition, we love the incredible detail of narration that’s given as this hack slowly takes shape. Video after the break.

Continue reading “Building A Solar Powered Game Boy Pocket”

STM32 Gets Up Close And Personal With Mandelbrot

The Mandelbrot set is a curious mathematical oddity that, while interesting in its own right, is also a useful tool for benchmarking various types of computers. Its constant computing requirement when zooming in and out on the function, combined with the fact that it can be zoomed indefinitely, means that it takes some quality hardware and software to display it properly. [Thanassis] has made this a pet project of his, running Mandelbrot set visualizations in different ways on many different hardware platforms.

This particular one is based on an STM32 board called the Blue Pill, which [Thanassis] chose because he hadn’t yet done a continuous Mandelbrot zoom on a microcontroller yet. The display is handled by a tiny 16K IPS color screen, and some clever memory tricks had to come into play in order to get smooth video output since the STM has only 20 kB available. The integer multiplication is also tricky on a platform this small while keeping the continuous zoom function, so it’s limited to fixed point multiplication.

Even with the limitations of the platform, he is still able to achieve nearly double-digit FPS rates with this one. If you want to play around with graphics like this on an STM platform, [Thanassis] has released all of the source code on his GitHub page, but if you’d like to see more Mandelbrot manipulation you can check out one of his older projects where he built a similar project on an FPGA.

Continue reading “STM32 Gets Up Close And Personal With Mandelbrot”

Open Source Smart Display Takes The Long Way Around

Thanks to the relatively low cost of the Raspberry Pi and high resolution LCD screens, “smart displays” have become a favorite project of those looking to clear out their parts bins. Just hook the Pi up to the screen, setup some software, and you’ve got yourself a digital bulletin board for your home that can show your schedule, the weather, etc. Build it into a mirror, and you’ve got yourself at least double Internet points.

But when [John Basista] started planning his own smart display, he decided to take the path less traveled. He’s entered the resulting open source project into the 2019 Hackaday Prize, and we’re very excited to see where it goes from here. Even in these early days he’s already made some great strides, with nary a Raspberry Pi in sight.

[John] has nothing against using the Raspberry Pi for these smart displays, and indeed, it has a number of traits which make it particularly well suited to the task. But the problem for him was that it only supported HDMI, and he had his heart set on using an Embedded DisplayPort (eDP) screen. Namely the Innolux N173HCE-E31, a 17.3 inch IPS LCD designed for laptops.

He tried to find a Linux or Android compatible SBC that featured eDP, but found it to be a challenge. There were some x86 options, but didn’t want to go down that road. Eventually he settled on the Dragonboard 410c, which features a quad-core Qualcomm APQ8016E CPU running at 1.2 GHz and 1GB of RAM. This board didn’t have eDP either, but it did have Display Serial Interface (DSI), which he could convert to eDP with the Texas Instruments SN65DSI86 IC.

From there, he started developing a PCB which would hold the Dragonboard 410c and the SN65DSI86. The board also breaks out I2C and UART so he can connect it to various other sensors and gadgetry down the road, and includes all the necessary power regulation to drive everything. The whole thing fits in the palm of your hand, and judging by the renders [John] has put together, should nestle nicely into the back of the 3D printed enclosure when everything is finished.

There’s still quite a bit left to do on this project, but [John] has plenty of time to tie up the loose ends. Currently there’s little information about the software side of things, but as you can see in the video after the break, it’s now running Android which should make things relatively easy.

Continue reading “Open Source Smart Display Takes The Long Way Around”

Hack A ThinkPad Display

Hackers really like their tools. This leads to holy wars over languages, editors, keyboards, and even laptops. The problem with laptops is that they age, and not always gracefully. [Syonyk] likes his ThinkPad T430S, except for one thing, its TN display wasn’t really very good. These flat screens use an older technology and show color changes with different viewing angles among other problems. So he managed to upgrade the device’s screen to IPS with the help of a replacement screen and an adapter (see right). Apparently, many similar ThinkPads can take the same sort of upgrade.

The problem is that the laptop uses LVDS to talk to the TN screen, while newer screens are likely to use Embedded DisplayPort (eDP) which is a different protocol entirely. However, there’s now a converter that [Syonyk] found on eBay (from China, of course). For about $70, the motherboard’s LVDS output can transform to eDP. Of course, you also need an IPS display panel.

Continue reading “Hack A ThinkPad Display”

Investigating The World’s Rarest Game Boy

Early last year, a very unique Game Boy Color showed up on Chinese shopping site Taobao. Rather than the rather anemic-looking display of the original GBC, this version was modified with a modern IPS LCD. Even in the pictures shown on the product page, it was clear the display on this unit was far more advanced than anything Nintendo ever packed into a Game Boy. The retro gaming community went wild, and soon the site was overwhelmed with orders. The majority of the sales were canceled by the seller, and it’s believed as few as 75 of these hacked GBCs were actually shipped out.

Thanks to one of his viewers, [Colin] was able to get his hands on one of these extremely rare customized handhelds. Clearly a man after our own heart, his first inclination was to tear the thing apart and see how they built it. While he had a fairly good idea of how they managed this hybrid of modern and classic technology, there were a couple of surprises inside.

The device has a completely stock main board, and as such works and plays like a normal GBC. But upon flipping the main board over, [Colin] found a nest of thin magnet wire connecting the new display controller to individual buttons on the front panel. As he later confirmed when he reassembled the system, this allows the user to adjust the display’s brightness by holding “Select” and using the directional pad.

As for the screen itself, the big surprise was that it’s clearly pulled out of a relatively recent smartphone. The screen is physically much larger than the opening in the GBC’s front panel, but through some software trickery the image is displayed only in the area that’s visible to the player. [Colin] managed to get a hold of a few contacts “in the know” who confirmed to him that both the hardware and software for the display controller were specifically created for this application, and are unlikely to be duplicated by anyone else.

Considering most of the Game Boy hacks we cover are about somebody jamming modern hardware into them, it’s an interesting change of pace to see a group that was so adamant about retaining as much original hardware as possible while still managing to improve the user experience.

[Thanks to Doc Oct for the tip]

Continue reading “Investigating The World’s Rarest Game Boy”