Forget Sudoku, Build Yourself A Minimalist Rubik’s Solver Robot

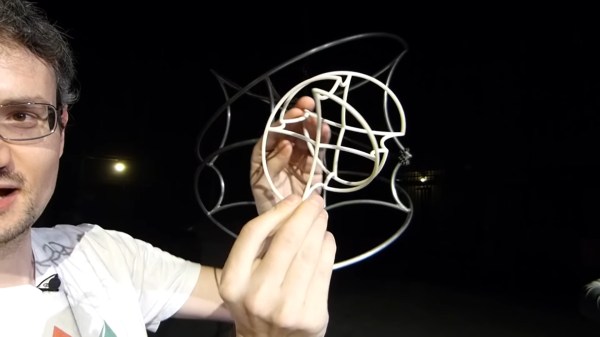
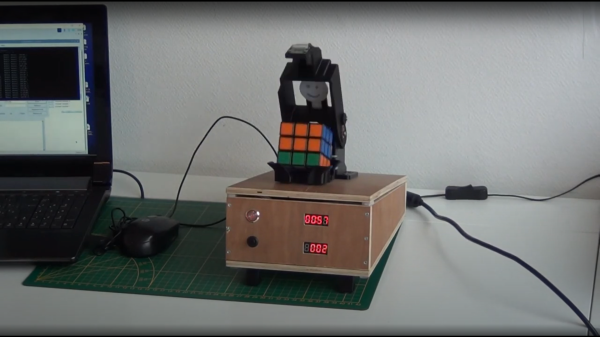
Some people like crossword puzzles, some are serious sudoku ninjas, but [Andrea Favero] likes to keep himself sharp, by learning coding and solving control problems, and that is something we can definitely relate to. When learning a new platform, it’s a very good idea to have a substantial project or goal in mind, and learn what is needed on the way there. [Andrea] chose to build an autonomous Rubik’s cube solver, and was kind enough to document exactly how how to do it, and we’re glad of it!

The result of the openCV processing chain

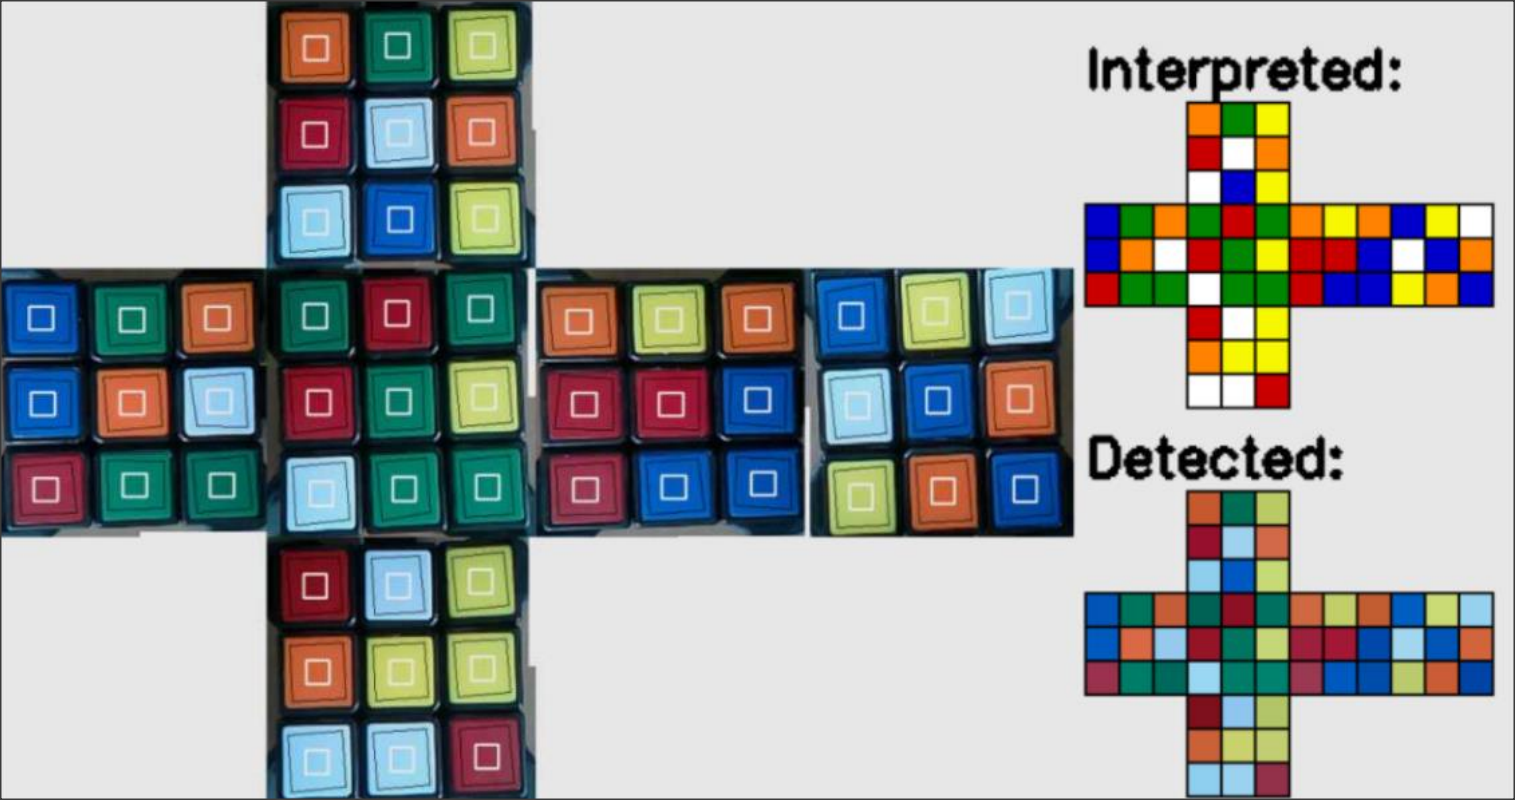
Working in python with OpenCV, [Andrea] uses the methodology by [Oussama Barkouki] to process each face image and convert it into a table of the colours of individual facelets. The basics of that, are first to convert the image to grayscale, then use a gaussian blur to denoise the image. Edges are identified using the canny algorithm, the result of which is then dilated and passed into a contour detector. The contours are sent into a cunning filter that identifies square contours, and those the wrong size are filtered off. What you’re left with are the outlines of the actual coloured facelets. Once you have a list of squares, these can be used to form image masks, and thence select the average colour from each square. The colour is then quantised and stored as a labelled colour from the standard Western Rubik’s cube colour scheme. Finally, once all face images are captured and facelets colours identified, the data are passed into a Rubik’s cube solving algorithm developed by [Hegbert Kociemba,] a guide to which is available on the speedsolving site. The result of the solving step is a sequence of descrambling moves, in the move notation developed by [David Singmaster]. Fascinating stuff, if you ask us! Continue reading “Forget Sudoku, Build Yourself A Minimalist Rubik’s Solver Robot”

3D Printed Circular Prototype Performance Prop Captivates Circus Spectators

When mathematically inspired maker [Henry Segerman] conspired with circus performer and acrobat [Marcus Paoletti] to advance the craft of acrobatics in round metal objects (such as cyr wheels and German Wheels), they came up with a fascinating concept that has taken shape in what [Henry] calls the Tao-Line.

Similar performance devices go in a straight line or can be turned on edge, but the Tao-Line is far more nimble. This is because the Tao-Line is not a continuous cylinder, but rather is made up of numerous circular shapes that allow the Tao-Line to be turned and inverted at different points in its rotation.

While a circus prop might not be your average Hackaday fare, it’s noteworthy because the Tao-Line started off as a 3D printed prototype, which was then turned into the metal fabrication you see in the video below the break.  It’s an excellent example of how modeling complex shapes as a physical product- not just a 3D model on the screen- can be helpful in the overall design and construction of the full scale piece.

If you’re looking to build something that’s under the big top but not quite so over the top, you might enjoy this mixed-media digital clock. Thanks to [Keith] for the great tip. Be sure to submit send your cool finds via the Tip Line!

Continue reading “3D Printed Circular Prototype Performance Prop Captivates Circus Spectators”

Keep Track Of Your Google Calendar With This Custom Build

Keeping track of your appointments on Google Calendar is easy enough if you’re holding a phone or sitting at a computer, but sometimes you just want to know what’s going on at a glance. This desktop calendar build from [andrei.erdei] does just that with plenty of helpful LEDs.

The attract mode is very cool, even if it doesn’t display any actual information.

The design is simple, using WS2812 LEDs to backlight numbers to indicate whether they are weekdays, weekends, anniversaries, holidays, or any other dates of importance. The numerical layout is a nifty perpetual design allowing the display to easily accommodate the structure of any month, even those neat and tidy ones that start on Monday.

The design relies on an ESP-01 to communicate with Google Calendar and display the relevant data. It’s all wrapped up in a 3D printed case, with the printed paper template backlit from behind some smoked acrylic giving a surprisingly professional-looking finish.

If you’re tired of picking up your phone for every last thing, this design could be just what you’re after for keeping track of your appointments. Alternatively, you could always go the hard copy route. Video after the break.

Continue reading “Keep Track Of Your Google Calendar With This Custom Build”

The Wanhao Duplicator CNC Heat Sealer

One custom, compliant heat exchanger, coming right up!

[Thane Hunt] needed to find a way to make a variety of different heat-seal patterns on a fluid heat exchanger made from polyolefin film, and didn’t want all the lead time and expense of a traditional sealing press machined from a steel plate. Pattern prototyping meant that the usual approach would not allow sufficient iteration speed and decided to take a CNC approach. Now, who can think of a common tool, capable of positioning in the X-Y plane, with a drivable Z axis and a controlled heat source? Of course, nowadays the answer is the common-or-garden FDM 3D printer. As luck would have it, [Thane] had an older machine to experiment with, so with a little bit of nozzle sanding, and a sheet of rubber on the bed, it was good to go!

Custom seal path made in Onshape

Now, heat sealing is usually done in a heated press, with a former tool, which holds the material in place and gives a flat, even seal. Obviously this CNC approach isn’t going to achieve perfect results, but for proof-of-concept, it is just fine. A sacrificial nozzle was located (but as [Thane] admits, a length of M6 would do, in a pinch) and sanded flat, and parallel to the bed, to give a 3mm diameter contact patch. A silicone rubber sheet was placed on the bed, and the polyolefin film on top. The silicone helped to hold the bottom sheet in place, and gives some Z-axis compliancy to prevent overloading the motor driver. Ideally, the printer would have been modified further to move this compliancy into the Z axis or the effector end, but that was more work. With some clever 3D modelling, Cura was manipulated to generate the desired g-code (a series of Z axis plunges along a path) and a custom heated indenter was born!

This isn’t the first such use of a 3D printer we’ve seen, here’s an earlier failure, and like everything, there’s more than one way to do it – here’s a method of making inflatable bladders with a defocused CO2 laser.

(warning! Two minutes of a 3D printer head-banging into the bed!)

Continue reading “The Wanhao Duplicator CNC Heat Sealer

Defective 3D Printing For Great Strength

Most of us want our 3D prints to be perfect. But at Cornell University, they’ve been experimenting with deliberately introducing defects into printed titanium. Why? Because using a post-print treatment of heat and pressure they can turn those defects into assets, leading to a stronger and more ductile printed part.

The most common ways to print metal use powders melted together, and these lead to tiny pores in the material that weaken the final product. Using Ti-6Al-4V, the researchers deliberately made a poor print that had more than the usual amount of defects. Then they applied extreme heat and pressure to the resulting piece. The pressure caused the pores to close up, and changed the material’s internal structure to be more like a composite.

Reports are that the pieces treated in this way have superior properties to parts made by casting and forging, much less 3D printed parts. In addition, the printing process usually creates parts that are stronger in some directions than others. The post processing breaks that directionality and the finished parts have equal strength in all directions.

The hot isostatic pressing (HIP) process isn’t new — it is commonly used in metal and ceramic processing — so this method shouldn’t require anything more exotic than that. Granted, even cheap presses from China start around $7,000 and go way up from there, but if you are 3D printing titanium, that might not be such a big expenditure. The only downside seems to be that if the process leaves any defects partially processed, it can lead to fatigue failures later.

We wonder if this development will impact all the car parts being printed in titanium lately. If you need something to print in titanium, consider hacking your rib cage.

Know Audio: A Mess Of Cables

We’ve now spent several months in this series journeying through the world of audio, and along the way we’ve looked at the various parts of a Hi-Fi system from the speaker backwards to the source. It’s been an enjoyable ride full of technical detail and examining Hi-Fi myths in equal measure, but now it’s time to descend into one of the simplest yet most controversial areas of audio reproduction. Every audio component, whether digital or analogue, must be connected into whatever system it is part of, and this is the job of audio cables, sometimes referred to as interconnects. They are probably the single component most susceptible to tenuous claims about their performance, with audiophiles prepared to spend vast sums on cables claimed to deliver that extra bit of listening performance. Is there something in it, or are they all the same bits of wire with the expensive ones being a scam? Time to take a look.

What Makes A Nearly Good Cable

In a typical domestic audio system with digital and analogue signals you might expect to find two types of cable, electrical interconnects that could carry either analogue or digital signals, and optical ones for digital signals. We’re here to talk about the electrical cables here as they’re the ones used for analogue signals, so lets start with a little transmission line theory. Continue reading “Know Audio: A Mess Of Cables”

Hackaday Invades The FLOSS Weekly Podcast

Regular Hackaday readers will know that we’re big supporters of free/libre and open source software (FLOSS) around these parts. There’s an excellent chance you are too, as so many of the incredible projects you send our way make it a habit to share their innermost details, from firmware source code to the OpenSCAD files that generate its 3D printed components. So when our recently minted Editor in Chief [Elliot Williams] was invited to join This Week in Tech’s FLOSS Weekly podcast, he jumped at the chance to represent our little corner of the Internet to the wider world of open source aficionados. (Ed: The final version is now live!  How did we get episode 666?!)

Hosted by [Doc Searls], FLOSS Weekly is known for its in-depth interviews with “the most interesting and important people in the Open Source and Free Software community”, so we hope the incursion by hacker rabble such as ourselves doesn’t taint their brand too much.

It’s live streamed every Wednesday at 12:30 PM Eastern / 9:30 AM Pacific / 17:30 UTC, which means that by the time this post hits the main page of the site, you’ve still got time to tune in. For those of you with gainful employment who can’t slack off for an hour or so in the middle of the workweek, the recorded version will be available afterwards for your time-shifted viewing and or listening pleasure.

[Elliot] will be joined by Hackaday writer and regular co-host of FLOSS Weekly [Jonathan Bennett], making this something of a Jolly Wrencher double-feature. [Jonathan] has been providing readers with a regular peek into the other type of hacking with his fantastic This Week in Security column, and is himself a devout FOSS supporter with a particular passion for GNU/Linux. We’re excited to listen in as the trio riffs on open source at the crossroads of hardware and software, not just because it promises to be an entertaining bit of programming, but because it’s a great opportunity to introduce the world of Hackaday to the wider open source audience.