NESPoise – A Nice Looking NES Clone

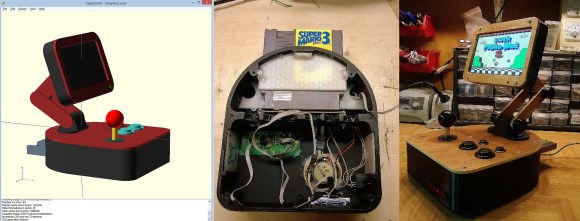
[Dave] tipped us about the latest project he just finished: a posable, desktop NES clone arcade machine. This idea came to be when its creator gathered a few bits and pieces he had lying around: an NES Retro Entertainment System (Retrobit RES, found for less than $25) and an arcade stick with its buttons. [Dave] then bought a 7″ car DVD screen (less than $40) and started a first standard arcade-looking design with OpenSCAD. As the first draft was relatively boring, he let it mature for a bit until he got another idea, shown in the picture above.

The final result is made of 3D printed PLA and varnished luaun plywood which gives the console a VCS style retro look. Many hours were required to 3D print the different parts using a Makerbot Replicator 2. [Dave] disassembled his Retrobit RES to layout its parts inside the case and  also replaced the original voltage regulator with a 7805 on a big heatsink. This may be one of the best ‘nintendo’ hacks we have received over the years, but there have been others that also take cartridges.

Veronica Gets A Pair Of Gamepads And A Bugged Chip

veronica

[Quinn Dunki]’s awesome 6502-based computer is coming right along, and she decided it’s time to add one of the most important features found in the 80s microcomputers she’s inspired by – gamepads.

There were two ways of implementing gamepads back in the 80s. The Apple II analog joysticks used a potentiometer for each joystick axis along with a 556 timer chip to convert the resistance of a pot into a digital value. Analog controls are awesome, but a lot of hardware is required. The other option is the Atari/Commodore joystick that uses buttons for each direction. Surprisingly, these joysticks are inordinately expensive on the vintage market but a similar hardware setup – NES gamepads – are common, dirt cheap, and extremely well documented.

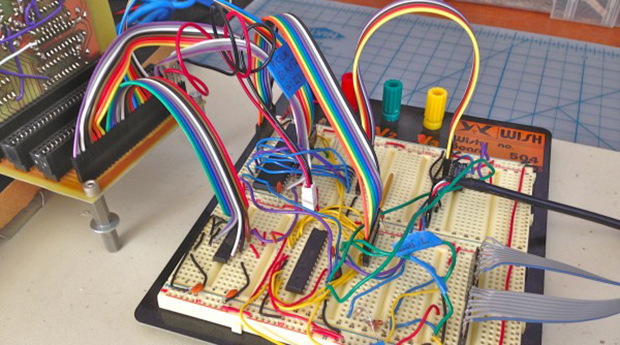
[Quinn] wrote a few bits of 6502 assembly to read these Nintendo controllers with Veronica’s 6522 VIA with the help of an ATMega168, and then everything went to crap.

In testing her setup, she found that sometimes the data line from the controller would be out of sync with the clock line. For four months, [Quinn] struggled with this problem and came up with one of two possible problems: either her circuit was bad, or the 6522 chip in Veronica was bad. You can guess which option is correct, but you’ll probably be wrong.

The problem turned out to be the 6522. It turns out this chip has a bug when it’s used with an external clock. In 40 years of production this hasn’t been fixed, but luckily 6502 wizard [Garth Wilson] has a solution for this problem: just add a flip-flop and everything’s kosher. If only this bug were mentioned in the current datasheets…

Now Veronica has two NES controller inputs and the requisite circuitry to make everything work. Video evidence below.

Continue reading “Veronica Gets A Pair Of Gamepads And A Bugged Chip”

8-Bit Video Game Is Best Of Retro Gaming On A Shoestring Budget

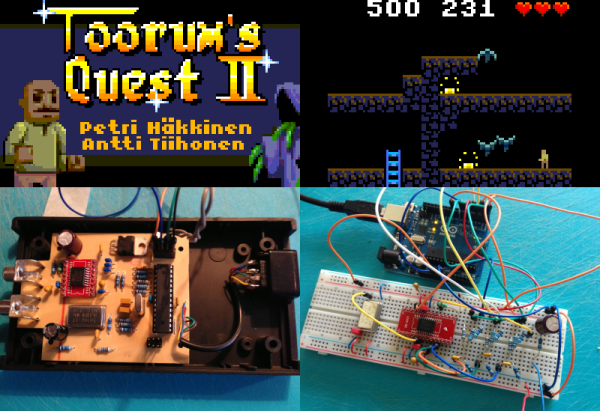
[Petri] wrote in to show off the 8-bit gaming system and original platformer which he and [Antti] developed. Don’t get us wrong now, it’s impressive that the duo were able to put together what looks like a very interesting game. But we’ve seen many industry-leading video games developed with just one or two people (we’re thinking all the way back to the days of Atari). Nope, what’s most interesting to us is that the console is also their creation. We should note that the title screen was the work of their friend [Juho].

Take this with a grain of salt, as the bottom right image in the vignette obviously includes an Arduino. But isn’t it a testament to the state of open hardware and the sharing of knowledge through the Internet that this is even possible on the hobby level? And just because we call it “hobby” doesn’t mean you have to lower your expectations. This thing is full featured. Watch the clip after the break to see the ATmega328 driving a 104×80 resolution screen with a 256 color palette, while using four audio channels for the chiptunes. The thing even utilizes an original NES controller port for user input.

And for those of you who are thinking we’ve seen the same thing before, we never get tired of seeing projects where a lot of hard work has obviously paid off!

Continue reading “8-Bit Video Game Is Best Of Retro Gaming On A Shoestring Budget”

Original NES Advantage Controller Stuffed With Clone NES

famiclone-inside-NES-advantage

Like all good hackers [Osgeld] makes regular appearances at the thrift store to scavenge for raw materials. This summer he was lucky enough to come across a couple of NES clone games. These are controllers that emulate the original Nintendo Entertainment System by connecting to a television using composite video. The mechanics of the controllers were pretty much shot, but he knew he could do something with the boards inside. It was a small gamble at a dollar apiece anyway.

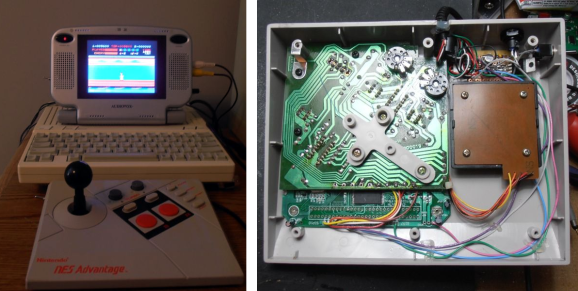
As you can see above, he upgraded a vintage NES Advantage controller by stuffing it full of the emulator hardware. To start he disassembled the arcade-like peripheral and gave everything a thorough cleaning. Since he was going to be soldering onto the PCBs anyway he upgraded the controller by swapping out the original switches for a different set of tactile switches. The large base provided plenty of room for [Osgeld] to fit the emulator (with included ROMs) and now he’s Playing with Power.

The NES Advantage is a very nostalgic controller. Even the Ghostbusters hacked on it!

Keyboard Spoofs 4 NES Controllers For Chiptune Goodness

NES-keyboard

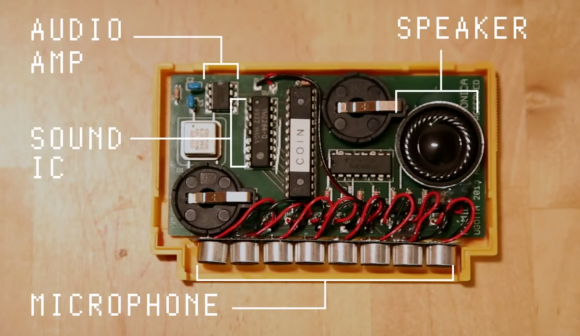
This toy keyboard is being used to play music on an NES. As you probably already know, the hardware inside those original controllers was dead simple. They’re just a parallel to serial shift register that reads from all of the keys. To get this keyboard up and running [heavyw8bit] simply mounted eight chips inside the gutted toy, connecting two of them to the keyboard keys, and the rest to the array of push buttons he added to the right.

So what’s the point of using this as a quadruple game controller? Are you expecting to see what a full speed-run of Contra looks like using this as the controls? That’s not the point at all. This becomes a musician-friendly frontend for the NES synthesizer ROM called NESK-1. [heavyw8bit] wrote the game/program in order to allow you to use the original console hardware to play all of the sounds you know and love. Our favorite is the arpeggio example heard at about 2:35 into the clip after the break.

Continue reading “Keyboard Spoofs 4 NES Controllers For Chiptune Goodness”

How The Game Genie Works

Those of us old enough to remember blowing into cartridges will probably remember the Game Genie – a device that plugs in to an NES, SNES, Sega Genesis, or Game Boy that gives the player extra lives, items, changes the difficulty, or otherwise modifies the gameplay. To someone who doesn’t yet know where the 1-up is in the first level of Super Mario Bros., the Game Genie seems magical. There is, of course, a rhyme and reason behind the Genie and [The Mighty Mike Master] put together a great walkthrough of how the Game Genie works.

There are two varieties of Game Genie codes – 6-character codes and 8-character codes. Both these types of codes translate into a 15-bit address in the game ROM (from 0x8000 to 0xFFFF for the 6502-based NES) and a data byte. For the 6-character codes, whenever the address referenced by the Game Genie code is accessed, a specific data byte is returned. Thus, infinite lives become a reality with just a 6-character code.

Some games, especially ones made in the late years of their respective systems, use memory mapping to increase the code and data provided on the cartridges. Since areas of data are constantly being taken in and out of the CPU’s address space, merely returning a set value whenever a specific address is accessed would be disastrous. For this bank-switching setup, the Game Genie uses an 8-bit code; it’s just like the 6-bit code, only with the addition of a ‘compare’ byte. Using an 8-bit code, the Game Genie returns a specific byte if the compare bytes are equal. Otherwise, the Genie lets hands off the original data to the CPU.

Of course, all this information could be gleaned from the original patent for the Game Genie. As for the circuitry inside the Game Genie, there’s really not much aside from an un-Googleable GAL (general array logic) and a tiny epoxied microcontroller. It’s an amazingly simple device for all the amazement it imbued in our young impressionable minds.

Continue reading “How The Game Genie Works”

Mario Plays Piano With A Little Help From Raspberry Pi

mario-piano

[David] has created his own live robot band to play live versions of the music and sound effects of NES games. Most of us who grew up in the 80’s and 90’s have the music of Nintendo games burned into our brains. While there have been some amazing remixes created over the years, [David] has managed to do something truly unique. Armed with an emulator, some software prowess, and a pair of Raspberry Pis, [Dave] created a system that plays game music and sound effects on analog instruments. A Yamaha Disklavier player piano handles most of the work through a connection to a Raspberry Pi. Percussion is handled by a second Pi.  Snare drum, wood block, and tambourine are all actuated by a custom solenoid setup.

The conversion process all happens on the fly as the game is played. [Dave] says the process has about ½ second of lag when played live, but we’re sure that could be fixed with some software tweaks. Continue reading “Mario Plays Piano With A Little Help From Raspberry Pi”