M.2 For Hackers – Expand Your Laptop

You’ve seen M.2 cards in modern laptops already. If you’re buying an SSD today, it’s most likely an M.2 one. Many of our laptops contain M.2 WiFi cards, the consumer-oriented WWAN cards now come in M.2, and every now and then we see M.2 cards that defy our expectations. Nowadays, using M.2 is one of the most viable ways for adding new features to your laptop. I have found that the M.2 standard is quite accessible and also very hackable, and I would like to demonstrate that to you.

If you ever searched the Web trying to understand what makes M.2 tick, you might’ve found one of the many confusing articles which just transcribe stuff out of the M.2 specification PDF, and make things look more complicated than they actually are. Let’s instead look at M.2 real-world use. Today, I’ll show you the M.2 devices you will encounter in the wild, and teach you what you need to know to make use of them. In part 2, I will show you how to build your own M.2 cards and card-accepting devices, too!

Well Thought-Out, Mostly

You can genuinely appreciate the M.2 standard once you start looking into it, especially if you have worked with mPCIe devices for some amount of time. mPCIe is what we’ve been using for all these years, and it gradually became a mish-mash of hardly-compatible pinouts. As manufacturers thought up all kinds of devices they could embed, you’d find hacks like mSATA and WWAN coexistence extensions, and the lack of standardization is noticeable in things like mPCIe WWAN modems as soon as you need something like UART or PCM. The M.2 specification, thankfully, accounted for all of these lessons.

Continue reading “M.2 For Hackers – Expand Your Laptop”

On the left, the Thunderbolt chip as mounted on the motherboard originally. On the right, the shim installed in place of a Thunderbolt BGA chip, with the IPEX connector soldered on

Macbook Gets NVMe SSD With Help Of A BGA-Imitating PCB

Recently, we stumbled upon a video by [iBoff], adding an M.2 NVMe port to a 2011-2013 MacBook. Apple laptops never came with proper M.2 ports, especially the A1278 – so what’s up? The trick is – desoldering a PCIe-connected Thunderbolt controller, then soldering a BGA-like interposer PCB in place of where the chip was, and pulling a cable assembly from there to the drive bay, where a custom adapter PCB awaits. That adapter even lets you expose the PCIe link as a full-sized PCIe 4x slot, in case you want to connect an external GPU instead of the NVMe SSD!

The process is well-documented in the video, serving as an instruction manual for anyone attempting to install this specific mod, but also a collection of insights and ideas for anyone interested in imitating it. The interposer board ships with solder balls reballed onto it, so that it can be installed in the same way that a BGA chip would be – but the cable assembly connector isn’t installed onto the interposer, since it has to be soldered onto the mainboard with hot air, which would then melt the connector. The PCB that replaces the optical drive makes no compromises, either, tapping into the SATA connector pins and letting you add an extra 2.5mm SATA SSD.

Adding an NVMe drive is an underappreciated way to speed up your old laptop, and since they’re all PCIe under the hood, you can really get creative with the specific way you add it. You aren’t even limited to substituting obscure parts like Thunderbolt controllers – given a laptop with a discrete GPU and a CPU-integrated one, you could get rid of the discrete GPU and replace it with an adapter for one, or maybe even two NVMe drives, and all you need is a PCB that has the same footprint as your GPU. Sadly, the PCB files for this adapter don’t seem to be open-source, but developing a replacement for your own needs would be best started from scratch, either way.

We’ve seen such an adapter made for a Raspberry Pi 4 before, solderable in place of a QFN USB 3.0 controller chip and exposing the PCIe signals onto the USB 3 connector pins. However, this one takes it up a notch! Typically, without such an adapter, we have to carefully solder a properly shielded cable if we want to get a PCIe link from a board that never intended to expose one. What’s up with PCIe and why is it cool? We’ve talked about that in depth!

Continue reading “Macbook Gets NVMe SSD With Help Of A BGA-Imitating PCB”

Developing Your Own Digital Film

In the olden days, you would have a roll of film that you could take to your local drug store and have them develop it. But a serious photographer would likely develop their own photos to maintain complete creative control. While photo editing software has largely replaced the darkroom of old, the images are still held on physical media, and that means there’s room for improvement and customization. In an article for photofocus, [Joseph Nuzzo] shows how you can make your own CFexpress card — the latest and greatest in the world of digital camera storage tech — for less than $100 USD.

The idea here is pretty simple, as CFexpress uses PCIe with a different connector. Essentially all you have to do is get a M.2 2230 NVMe drive and put it into an adapter. In this case [Joseph] is using a turn-key model from Sintech, but we’ve shown in the past how you can roll your own.

Now you might not give it much thought normally, but NVMe devices get pretty hot. This usually isn’t problem inside a large computer case, where they often have large amounts of air blowing over them. But inside a camera you need to dissipate that heat, so thermal compound is a must. With everything screwed together, you have your own card that’s faster and cheaper than commercial offerings.

It’s no secret that there’s a lot of love for NVMe. It’s easy, fast, and adaptable. Since the M.2 slot format includes SATA and PCIe, there’s a likely chance there is a PCIe bus in many cameras. The PCIe bus on the Pi has been convenient for hacking, and we wonder what sort of hacks are out there for cameras.

NVMe Boot Finally Comes To The Pi Compute Module 4

Since the introduction of the Raspberry Pi Compute Module 4, power users have wanted to use NVMe drives with the diminutive ARM board. While it was always possible to get one plugged in through an adapter on the IO Board, it was a bit too awkward for serious use. But as [Jeff Geerling] recently discussed on his blog, we’re not only starting to see CM4 carrier boards with full-size M.2 slots onboard, but the Raspberry Pi Foundation has unveiled beta support for booting from these speedy storage devices.

The MirkoPC board that [Jeff] looks at is certainly impressive on its own. Even if you don’t feel like jumping through the hoops necessary to actually boot to NVMe, the fact that you can simply plug in a standard drive and use it for mass storage is a big advantage. But the board also breaks out pretty much any I/O you could possibly want from the CM4, and even includes some of its own niceties like an RTC module and I2S DAC with a high-quality headphone amplifier.

Once the NVMe drive is safely nestled into position and you’ve updated to the beta bootloader, you can say goodbye to SD cards. But don’t get too excited just yet. Somewhat surprisingly, [Jeff] finds that booting from the NVMe drive is no faster than the SD card. That said, actually loading programs and other day-to-day tasks are far snappier once the system gets up and running. Perhaps the boot time can be improved with future tweaks, but honestly, the ~7 seconds it currently takes to start up the CM4 hardly seems excessive.

NVMe drives are exciting pieces of tech, and it’s good to see more single-board computers support it. While it might not help your CM4 boot any faster, it definitely offers a nice kick in performance across the board and expands what the system is capable of. Continue reading “NVMe Boot Finally Comes To The Pi Compute Module 4”

NVMe Blurs The Lines Between Memory And Storage

The history of storage devices is quite literally a race between the medium and the computing power as the bottleneck of preserving billions of ones and zeros stands in the way of computing nirvana. The most recent player is the Non-Volatile Memory Express (NVMe), something of a hybrid of what has come before.

The first generations of home computers used floppy disk and compact cassette-based storage, but gradually, larger and faster storage became important as personal computers grew in capabilities. By the 1990s hard drive-based storage had become commonplace, allowing many megabytes and ultimately gigabytes of data to be stored. This would drive up the need for a faster link between storage and the rest of the system, which up to that point had largely used the ATA interface in Programmed Input-Output (PIO) mode.

This led to the use of DMA-based transfers (UDMA interface, also called Ultra ATA and Parallel ATA), along with DMA-based SCSI interfaces over on the Apple and mostly server side of the computer fence. Ultimately Parallel ATA became Serial ATA (SATA) and Parallel SCSI became Serial Attached SCSI (SAS), with SATA being used primarily in laptops and desktop systems until the arrival of NVMe along with solid-state storage.

All of these interfaces were designed to keep up with the attached storage devices, yet NVMe is a bit of an odd duck considering the way it is integrated in the system. NVMe is also different for not being bound to a single interface or connector, which can be confusing. Who can keep M.2 and U.2 apart, let alone which protocol the interface speaks, be it SATA or NVMe?

Let’s take an in-depth look at the wonderful and wacky world of NVMe, shall we?

Continue reading “NVMe Blurs The Lines Between Memory And Storage”

Hackaday Links Column Banner

Hackaday Links: July 26, 2020

An Australian teen is in hot water after he allegedly exposed sensitive medical information concerning COVID-19 patients being treated in a local hospital. While the authorities in Western Australia were quick to paint the unidentified teen as a malicious, balaclava-wearing hacker spending his idle days cracking into secure systems, a narrative local media were all too willing to parrot, reading down past the breathless headlines reveals the truth: the teen set up an SDR to receive unencrypted POCSAG pager data from a hospital, and built a web page to display it all in real-time. We’ve covered the use of unsecured pager networks in the medical profession before; this is a well-known problem that should not exactly take any infosec pros by surprise. Apparently authorities just hoped that nobody would spend $20 on an SDR and an afternoon putting it all together rather than address the real problem, and when found out they shifted the blame onto the kid.

Speaking of RF hacking, even though the 2020 HOPE Conference is going virtual, they’ll still be holding the RF Hacking Village. It’s not clear from the schedule how exactly that will happen; perhaps like this year’s GNU Radio Conference CTF Challenge, they’ll be distributing audio files for participants to decode. If someone attends HOPE, which starts this weekend, we’d love to hear a report on how the RF Village — and the Lockpicking Village and all the other attractions — are organized. Here’s hoping it’s as cool as DEFCON Safe Mode’s cassette tape mystery.

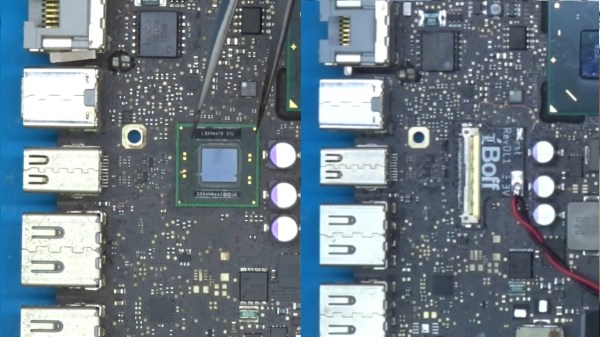
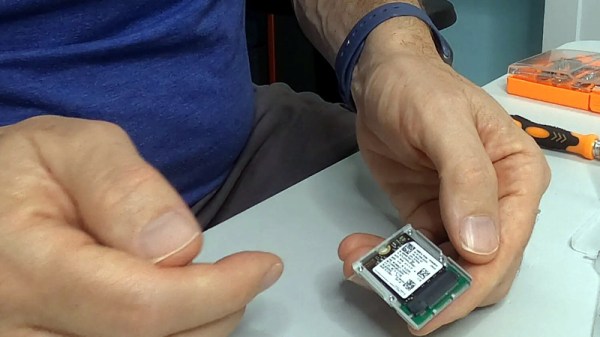
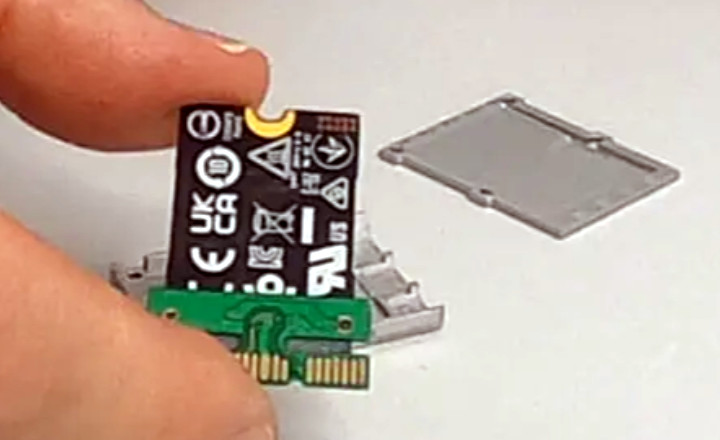
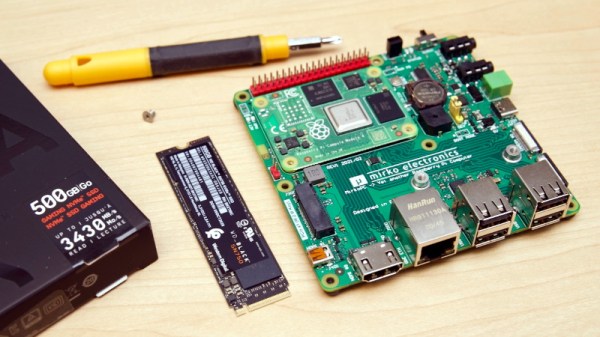
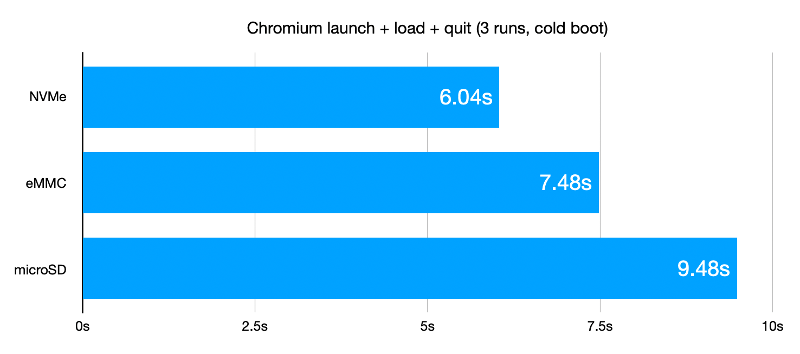
It looks like the Raspberry Pi family is about to get a big performance boost, with Eben Upton’s announcement that the upcoming Pi Compute Module 4 will hopefully support NVMe storage. The non-volatile memory express spec will allow speedy access to storage and make the many hacks Pi users use to increase access speed unnecessary. While the Compute Modules are targeted at embedded system designers, Upton also hinted that NVMe support might make it into the mainstream Pi line with a future Pi 4A.

Campfires on the sun? It sounds strange, but that’s what solar scientists are calling the bright spots revealed on our star’s surface by the newly commissioned ESA/NASA Solar Orbiter satellite. The orbiter recently returned its first images of the sun, which are extreme closeups of the roiling surface. They didn’t expect the first images, which are normally used to calibrate instruments and make sure everything is working, to reveal something new, but the (relatively) tiny bright spots are thought to be smaller versions of the larger solar flares we observe from Earth. There are some fascinating images coming back from the orbiter, and they’re well worth checking out.

And finally, although it’s an old article and has nothing to do with hacking, we stumbled upon Tim Urban’s look at the mathematics of human relations and found it fascinating enough to share. The gist is that everyone on the planet is related, and most of us are a lot more inbred than we would like to think, thanks to the exponential growth of everyone’s tree of ancestors. For example, you have 128 great-great-great-great-great-grandparents, who were probably alive in the early 1800s. That pool doubles in size with every generation you go back, until we eventually — sometime in the 1600s — have a pool of ancestors that exceeds the population of the planet at the time. This means that somewhere along the way, someone in your family tree was hanging out with someone else from a very nearby branch of the same tree. That union, likely between first or second cousins, produced the line that led to you. This is called pedigree collapse and it results in the pool of ancestors being greatly trimmed thanks to sharing grandparents. So the next time someone tells you they’re descended from 16th-century royalty, you can just tell them, “Oh yeah? Me too!” Probably.

IPhone NVMe Chip Reversed With Custom Breakout Boards

Ever so slowly, the main storage in our computers has been moving from spinning disks, to SSDs over SATA, to Flash drives connected to a PCI something or other. The latest technology is NVMe — Non-Volitile Memory Express — a horribly named technology that puts a memory controller right on the chip. Intel has a PCI-based NVMe drive out, Samsung recently released an M.2 NVMe drive, and the iPhone 6S and 6S Plus are built around this storage technology.

New chips demand a reverse engineering session, and that’s exactly what [Ramtin Amin] did (Internet Archive). He took a few of these chips out of an iPhone, created a board that will read them, and managed to analyze the firmware.

Any reverse engineering will begin with desoldering the chip. This is easy enough, with the real trick being getting it working again outside whatever system it was removed from. For this, [Ramtin] built his own PCIe card with a ZIF socket. This socket was custom-made, but the good news is you can buy one from ITEAD. Yes, it is expensive — that’s what you get with a custom-made ZIF socket.

With the chip extracted, a custom PCIe card, and a bit of work with the NVMe implementation for Linux, [Ramtin] had just about everything working. Eventually, he was able to dump the entire file system on the chip, allowing anyone to theoretically back up the data on their iPhone or MacBook Air. Of course, and especially for the iPhone, this data is encrypted. It’s not possible to clone an iPhone using this method, but it is a remarkably deep dive into the hardware that makes our storage tick.