Fixing A Broken CCFL Backlight

When you work at Tektronix and they make a difficult to refuse offer for their ‘scopes, you obviously grab it. Even if the only one you can afford is the not-so-awesome TDS1012. [Jason Milldrum] got his unit before cheaper, and better ‘scopes appeared on the market. It served him well for quite a long time. But keeping it switched on all the time took a toll, and eventually the CCFL backlight failed. Here’s how he replaced the CCFL back light with a strip of LED’s and revived the instrument.

Searching for an original replacement CCFL backlight didn’t turn up anything – it had been obsoleted long back. Even his back-channel contacts in Tektronix couldn’t help him nor could he find anything on eBay. That’s when he came across a video by [Shahriar] who hosts the popular The Signal Path blog. It showed how the CCFL can be replaced by a thin strip of SMD LEDs powered by a DC-DC converter. [Jason] ordered out the parts needed, and having worked at Tektronix, knew exactly how to tear down the ‘scope. Maybe he was a bit rusty, as he ended up breaking some (non-critical) plastic tabs while removing the old CCFL. Nothing which could not be fixed with some silicone sealant.

The original DC-DC converter supplied along with his LED strip needed a 12V input, which was not available on the TDS1012. Instead of trying to hack that converter to work off 6V, he opted to order out another suitable converter instead. [Jason]’s blog details all the steps needed, peppered with lots of pictures, on how to make the swap. The one important caveat to be aware of is the effect of the LED DC-DC converter on the oscilloscope. Noise from the converter is likely to cause some performance issues, but that could be fixed by using a more expensive module with RF and EMI filtering.

This is not an original hack for sure. Here’s a “Laptop backlight converted from CCFL to LED” from a few years back, and this one for “LCD: Replacing CCFL with LEDs” from even further back in time. Hopefully if you have an instrument with a similar issue, these ought to guide you on how to fix things.

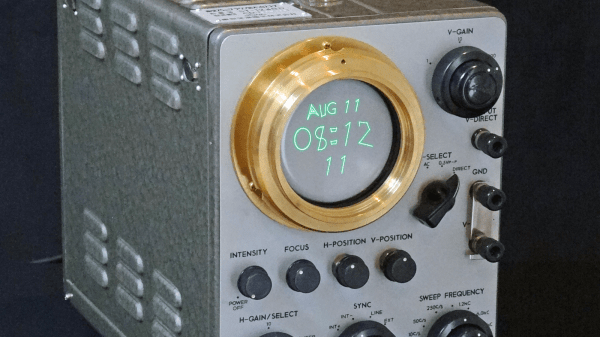
Amazing Oscilloscope Graphics

From what we can understand, [ompuco] has built a 2D audio output on top of the Unity game engine, enabling him to output X and Y values from his stereo soundcard straight to an oscilloscope in XY mode. His code simply scans through all the vertexes in the scene and outputs the right voltages into the left and right audio streams. He’s using this to create some pretty incredible animations. Check out the video “additives” below for an example. (See if you can figure out what’s being “added”.)

Continue reading “Amazing Oscilloscope Graphics”

DIY Active Sub-GHz Differential Scope Probe

Fancy measurement gear is often expensive to buy, but some bits of kit are entirely DIY’able if you’re willing to put a little work into the project. [Christer Weinigel] needed to get some measurements of a differential clock signal that was ticking away around 500 MHz. El-cheapo probes aren’t going to cut it here. They won’t have the bandwidth and most off-the-rack probes are single-ended, that is they’re referenced to ground. [Christer] needed the difference between two balanced signals, neither of which is grounded. In short, [Christer] needed a high-frequency active differential oscilloscope probe, and they’re not cheap. So he built one himself.

simulation-schematicThe circuit in the probe is really just an instrumentation amplifier design with a modified input stage and a 50 ohm output impedance. (See this article on in-amps if you need to brush up.) With higher frequencies like this, it’s going to be demanding on the op-amp, so [Christer] spent some time simulating the circuit to make sure it would work with his chosen part. Then he made up a bunch of PCB designs and had them made. Actual results matched fairly well with the simulation.

With some minor tweaking on the input damping resistors, he got a tool that’s dead flat up to 300 MHz, and totally usable up to 850 MHz. If you tried to buy one of these, it’d set you back the cost of a few hundred lattes, but this one can be made for the price of one or two if you get the PCBs done cheaply. Of course, the design files are available for your own use. Kudos [Christer].

Edit: By total coincidence, Bil Herd just posted a video intro to differential signals. Go check it out.

And thanks to [nebk] for the tip!

You Speak, Your Scope Obeys

We’ve been scratching our heads about the various voice-recognition solutions out there. What would you really want to use one for? Turning off the lights in your bedroom without getting up? Sure, it has some 2001: A Space Odyssey flare flair, but frankly we’ve already got a remote control for that. The best justification for voice control, in our mind, is controlling something while your hands or eyes are already busy.

[Patrick Sébastien Coulombe] clearly has both of his hands on his oscilloscope probes. That’s why he developed Speech2SCPI, a quick mash-up of voice recognition and an oscilloscope control protocol. It combines the Julius open-source speech recognizer project with the Standard Commands for Programmable Instruments (SCPI) syntax to make his scope obey his every command. You’ve got to watch the video below the break to believe how well it works. It even handles his French accent.

Continue reading “You Speak, Your Scope Obeys”

Raindrops On An Oscilloscope

Something very beautiful appeared in our feed this evening, something that has to be shared. [Duncan Malashock] has created an animation of raindrops creating ripples. Very pretty, you might say, but where’s the hack? The answer is, he’s done it as a piece of vector display work on an oscilloscope.

He’s using [Trammell Hudson’s] V.st Teensy-powered vector graphics board. We’ve featured this board before, but then it was playing vector games rather than today’s piece of artwork. The ‘scope in question is slightly unusual, a Leader LBO-51, a device optimized for vector work rather than the general purpose ‘scopes we might be used to. The artwork is written using Processing, and all the code is available in a GitHub repository.

So sit back and enjoy the artwork unfolding in the video. We look forward to more work featuring this hardware.

Continue reading “Raindrops On An Oscilloscope”

Pimp My Scope: Touchscreen Edition

Do you have a touch-screen oscilloscope? Neither do we. But how cool would that be to pan left and right or expand either axis just like you do on your cellphone screen? [Igor] did just that, and the results (in the video below the break) look fantastic.

We’ve covered [Igor]’s previous round of hacking on his Siglent scope, where he bricked it by flashing the wrong firmware, and then fixed it by Frankensteining the screen into the box that the firmware wanted. But once he’d gotten the scope-hacking bug, he couldn’t quit.

A brief overview: an Arduino Nano reads the touchscreen and sends the commands to the scope to act accordingly. [Igor] initially wanted to simply use the COM port on the back to control, but his previous mis-flashing of the firmware had rendered that moot. Instead, he went after the data bus that interfaces with the keyboard unit, reverse engineered its protocol, and spoofed keypresses with custom code in the AVR.

As a side effect of all this, [Igor] could also write a script that controls the scope from his computer, and he ended up re-housing it all in the nice wooden front panel that you see now. It’s more than a step up from the previous covered-in-electrical-tape look, and the new functionality is very very cool. Kudos.

Continue reading “Pimp My Scope: Touchscreen Edition”

Two Portable Oscilloscopes: Shootout

Last time I introduced you to two relatively inexpensive and somewhat portable scopes: the EM125, which is a cross between a digital voltmeter and an oscilloscope, and the Wave Rambler, which is a scope probe with a USB connector attached. Both of the devices cost about $100, and both have their plusses and minuses.

This time, though, I wanted actually to look at some real-world signals. To make that easy, I grabbed yet another scope-like thing I had handy: an Embedded Artists Labtool. This is an interesting board in its own right. It is an LPC-Link programmer attached to an LPC ARM board that has several high-speed A/D channels. However, I’m not using any of that capability for now. The board also has a cheap ARM processor (an LPC812) on it that serves only to generate test signals. The idea is you can use the Labtool in a classroom with no additional equipment.

The Labtool’s demo CPU generates a lot of different signals, but with only one channel on the test scopes, it didn’t make sense to look at, for example, I2C data. So I stuck with two different test signals: a varying pulse width modulation signals and a serial UART transmitter.

Continue reading “Two Portable Oscilloscopes: Shootout”