Fail Of The Week: Silicone Molding That Won’t Cure

fotw-uncured-silicone

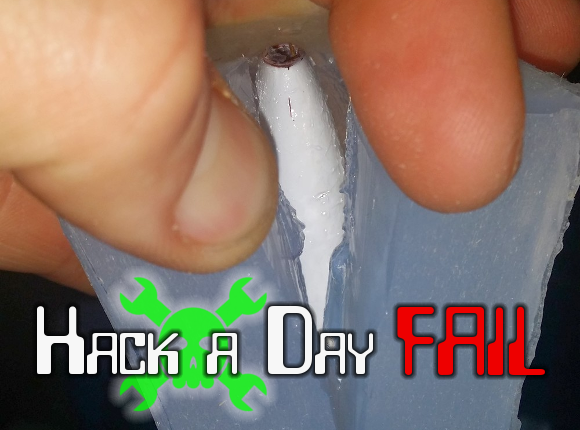
Mold making is a hacking skill we see pop up around here from time to time. But rarely do we hear about problems in the process, and they must happen. Here’s proof. This Fail of the Week focuses on [Michael’s] unfortunate experience with failed mold making due to uncured silicone around the master mold. It’s worse than it may sound, since he lost about a pound of silicone to the fail, and we’re unsure of whether he can even use the master again (how do you clean uncured silicone off of something?). Not to mention the time lost from setting up the pour and waiting 20 hours for it to cure.

Soon after the issue presented itself [Michael] started researching to see what had gone awry and noticed that the master should have been sealed with acrylic lacquer. This gave him the opportunity to test several different finishes before making a run at the full mold once again. He picked up a variety of the paint products he could find locally, used them to coat some scraps, and globbed on some silicone to see which worked the best.  He found a couple of different primers worked well, as did both glossy and matte acrylic coatings.

If you’ve never had a reason for mold making before, keep it in mind. You’d be surprised what kind of factory-production-type things can be pulled off by 3D printing a master, and casting a silicone mold of it.


2013-09-05-Hackaday-Fail-tips-tileFail of the Week is a Hackaday column which runs every Wednesday. Help keep the fun rolling by writing about your past failures and sending us a link to the story — or sending in links to fail write ups you find in your Internet travels.

Integrating A Power Bus Into A Quadcopter Frame

When working on flying vehicles weight is always a consideration. [Brendin] found a way to get rid of a wiring harness on his quadcopter, simplifying the assembly while lightening the load. He did it by incorporating the power bus into the frame of the vehicle.

He started with some copper clad board. Because the substrate is a structural component he didn’t want to use a CNC mill to do the etching as it also removes a bit more than just copper. After using the mill to cut out the shape and drill holes he coated the board with flat black paint. This acts as the etch resist, which he sent through a 50W laser engraver to remove the paint and expose the areas he wants to etch. After etching he removed the rest of the resist, and masked off his solder pads with small rectangles of electrical tape. This protects the solder pads from the truck bed liner paint he uses to insulate the copper. He says it works great and plans to use the technique on all future builds.

A Fifty-dollar Projection Screen You Can Be Proud Of

[Lou] wrote in to share the fifty-dollar projection screen he built in his home. We’ve seen several of these projects lately. Unlike the one used at a lake cabin, or the other that fills an awkward alcove, this version doesn’t use fabric for the screen. He actually painted it right on the wall.

The key to achieving a great end product is to make sure your wall is flat. [Lou’s] instructional video (embedded after the break) shows how to patch holes in the wall, and repair high spots. Before beginning the process he uses his projector’s grid feature to map out the portion of the wall that will be used as a viewing area (that’s the grid seen on the screen above). Once the area has been marked with masking tape and carefully repaired he paints it with bright white or silver paint. You might also consider a paint additive for better results. We’ve seen sand blasting beads used for this purpose.

A frame is added to the area to make it look like a proper screen. This is nothing more than molding covered in black fabric. [Lou] stretches the fabric around the molding, using duct tape to hold it in place until it can be stapled down.

Continue reading “A Fifty-dollar Projection Screen You Can Be Proud Of”

Electric Paint Brush Loads Itself With Paint

Meet [Jahangir Ahmad]. He’s a 19-year-old from India who recently won third place in a contest put on by the National Innovation Foundation. Here he’s posing with the electric paint brush which he developed after seeing some local painters struggling with brushes and buckets at the top of a ladder.

His system uses a 1 hp motor to pump paint from the bucket directly into the brush. Once it enters the handle a distributor splits the flow into four parts so that it reaches the bristles evenly. The pump of the paint is actuated by a controller which can be worn on the painter’s belt. When you get a little low on paint, just hit the button and you’ll get boost. Since the base of the bristles is meant to hold a small reservoir of paint, this has the potential to be better than dipping in a bucket.

[via Reddit via Home Harmonizing via Damn Geeky]

3D Whiteboard Without The Whiteboard

This one is so simple, and works so well, we’d call it a hoax if April 1st hadn’t already passed us by. But we’re confident that what [William Myers] and [Guo Jie Chin] came up with exists, and we want one of our own. The project is a method of drawing in 3 dimensions using ultrasonic sensors.

They call it 3D Paint, and that’s fitting since the software interface is much like the original MS Paint. It can show you the movements of the stylus in three axes, but it can also assemble an anaglyph — the kind of 3D that uses those red and blue filter glasses — so that the artists can see the 3D rendering as it is being drawn.

The hardware depends on a trio of sensors and a stylus that are all controlled by an ATmega644. That’s it for hardware (to be fair, there are a few trivial amplifier circuits too), making this an incredibly affordable setup. The real work, and the reason the input is so smooth and accurate, comes in the MATLAB code which does the trilateration. If you like to get elbow deep in the math the article linked above has plenty to interest you. If you’re more of a visual learner just skip down after the break for the demo video.

Continue reading “3D Whiteboard Without The Whiteboard”

Making Paint With Inorganic Chemistry

Back during the Renaissance, great artists like Leonardo, Michelangelo, and Raphael would create their own paints. Of course paint is very cheap and readily available, but that doesn’t mean you can’t make your own paint by playing with chemistry.

Last summer, [Sean] at the Philly hackerspace Hive76 did some experiments with ferrofluids. For these experiments [Sean] prepared a bunch of magnetite from rusty iron screws. In the process a lot of iron hydroxide was formed, which can produce wonderful colors. The red-brown eye in the title pic was made from some of the stuff floating on the top of [Sean]’s beaker.

[Sean] was really after something really black, so he turned his efforts towards hematite, a very dark pigment and is now working with other metals to produce some interesting colors. Already he’s made green and yellow pigments with two copper compounds. We’ll just have to hope he uses a fume hood when he starts taking apart mercury switches to make red.

Make Your Own Spray Paint Cans

[Mikeasaurus] found a way to build his own refillable spraypaint canister. The donor vessel used here is a plastic soda bottle. It’s a great choice since it is engineered to house a pressurized liquid and you can find them for free by intercepting a satisfied soda consumer before they reach the recycling bin.

He repurposed the spray nozzle from a commercial spray paint can. By first releasing all of the pressure from the empty paint he could then use a hack saw to remove the top disk. He used Sugru to attach it to the bottle cap which has a hole drilled in the center to accept the feed straw. We wonder if there wouldn’t be a better way to attach this from the inside of the cap for better resistance to bottle pressure?

The final piece of hardware is a Shrader valve from a bicycle inner tube. This lets you pump up the pressure in the bottle. You’ll need to dilute the paint you use to make it sprayer-friendly. [Mikeasaurus] diluted his six to one which might have been a bit too much judging from the drips seen in the video after the break.

Continue reading “Make Your Own Spray Paint Cans”