Imaging The Neighborhood With Solar Panels

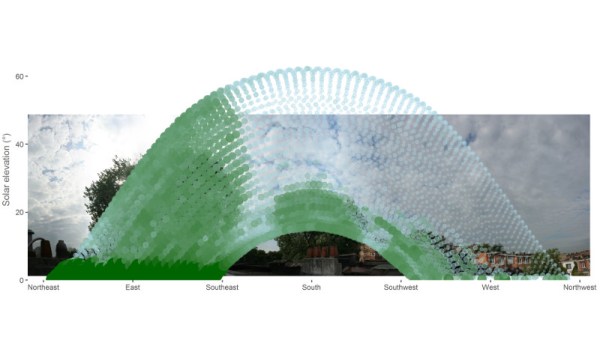
Like many people who have a solar power setup at home, [Jeroen Boeye] was curious to see just how much energy his panels were putting out. But unlike most people, it just so happens that he’s a data scientist with a deep passion for programming and a flair for visualizations. In his latest blog post, [Jeroen] details how his efforts to explain some anomalous data ended with the discovery that his solar array was effectively acting as an extremely low-resolution camera.

It all started when he noticed that in some months, the energy produced by his panels was not following the expected curve. Generally speaking, the energy output of stationary solar panels should follow a clear bell curve: increasing output until the sun is in the ideal position, and then decreasing output as the sun moves away. Naturally cloud cover can impact this, but cloud cover should come and go, not show up repeatedly in the data.
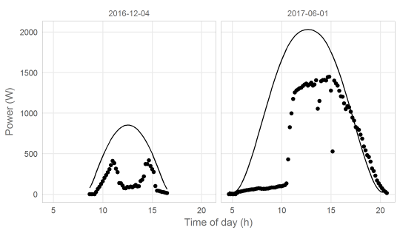
Expected versus actual power output.

[Jeroen] eventually came to realize that the dips in power generation were due to two large trees in his yard. This gave him the idea of seeing if he could turn his solar panels into a rudimentary camera. In theory, if he compared the actual versus expected output of his panels at any given time, the results could be used as “pixels” in an image.

He started by creating a model of the ideal energy output of his panels throughout the year, taking into account not only obvious variables such as the changing elevation of the sun, but also energy losses through atmospheric dispersion. This model was then compared with the actual power output of his solar panels, and periods of low efficiency were plotted as darker dots to represent an obstruction. Finally, the plotted data was placed over a panoramic image taken from the perspective of the solar panels. Sure enough, the periods of low panel efficiency lined up with the trees and buildings that are in view of the panels.

We’ve seen plenty of solar hacks, but this one has to be something of a first. Usually people are more worried about maximizing efficiency or tracking the sun with them.

Smart Phone Camera Turns Laser Cutter Into Hi-Res Scanner

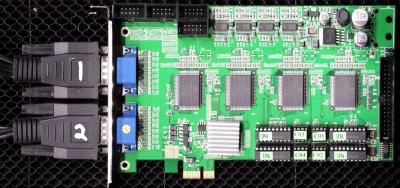
Getting decent macro photos always seems to be a chore. Some important detail always seems to be just outside of the depth of field, or you have to be zoomed in so close that you get great detail in one spot but miss the big picture. [Nate B] had such a problem while trying to document some PC boards, and he came up with a nifty hack that uses a laser cutter and a smart phone camera to do the job.

Pv150a-front
Click for detail.

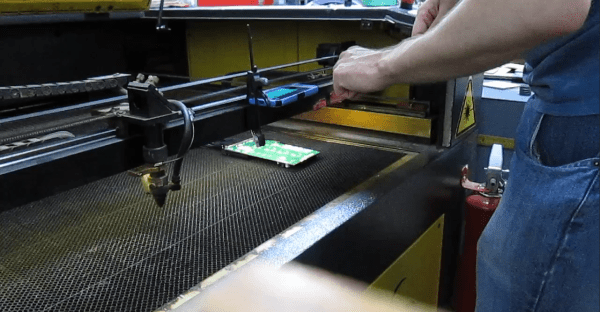
Having first tried scanning the boards with a flat-bed scanner but finding the depth of field unsatisfactory, [Nate B] then went on to his Samsung phone’s camera. Set to panorama mode, he manually scanned across the boards and let the camera stitch the images together. The results were better, but the wobblies got the better of him and the images showed it. He then decided to use a laser cutter — with the laser disabled, of course — as an impromptu X-Y stage to raster his camera above the boards. In a slightly cringe-worthy move, he gingerly clamped the phone to the cutter gantry, started the panorama, and let the cutter move over the board. This results in a rock-solid pictures of his boards with a lot of detail – perfect for his documentation. As a bonus, the honeycomb laser cutter bed makes for an interesting background texture.

Obviously anything could be used to raster a camera and achieve similar results, but full points here for maximizing available resources and not over-complicating a simple job. Yet another reason you can use to justify that laser-cutter purchase.

Continue reading “Smart Phone Camera Turns Laser Cutter Into Hi-Res Scanner”

Witness The Birth Of A 36-Lens Panoramic Camera

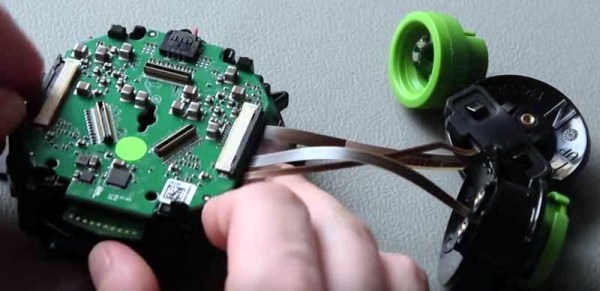
We are suckers for a teardown video here at Hackaday: few things are more fascinating than watching an expensive piece of equipment get torn apart. [Jonas Pfeil] is going the other way, though: he has just published an interesting video of one of his Panono panoramic ball cameras being built.

The Panono is a rather cool take on the panoramic camera: it is a ball-shaped device fitted with 36 individual cameras. When you press the button and throw the camera in the air, it waits until the highest point and then takes pictures from all of the cameras. Sound familiar? We first coverd [Jonas’] work way back in 2011.

Photos are stitched together into a single panoramic image with an equivalent resolution of up to 106 megapixels. The final image is panoramic in both horizontal and vertical directions: you can scroll up, down, left, right or in and out of the image. Since images are all taken at the same time you don’t have continuity problems associated with moving a single camera sensor. There are a number of sample images on their site but keep reading for a look at some of the updated hardware since our last look at this fascinating camera.

Continue reading “Witness The Birth Of A 36-Lens Panoramic Camera”

Panoramic And Spheric Tripod Rig

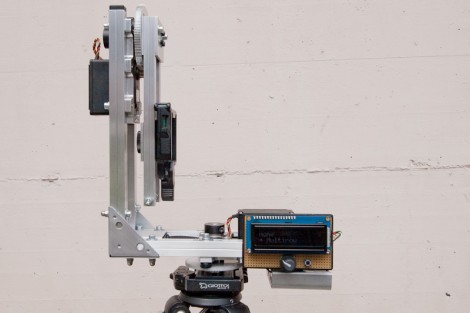
This simple yet precise build takes your camera for a spin in order to take spherical and multi-row panorama photographs. The rig mounts to a tripod, using two servo motors for motion, producing images that can be stitched together perfectly. An Arduino handles the hardware with an LCD interface for dialing in the settings.It’s not the cheapest way to get 360 degree shots but the example images are amazing.

[Thanks Juan]

Panoramic Scanner Camera

[Photodesaster] put together a panoramic digital camera using a scanner and some miscellaneous parts. You may remember seeing something like this about six months ago and originally about five years back. The parts used here work together nicely. The sensor board from the scanner is mounted to a metal plate along with a 50mm lens. The plate is mounted to a hard drive platter that is turned via belts connected to the original scanner motor. This way, when you tell the computer to scan an image, the lens is rotated to capture the panorama. The use of an 18V tool battery is a nice portability hack for the scanner circuitry.

Judging from this 71MP image he has achieved some remarkable results.

[Thanks Stefan]

Home Made Panoramic Camera

This one is from way back in 2002, but we didn’t see it till today. This is a hand built panoramic camera. The film is laid out across the back of the case, and when taking a picture, the lens assembly rotates to expose the film. It is a very nice looking design. The brass body is quite reminiscent of the recent one posted here. On the site, you’ll find not only the build log, but a full explanation of all the math behind the design. It is a very interesting read, even if you have no plans on building your own.

[via Make]

Build A Google-style Panorama Rig For $300

PhotoTrail

As part of a “disruptive technologies” course at the United States Military Academy, [Roy D. Ragsdale] produced a working prototype of a Google Street View-like system called PhotoTrail. Like its corporate-backed inspiration, the system captures georeferenced 360-degree panoramas that can be viewed interactively in a web browser…but at a hardware cost of only around $300. [Ragsdale’s] prototype is based entirely on consumer-grade off-the-shelf components and open source software, all tied together by the yin and yang of DIY: foam core board and a few Python scripts.

This article from IEEE Spectrum magazine provides some background on the selection of parts and construction of the system, including a hardware shopping list and a list of links to all of the open source packages used.

The PhotoTrail prototype is surprisingly small and lightweight. A vehicle isn’t even required; the camera array can be carried overhead by a single person, making it possible to capture remote locations. But [Roy] expects future revisions to be even smaller and less obtrusive, perhaps mounted to a headband. Mount Everest awaits!