Simple Hack Lets Smartphone Take Resin Printer Time-Lapses

With how cheap they’re getting, everyone seems to be jumping on the resin printer bandwagon. They may not be able to fully replace your trusty old FDM printer, but for certain jobs, they just can’t be beaten. Sadly though, creating those smooth time-lapse videos of your prints isn’t quite as easy to do as it is on their filament-based counterparts.

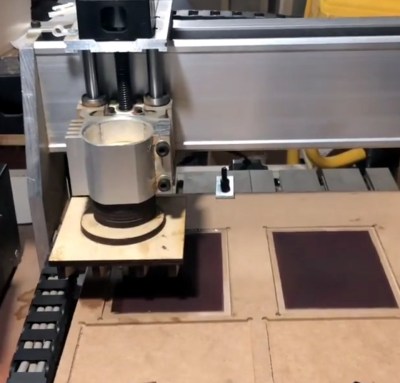
Not as easy, perhaps, but not impossible. [Fraens] found a way to make time-lapses on any resin printer, and in a wonderfully hacky way. First, you need to find a smartphone, which shouldn’t be too hard, given how often we all tend to upgrade. [Fraens] recommends replacing the standard camera app on the phone with Open Camera, to prevent it from closing during the long intervals with nothing happening. The camera is triggered by any readily available Bluetooth dongle, which is connected via a simple transistor circuit to an Arduino output. To trigger the shutter, a light-dependent resistor (LDR) is connected to one of the microcontroller’s inputs. The LDR is placed inside the bed of the resin printer — an Anycubic Photon in this case — where light from the UV panel used to cross-link the resin can fall on it. A simple bit of Arduino code triggers the Bluetooth dongle at the right moment, capturing a series of stills which are later stitched together using DaVinci Resolve.

The short video below shows the results, which look pretty good to us. There are other ways to do this, of course, but we find the simplicity of this method pleasing.

Continue reading “Simple Hack Lets Smartphone Take Resin Printer Time-Lapses”

Spuds Lend A Hand In The Darkroom

If film photography’s your thing, the chances are you may have developed a roll or two yourself, and if you’ve read around on the subject it’s likely you’ll have read about using coffee, beer, or vegetable extracts as developer. There’s a new one to us though, from [cm.kelsall], who has put the tater in the darkroom, by making a working developer with potatoes as the active ingredient.

The recipe follows a fairly standard one, with the plant extract joined by some washing soda and vitamin C. The spuds are liquidised and something of a watery smoothie produced, which is filtered and diluted for the final product. It’s evidently not the strongest of developers though, because at 20 Celcius it’s left for two hours to gain an acceptable result.

The chemistry behind these developers usually comes from naturally occurring phenols in the plant, with the effectiveness varying with their concentration. They’re supposed to be better for the environment than synthetic developers, but sadly those credentails are let down somewhat by there not being a similar green replacement for the fixer, and the matter of a load of silver ions in the resulting solutions. Still, it’s interesting to know that spuds could be used this way, and it’s something we might even try ourselves one day.

We’ve even had a look at the coffee process before.

Photography Goes Leaf Green

Something that haunts film photographers is the prospect of a film shortage. This won’t replace film in that event, but [Applied Science] demonstrates photography using leaves. That’s right, a plant can record an image on its leaves.

Anyone with a high-school level of education can tell you that the leaf is a solar energy harvester, with the green chlorophyll using CO2 scavenged from the air to make sugars in the presence of light. It stands to reason that this light sensitivity could be used to capture images, and indeed if you place a leaf in the dark for an extended period of time its chlorophyll fades away where there is no light. The technique described in the video below the break is different though, and much more sensitive than the days-long exposures required to strip chlorophyll. It relies on starch, which the leaf uses to store energy locally when it has an excess of light. Continue reading “Photography Goes Leaf Green”

Privacy And Photography, We Need To Talk

One of the fun aspects of our global community is that there are plenty of events at which we can meet up, hang out, and do cool stuff together. They may be in a Las Vegas convention center, a slightly muddy field in England, or a bar in Berlin, but those of us with a consuming interest in technology and making things have a habit of finding each other. Our events all have their own cultures which make each one slightly different from others.

The German events, for example, seem very political to my eyes — with earnest blue-haired young women seeking to make their mark as activists, while the British ones are a little more laid-back and full of middle-aged engineers seeking the bar. There are some cultural things which go beyond the superficial though and extend into the way the events are run, and it’s one of these which I think it’s time we had a chat about.

Our Community Takes Privacy Seriously

The relevant section about photography in the SHA2017 code of conduct.

The hacker community differs from the general public in many ways, one of which is that we tend to have a much greater understanding of privacy in the online age. The Average Joe will happily sign up to the latest social media craze without a care in the world, while we quickly identify it as a huge data slurp in which the end user is the product rather than the customer.

The work of privacy activists in our community in spotting privacy overreaches may pass unnoticed by outsiders, but over the years it’s scored some big wins that benefit everyone. Part of this interest in privacy appears at our events; it’s very much not done to take a photograph of someone at a hacker event without their consent. This will usually be clearly stated in the code of conduct, and thus if taking a picture featuring someone it’s imperative to make damn sure they’re OK with it. Continue reading “Privacy And Photography, We Need To Talk”

DIY Pan And Tilt Camera Mount

Pan and tilt mounts have a number of uses that can increase the functionality of various types of cameras. Security cameras can use them to adjust the field of view remotely, astronomers can use them as telescope mounts to accurately track celestial objects, and of course photographers and videographers can use them to add dynamic elements to shots. But getting the slow, smooth, and reliable movement isn’t as simple as slapping some servos on a tripod. So unless you want to break the bank for a commercial mount, this DIY pan and tilt mount might be the way to go.

The mount is built largely out of 3D printed parts and a few fairly common motors, belts, pulleys, and bearings. The movements are controlled using stepper motors, and there are two additional systems built in so that focus and zoom can be controlled through the system as well. The software controlling it all is open-source and  available on GitHub, and controls the mount remotely through a network connection. It’s also designed to use the readily-available ESP32 chip, making it overall fairly adaptable.

The system doesn’t slouch on features, either. It can move from one point to another with various programmable speeds, has a key sequencer for more complex movements, and can accommodate the needs of stop motion animators as well. It’s an impressive build that should be accessible to plenty of photographers with a 3D printer and the right parts, but photography and astronomy aren’t the only reasons to use a pan and tilt mount. Check out this one that brings some sunlight to a shaded room.

Old Film Camera Modified For Different Chemistry

While most photographers have moved on to digital cameras with their numerous benefits, there are a few artists out there still taking pictures with film. While film is among the more well-known analog photographic methods available, there are chemically simpler ways of taking pictures available for those willing to experiment a little bit. Cyanotype photography is one of these methods, and as [JGJMatt] shows, it only takes a few commonly available chemicals, some paper, and a slightly modified box camera to get started.

Cyanotype photography works by adding UV-reactive chemicals to paper and exposing the paper similarly to how film would be exposed. The photographs come out blue wherever the paper wasn’t exposed and white where it was. Before mixing up chemicals and taking photos, though, [JGJMatt] needed to restore an old Kodak Brownie camera, designed to use a now expensive type of film. Once the camera is cleaned up, only a few modifications are needed to adapt it to the cyanotype method, one of which involves placing a magnet on the shutter to keep it open for the longer exposure times needed for this type of photography. There is some development to do on these pictures, but it’s relatively simple to do in comparison to more traditional chemical film development.

For anyone looking for a different way of taking photographs, or even those looking for a method of taking analog pictures without the hassle of developing film or creating a darkroom, cyanotype offers a much easier entry point and plenty of artists creating images with this method don’t use a camera at all. There are plenty of other photographic chemistries to explore as well; one of our favorites uses platinum to create striking black-and-white photos.

Forgotten Chemical Photography

Much to the chagrin of Eastman Kodak, the world has moved on from chemical photography into the realm of digital, thanks to the ease of use and high quality of modern digital cameras. There are a few photographers here and there still using darkrooms and various chemical processes to develop film, and the most common of these use some type of chemistry based on silver to transfer images to paper. There are plenty of alternatives to silver, though, each with their unique style and benefits, like this rarely-used process that develops film using platinum.

This process, notable for its wide tonal range, delicate highlights, and rich blacks, produces only black and white photographs. But unlike its silver analog, it actually embeds the image into the paper itself rather than holding the image above the paper. This means that photographs developed in this manner are much more resilient and can last for much longer. There are some downsides to this method though, namely that it requires a large format camera and the negatives can’t be modified to produce various sized images in the same ways that other methods allow for. Still, the results of the method are striking for anyone who has seen one of these images in person.

As to why this method isn’t more common, [Matt Locke] describes a somewhat complicated history involving the use of platinum to create commercial fertilizers, which is an identical process to that of the creation of explosives, which were needed in great numbers at the same time this photographic method was gaining in popularity. While the amount of research and development that goes into creating weapons arguably generates some ancillary benefit for society, the effects of war can also serve to divert resources away from things like this.