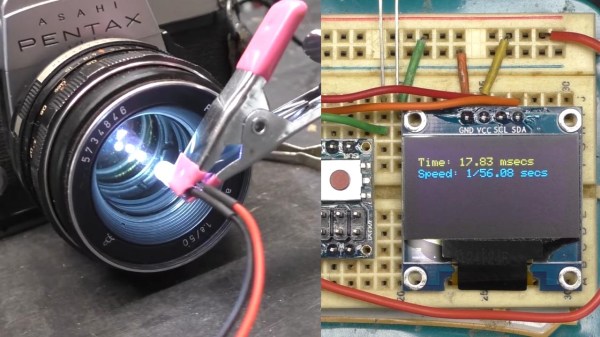
Taking (Good) Pictures Of PCBs

Snapping pictures is not technically difficult with modern technology, but taking good photographs is another matter. There are a number of things that a photographer needs to account for in order to get the best possible results, and if the subject matter isn’t particularly photogenic to start with it makes the task just a little more difficult. As anyone who’s posted something for sale online can attest, taking pictures of everyday objects can present its own challenges even to seasoned photographers. [Martijn Braam] has a few tricks up his sleeve for pictures like this in his efforts to photograph various circuit boards.

[Martijn] has been updating the images on Hackerboards, an online image reference for single-board computers and other PCBs, and he demands quality in his uploads. To get good pictures of the PCBs, he starts with ample lighting in the form of two wirelessly-controlled flashes in softboxes. He’s also using a high quality macro lens with low distortion, but the real work goes into making sure the image is sharp and the PCBs have well-defined edges. He’s using a Python script to take two pictures with his camera, and some automation in ImageMagic to composite the two images together.

While we’re not all taking pictures of PCBs, it’s a great way of demonstrating the ways that a workflow can be automated in surprising ways, not to mention the proper ways of lighting a photography subject. There are some other excellent ways of lighting subjects that we’ve seen, too, including using broken LCD monitors, or you can take some of these principles to your workspace with this arch lighting system.

Trinocular Lens Makes Digital Wigglegrams Easier To Take

Everyone likes a good animated GIF, except for some Hackaday commenters who apparently prefer to live a joyless existence. And we can’t think of a better way to celebrate moving pictures than with a 3D printed trinocular camera that makes digital Wigglegrams a snap to create.

What’s a Wigglegram, you say? We’ve seen them before, but the basic idea is to take three separate photographs through three different lenses at the same time, so that the parallax error from each lens results in three slightly different perspectives. Stringing the three frames together as a GIF later results in an interesting illusion of depth and motion. According to [scealux], the inspiration for building this camera came from photographer [Kirby Gladstein]’s work, which we have to admit is pretty cool.

While [Kirby] uses a special lenticular film camera for her images, [scealux] decided to start his build with a Sony a6300 mirrorless digital camera. A 3D printed lens body with a focusing mechanism holds three small lenses which were harvested from disposable 35 mm film cameras — are those still a thing? Each lens sits in front of a set of baffles to control the light and ensure each of the three images falls on a distinct part of the camera’s image sensor.

The resulting trio of images shows significant vignetting, but that only adds to the charm of the finished GIF, which is created in Photoshop. That’s a manual and somewhat tedious process, but [scealux] says he has some macros to speed things up. Grainy though they may be, we like these Wigglegrams; we don’t even hate the vertical format. What we’d really like to see, though, is to see everything done in-camera. We’ve seen a GIF camera before, and while automating the post-processing would be a challenge, it seems feasible.

Continue reading “Trinocular Lens Makes Digital Wigglegrams Easier To Take”

ERRF 22: Building A Library Of Filament Colors

If you’ve ever paged through the color samples at the hardware store trying to match a particular color, you know how hard it can be. Not only are there nearly limitless color variations, but each manufacturer has their own formulas and tints. Often times, the only way to get the exact color you need is to get it custom mixed.

Unfortunately, that’s not really an option when it comes to filament for your 3D printer. Will that roll of orange from Hatchbox actually match the orange from Overture? That’s where the Filament Librarian comes in. Created by [Joe Kaufeld], the project aims to catalog and photograph as many 3D printer filaments as possible so you can see exactly what you’re getting.

Now of course, if it was as easy as looking at pictures of filament swatches on your computer, you wouldn’t need this service to begin with. So what’s the trick? A custom automated camera rig, powered by the Raspberry Pi, is used to position, light, and photograph each filament sample in the library. So while [Joe] can’t promise your monitor is showing a perfect representation of each filament’s color, you can at least be sure they will all look correct in relation to each other. So for example, the site can help you figure out if the local Microcenter stocks anything that comes close to matching Prusament’s Galaxy Silver PLA.

[Joe] brought a collection of his samples along with his slick camera setup to the 2022 East Coast RepRap Festival so attendees could see first-hand how he adds a new filament to the database. With an easy-to-use touch-screen interface, it takes just seconds to get the camera ready for the next shot.

Now that he’s got the hardware and the procedure down, [Joe] is asking the community to help out by providing him with filament samples to process. It doesn’t take much: all he asks is you snip him off a couple meters of filament, write down what it is and who makes it on a pre-made form, and drop it in the mail. If you’re in the US, you can send it directly to his address in Indiana, and for those on the other side of the globe, he’s got a drop point in the Netherlands you can use.

We love a good passion project here at Hackaday, so here’s hoping that the Filament Librarian receives plenty of new filament samples from all over the planet to feed into that fancy camera setup of his.

Mommy, Where Do Ideas Come From?

We wrote up an astounding old use of technology – François Willème’s 3D scanning and modeling apparatus from 1861, over 150 years ago. What’s amazing about this technique is that it used absolutely cutting-edge technology for the time, photography, and the essence of a technique still used today in laser-line 3D scanners, or maybe even more closely related to the “bullet time” effect.

This got me thinking of how Willème could have possibly come up with the idea of taking 24 simultaneous photographs, tracing the outline in wood, and then re-assembling them radially into a 3D model. And all of this in photography’s very infancy.

But Willème was already a sculptor, and had probably seen how he could use photos to replace still models in the studio, at least to solidify proportions. And he was probably also familiar with making cameos, where the profile was often illuminated from behind and carved, often by tracing shadows. From these two, you could certainly imagine his procedure, but there’s still an admirable spark of genius at work.

Could you have had that spark without the existence of photography? Not really. Tracing shadows in the round is impractical unless you can fix them. The existence of photography enabled this idea, and countless others, to come into existence.

That’s what I think is neat about technology, and the sharing of new technological ideas. Oftentimes they are fantastic in and of themselves, like photography indubitably was. But just as often, the new idea is a seed for more new ideas that radiate outward like ripples in a pond.

An Automated Digitizer For 35mm Slides

Slides make for great old-timey fun, but it’s awesome to have a digital backup of your old photos, too. An automatic digitizer can make quick work of your collection, and this build from [rbwood53] will do just that.

The digitizizer is based on a Kodak carousel slide projector. It’s fitted with LED strips instead of the original light source, which are used to illuminate the slides themselves. An Arduino Nano is used to command a camera to take photos, via a hacked-up shutter release remote. The camera is set up with a zoom lens and relies on auto-focus to get crisp, clear images of the slides. The Arduino is also charged with telling the carousel system to advance to the next slide as required. It keeps count as the slides go by, so it stops when the entire carousel has been imaged.

Overall, it’s a straightforward build that automatically imaged over 40 boxes of slides for [rbwood53] without issue. If you’ve got a smaller collection to digitize, you might find this simple 3D-printed adapter to be useful, too!

In A Way, 3D Scanning Is Over A Century Old

In France during the mid-to-late 1800s, one could go into François Willème’s studio, sit for a photo session consisting of 24 cameras arranged in a circle around the subject, and in a matter of days obtain a photosculpture. A photosculpture was essentially a sculpture representing, with a high degree of exactitude, the photographed subject. The kicker was that it was both much faster and far cheaper than traditional sculpting, and the process was remarkably similar in principle to 3D scanning. Not bad for well over a century ago.

This article takes a look at François’ method for using the technology and materials of the time to create 3D reproductions of photographed subjects. The article draws a connection between photosculpture and 3D printing, but we think the commonality with 3D scanning is much clearer.

Continue reading “In A Way, 3D Scanning Is Over A Century Old”

Telephoto Lens Without The Fiscal Pain

If you’re in the market for a telephoto lens, the available range of optics for your camera is limited only by the size of your bank account. So when [Pixels and Prisms] promises a telephoto for $13 USD it has to be worth a second look, right? Where’s the catch.

The lens has a 3D printed shell containing the optics, with associated focusing and aperture, and has a mount designed for Canon cameras to give a result with 163 mm focal length and f/2.5 . When a Canon lens costs many times more it’s evident that there is some compromise involved, and it comes in the lens system being very simple and comprised of off-the-shelf surplus lenses without the great effort put in by the manufacturer to correct distortion. The result is nonetheless a very creditable lens even if not the first choice for a paparazzo in pursuit of an errant politician.

The real interest for us in this open source project comes in it being something of an experimenter’s test bed for lenses. There’s no need to use the combination shown and the design can be readily adapted for other lenses, so spinning one’s own lens system becomes a real possibility. Plus it’s achieved the all-too-easy task of engaging a Hackaday writer’s time browsing the stock of the Surplus Shed.

We’ve featured a lot of lens projects over the years, but they more often take an existing camera lens as a starting point.