Voidstar’s Vitals, Visualized For Video

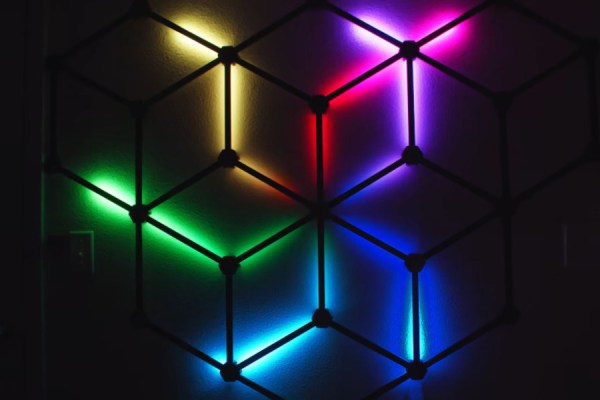
Great news for fans of [Voidstar Labs] — [Zack] is going to be streaming future builds live on YouTube instead of trying to keep up with a grueling and limiting schedule of releasing a build video every week. The only problem is that the wall behind him is totally blank and boring, which matters quite a bit for pretty much any streamer that doesn’t broadcast from a hot tub. Well, not anymore! Now the wall has twenty square feet of rainbow hexagons, because blinkenlights.

But these aren’t just any blinkenlights. They’re informative. They dance to the beat of [Zack]’s bio-metrics, or in other words, they are visualizing how sweaty and anxious [Zack] may be at a given moment, and turning that information into art.

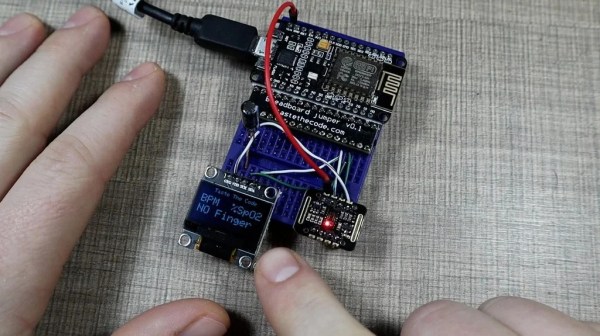
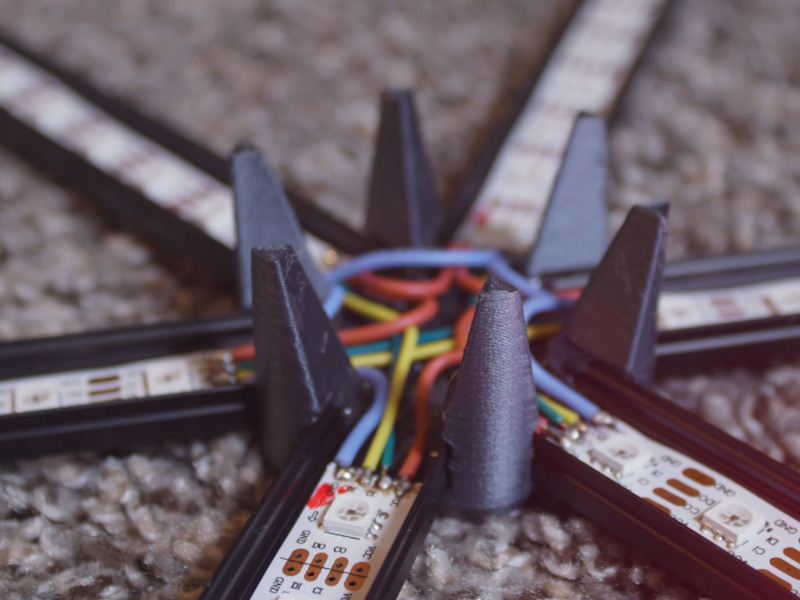
At the heart of this build is a brand-new bio-metric board called the EmotiBit which boasts sixteen sensors in a small package, including a pulse oximeter. The EmotiBit sends vitals to [Zack]’s PC, which is running an oscilloscope app to interpret the signals. Then they are sent over Open Sound Control to an ESP32, which runs the light show.

Like [Zack] says in the video after the break, this isn’t a terribly difficult project, but the construction takes time. [Zack] used aluminum extrusion meant for under-cabinet lighting and ran forty strips of fourteen DotStar LEDs each. The nodes are printed in carbon-fiber PLA and hold the lights away from the wall so it looks cooler. Worried about the current draw? It’s okay, because the brightness and number of lit LEDs at any one time is limited. Add in the fact that none of the LEDs are ever turned off — they fade by one percent each loop — and you have some really cool animations. Check them out after the break.

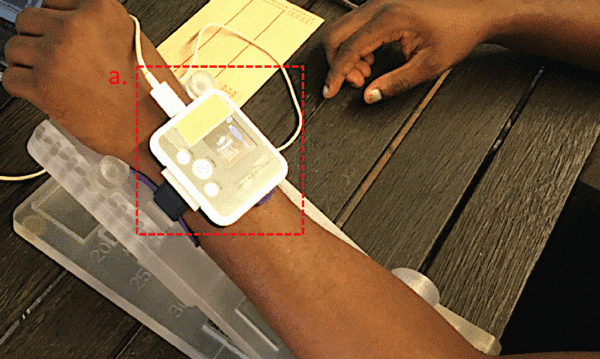
Want some localized blinkenlights to wear about town? Wear your heart on your sleeve and show them how hard you’re crushing the elliptical at the gym.

Continue reading “Voidstar’s Vitals, Visualized For Video”

An LED Heartbeat Display You Can Wear On Your Sleeve

There are a few different ways to take a person’s pulse, with varying utility depending on the categories said patient fits in to. [Nitin Nair]’s method doesn’t really have a medical application, but it’s certainly a neat example of what you can do with modern sensors. 

The build combines an EmotiBit sensor platform with an Adafruit Feather and accompanying Charlieplexed LED module. The EmotiBit packs a PPG, or photoplethysmogram sensor, otherwise known as a pulse oximeter, which uses optical methods to detect changes in blood volume beneath the skin. From this data, a pulse rate can be derived, and the LEDs flashed with a heart graphic in concert with the rhythm of the wearer’s heart. The benefit of the PPG in the EmotiBit is that it can be worn on the wearer’s arm, or other location with suitable vascularization. This allows the wearer to place the sensor on the arm, and thus wear their heart on their sleeve.

It’s a cool concept, and we’d love to see it neatly packaged with a smoothly animated fade as a sports accessory. It’d be an easy way to signal how fast your heart rate recovers on a run with friends – the device could brag about your fitness for you. Alternatively, if pulse oximetry isn’t enough for you, go ahead and build an ECG instead!

A Pulse Oximeter From Very Little

Against the backdrop of a global respiratory virus pandemic, it’s likely that more than a few readers have been thinking about pulse oximeters. You may even have looked at one closely and seen that it’s little more than a device which shines light through your finger, and wondered how they work. It’s something [Giulio Pons] has done, and to show us how it’s done he’s created a working pulse oximeter of his own.

He started with an infra-red heartbeat sensor module, which is revealed as nothing more than an IR LED and a photodiode. Sampling the output from the photodiode allows measurement of heartbeat, but gives not clue as to oxygen saturation. The interesting part comes via the property of red light in that it’s transmission through flesh varies with oxygen saturation, so adding a red LED and alternately measuring from the IR and red illuminations allows a saturation figure to be derived.

Commercial pulse oximeters are pretty cheap, so many of us will no doubt simply order one from the usual sources and call it good. But it’s always interesting to know how any device works, and this project reveals something simpler than we might have expected. If pulse oximeters interest you, compare it with this one we featured a few years ago.

Hackaday Prize Entry: Open Source Patient Monitor

Vital sign monitors are usually found in developed countries; they just cost too much for less affluent communities to afford. The HealthyPi project aims to change that by developing an inexpensive but accurate monitor using a Raspberry Pi, a custom hat studded with sensors, and a touch screen. The resulting monitor could be used by medical professionals as well as students and private researchers.

[Ashwin K Whitchurch] and his team created HealthyPi, a Raspberry Pi hat that includes an AFE4490 chip serving as the pulse oximeter front end, an analog to digital converter that interprets the ECG and respiration data, and a MAX30205 body temperature sensor. The hat has its own microcontroller, a ATSAMD21 Cortex M0+ that can also be loaded with the Arduino Zero bootloader.

This project is capable of monitoring a patient’s pulse, respiration, body temperature, and all the other vital signs made measure d by other ‘medical-grade’ vital sign monitors at a fraction of the cost. It’s a democratizing technology, and [Ashwin] already has some working hardware available on Crowd Supply.

Learn more about HealthyPi at the project page or download the code from GitHub.

Continue reading “Hackaday Prize Entry: Open Source Patient Monitor”

Pulse Oximeter Is A Lot Of Work

These days we are a little spoiled. There are many sensors you can grab, hook up to your favorite microcontroller, load up some simple library code, and you are in business. When [Raivis] got a MAX30100 pulse oximeter breakout board, he thought it would go like that. It didn’t. He found it takes a lot of processing to get useful results out of the device. Lucky for us he wrote it all down with Arduino code to match.

A pulse oximeter measures both your pulse and the oxygen saturation in your blood. You’ve probably had one of these on your finger or earlobe at the doctor’s office or a hospital. Traditionally, they consist of a red LED and an IR LED. A detector measures how much of each light makes it through and the ratio of those two quantities relates to the amount of oxygen in your blood. We can’t imagine how [Karl Matthes] came up with using red and green light back in 1935, and how [Takuo Aoyagi] (who, along with [Michio Kishi]) figured out the IR and red light part.

The MAX30100 manages to alternate the two LEDs, regulate their brightness, filter line noise out of the readings, and some other tasks. It stores the data in a buffer. The trick is: how do you interpret that buffer? Continue reading “Pulse Oximeter Is A Lot Of Work”

Hackaday Prize Entry: Open-source Pulse Oximetry

Chances are pretty good you’ve had a glowing probe clipped to your fingertip or earlobe in some clinic or doctor’s office. If you have, then you’re familiar with pulse oximetry, a cheap and non-invasive test that’s intended to measure how much oxygen your blood is carrying, with the bonus of an accurate count of your pulse rate. You can run down to the local drug store or big box and get a fingertip pulse oximeter for about $25USD, but if you want to learn more about photoplethysmography (PPG), [Rajendra Bhatt]’s open-source pulse oximeter might be a better choice.

PPG is based on the fact that oxygenated and deoxygenated hemoglobin have different optical characteristics. A simple probe with an LED floods your fingertip with IR light, and a photodiode reads the amount of light reflected by the hemoglobin. [Rajendra]’s Easy Pulse Plugin receives and amplifies the signal from the probe and sends it to a header, suitable for Arduino consumption. What you do with the signal from there is up to you – light an LED in time with your heartbeat, plot oxygen saturation as a function of time, or drive a display to show the current pulse and saturation.

We’ve seen some pretty slick DIY pulse oximeters before, and some with a decidedly home-brew feel, but this seems like a good balance between sophisticated design and open source hackability. And don’t forget that IR LEDs can be used for other non-invasive diagnostics too.

The 2015 Hackaday Prize is sponsored by:

HeartBeat Boombox Creates Bio Beats

sophi1

If you happened to be wandering the hall of science during MakerFaire NY, you may have noticed a woman walking around with a rather odd boombox strapped around her neck. That was [Sophi Kravitz] with her HeartBeat Boombox. Thankfully [Sophi] lives within driving distance of Makerfaire, and didn’t attempt to get through airport security with her hardware. She started with three medical grade pulse oximeters. These oximeters output a “beep” for every beat of your heart. [Sophi] rolled her own AVR board running Arduino firmware to capture pulses on their way to the oximeter audio transducer. The AVR uses a sound board to convert the pulses into various percussion sounds. The pulse indicators also activate one of three LED strips.

[Sophi’s] biggest frustrations with the hack were the JST connectors on the LIPO batteries powering the entire system. She found that they fell apart rather easily. We’ve used JST connectors in the past with no problem, so we’re guessing she ended up with one of the many knock off connectors out there. [Sophi] tied the entire system together with a custom milled acrylic plate mounted to the front of the boombox.

The final result was very slick. With three people connected to the finger inputs of the pulse oximeters, some complex beats could be formed. We thought we were listening to dubstep when she first walked by. One feature we would like to see implemented would be the ability to record and play back some of the beats created by the boombox.