Waveshare’s Pi CM3 Laptop Arrives A Bit Too Late

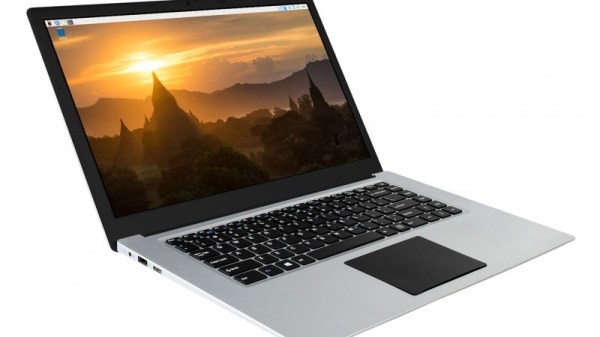
The good news it that you can now buy a pretty decent laptop that’s based around the Raspberry Pi Compute Module (CM). The bad news is that it was conceived before anyone knew the interface was going to change for the new CM4, so it doesn’t have any of the features that would make it really interesting such as support for PCI-Express. Oh, and it costs $300.

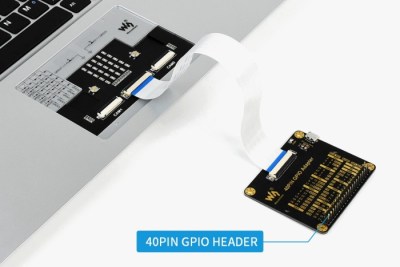
Waveshare, the company that most of us know best as a purveyor of e-paper displays, also made some rather interesting design choices on their laptop. See that black pad under the keyboard? No, it’s not a trackpad. It’s just a decorative cover that you remove to access an LED matrix and GPIO connectors. Make no mistake, a laptop that features a GPIO breakout right on the front is definitely our jam. But the decision to install it in place of the trackpad, and then cover it with something that looks exactly like a trackpad, is honestly just bizarre. It might not be pretty, but the Pi 400 seemed to have solved this problem well enough without any confusion.

On the other hand, there seems to be a lot to like about this product. For one, it’s a very sleek machine that doesn’t have the boxy and somewhat juvenile look that seems so common in other commercial Pi laptops. We also like that Waveshare included a proper Ethernet jack, something that’s becoming increasingly rare even on “real” laptops. As [ETA PRIME] points out in the video after the break, the machine also has a crisp IPS display and a surprisingly responsive keyboard. Though the fact that it still has a “Windows” key borders on being offensive considering how much it costs.

But really, the biggest issue with this laptop is when it finally hit the market. If Waveshare had rushed this out when the CM3 was first introduced, it probably would have been a more impressive technical achievement. On the other hand, had they waited a bit longer they would have been able to design it around the far more capable CM4. As it stands, the product is stuck awkwardly in the middle.

Continue reading “Waveshare’s Pi CM3 Laptop Arrives A Bit Too Late”

Adventures In Overclocking: Which Raspberry Pi 4 Flavor Is Fastest?

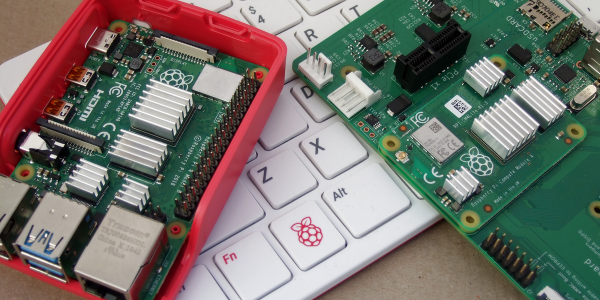
There are three different versions of the Raspberry Pi 4 out on the market right now: the “normal” Pi 4 Model B, the Compute Module 4, and the just-released Raspberry Pi 400 computer-in-a-keyboard. They’re all riffing on the same tune, but there are enough differences among them that you might be richer for the choice.

The Pi 4B is easiest to integrate into projects, the CM4 is easiest to break out all the system’s features if you’re designing your own PCB, and the Pi 400 is seemingly aimed at the consumer market, but it has a dark secret: it’s an overclocking monster capable of running full-out at 2.15 GHz indefinitely in its stock configuration.

In retrospect, there were hints dropped everywhere. The system-on-a-chip that runs the show on the Model B is a Broadcom 2711ZPKFSB06B0T, while the SOC on the CM4 and Pi 400 is a 2711ZPKFSB06C0T. If you squint just right, you can make out the revision change from “B” to “C”. And in the CM4 datasheet, there’s a throwaway sentence about it running more efficiently than the Model B. And when I looked inside the Pi 400, there was this giant aluminum heat spreader attached to the SOC, presumably to keep it from overheating within the tight keyboard case. But there was one more clue: the Pi 400 comes clocked by default at 1.8 GHz, instead of 1.5 GHz for the other two, which are sold without a heat-sink.

Can the CM4 keep up with the Pi 400 with a little added aluminum? Will the newer siblings leave the Pi 4 Model B in the dust? Time to play a little overclocking!

Continue reading “Adventures In Overclocking: Which Raspberry Pi 4 Flavor Is Fastest?”

Getting Over 4Gbps Out Of A Compute Module 4

For the average home gamer, good old fashioned Ethernet at 100 Mbit/s is only just starting to become a bottleneck as things like 4K video streaming begin to demand more bandwidth. As always, though, there are those who wish to push the limits of what is possible. [Jeff Geerling] is one such operator, who set out to maximise the network throughput on the Raspberry Pi Compute Module 4. 

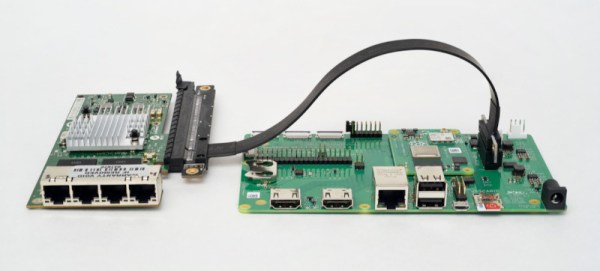
The build began by taking advantage of the PCI-Express 2.0 single lane interface on the new Raspberry Pi Compute Module. Hooked up to an Intel four-port Gigabit Ethernet card, and in combination with the onboard Gigabit-E port, [Jeff] was able to get 3.0 Gbit/s out of the setup without too much fuss. However, he wanted more, and set about finding where he was being held back. It turned out that ksoftirqd, a daemon that handles network packets, can only run on one core on the Raspberry Pi 4, and it was getting maxed out at this data rate. Overclocking the CPU helped, getting the max rate up to 3.4 Gbit/s.

Further analysis showed that the onboard interface was only contributing 200 Mbit/s, with the Intel card maxing out at 3.2 Gbit/s. In the case of the latter, this was due to the limits of the PCI-E interface. In the case of the former, however, [Jeff] knew that more was available. The trick turned out to be recompiling the Linux kernel to allow the internal interface to be able to set to use a higher Maximum Transmission Unit. This allows each network transmission to carry more data without extra CPU load. With the internal interface and the external card all set to an MTU of 9000, the Pi was able to spit out a scorching 4.15 Gbit/second. Details of the hack are available on Github for the curious.

It’s a hack that doesn’t offer a lot to the average user, though [Jeff] states he has some interesting applications in mind. He’s also contemplating what can be achieved with a 10 Gbit card, which we can’t wait to see. If you want to learn more about the Compute Module’s features, including a couple of tips for laying out yor own board, check out our review. Video after the break.

Continue reading “Getting Over 4Gbps Out Of A Compute Module 4”

Hackaday Prize China Finalists Announced

In the time since the Hackaday Prize was first run it has nurtured an astonishing array of projects from around the world, and brought to the fore some truly exceptional winners that have demonstrated world-changing possibilities. This year it has been extended to a new frontier with the launch of the Hackaday Prize China (Chinese language, here’s a Google Translate link), allowing engineers, makers, and inventors from that country to join the fun. We’re pleased to announce the finalists, from which a winner will be announced in Shenzhen, China on November 23rd. If you’re in Shenzen area, you’re invited to attend the award ceremony!

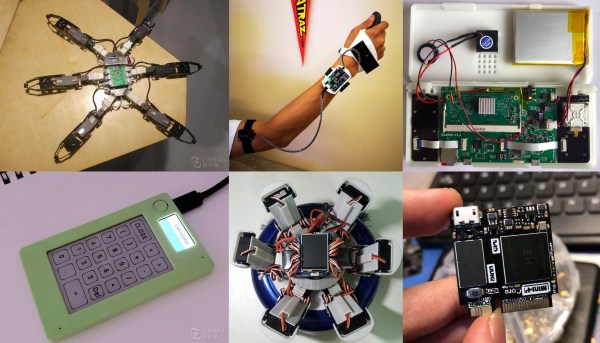
All six of these final project entries have been translated into English to help share information about projects across the language barrier. On the left sidebar of each project page you can find a link back to the original Chinese language project entry. Each presents a fascinating look into what people in our global community can produce when they live at the source of the component supply chain. Among them are a healthy cross-section of projects which we’ll visit in no particular order. Let’s dig in and see what these are all about!

Continue reading “Hackaday Prize China Finalists Announced”

Balena Introduces DIN-Capable Pi Compute Module Carrier Board

Although you don’t hear about it very much over the clamor of emulating old video game systems, one of the biggest uses of the Raspberry Pi outside its educational roots is in industry. The Pi makes for a great industrial control system, and if you mount it to a DIN rail, you’re golden. This is the biggest reason the Pi foundation is still making the Pi 1, and it’s one of the big motivations behind the Pi Compute Module.

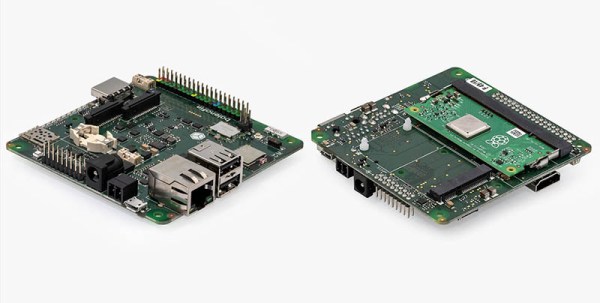
Now that the Pi Compute Module 3 and 3+ have been out for a while, it’s only fitting that these modules get a great carrier board. The balenaFin 1.1 is out now, and it’s the perfect carrier board for the Pi compute module.

Balena (formerly resin.io) is a software stack designed for managing fleets of Linux devices, and there’s no better example of that than a factory filled with Pis fiddling relays and such. Balena has found its way from tracking sea turtles to monitoring oil rigs, and with that comes a need for a developer kit. The Pi compute module is supposed to have a very long support life, so the obvious solution is to make a great carrier board for this fantastic module.

Features of note include two camera connectors, PoE (with a Hat), USB headers, an RGB indicator LED, an industrial temperature range, and a case designed for a DIN rail. So far, so goo, but there’s also a microcontroller with a Bluetooth radio that can operate without the compute module being turned on, and an RTC for time-based operation. There’s a mini PCI express slot designed for cellular modems, and a SIM card slot just for fun.

While most Pi builds we see could make use of these features, they are assuredly one-off builds. You’re not going to be deploying hundreds of Pis if you need to 3D print an enclosure for each one. That’s when actual engineers need to get involved, and if you’re doing that, you might as well go with the Raspberry Pi compute module. If you’re looking for a fleet of Pis, you could do worse than to look at this very nice compute module carrier board.

So You Bought A Raspberry Pi Compute Module. What Now?

The Raspberry Pi Compute Module hasn’t seen as much attention as it should have in our community, probably because the equivalents from the familiar consumer range can be so much cheaper. When a Raspberry Pi Zero is a similar size to a Compute Module and costs so much less, we can’t blame you for asking what would be the point of using the industrial version.

It’s interesting then to see an Instructables piece from [Manolis Agkopian] in which he takes the reader through the process of creating their own Compute Module project. Following hot on the heels of the recent launch of the latest in the range it’s come to us at an appropriate moment to take a fresh look at the fruity computer’s more obscure incarnation. He starts with a description of the Compute Module and its official development board, before taking us through setting up a module and putting an OS on it. Finally he shows us his board design, which he offers us as a jumping-off point for our own projects.

So given that it’s piqued your interest, why might you want to design a Compute Module project? The answer’s simple enough: the consumer boards only provide the subset of features the Pi foundation people deemed appropriate for their mission. A Compute Module project is the equivalent of designing a Raspberry Pi that does it your way, tailored exactly for your needs. If you want an example, look no further than this stereoscopic camera.

Via Hacker News.

Raspberry Pi’s Latest Upgrade: The Compute Module 3+

We’ve become so used to the Raspberry Pi line of boards that have appeared in ever-increasing power capabilities since that leap-year morning in 2012 when the inexpensive and now ubiquitous single board computer was announced and oversold its initial production run. The consumer boards have amply fulfilled their mission in providing kids with a pocket-money computer, and even though they are not the most powerful in the class of small Linux boards they remain the one to beat.

The other side of the Pi coin comes with the industrial siblings of the familiar boards, the Compute Module. This is a version of the Pi meant to be built into other products, utilizing a SODIMM connector as the hardware interface. Today brings news of a fresh addition to that range: the Compute Module 3+.

As you might expect from the nomenclature this brings the Broadcom BCM2837B0 processor from the Raspberry Pi 3B+ to the barebones SODIMM-style Pi, but unexpectedly they have also made it available with a range of different size eMMC devices installed. In place of the 4 GB capacity of previous offerings are 8, 16, and 32 GB devices, with an intriguing new “lite” variant that has no onboard storage at all.

Perhaps the saddest thing from a Hackaday reader’s perspective is that as the Pi blog post notes due to commercial sensitivities they have little idea what products many of the Compute Modules they sell end up in — a mystery we’d really like to solve. No doubt there are some fascinating applications just waiting do be discovered by hardware hackers in a decade’s time as units enter the surplus market, but for now we’ll have to be content with community offerings. This stereoscopic camera is a recent one, or perhaps one of several handheld game consoles.