It’s been a while since we’ve seen [Sprite_tm] pull a project from thin air, and we haven’t seen him do anything with a Raspberry Pi yet. All things must pass, and finally [Sprite] has unleashed his tiny, pocket-sized MAME machine to the world.
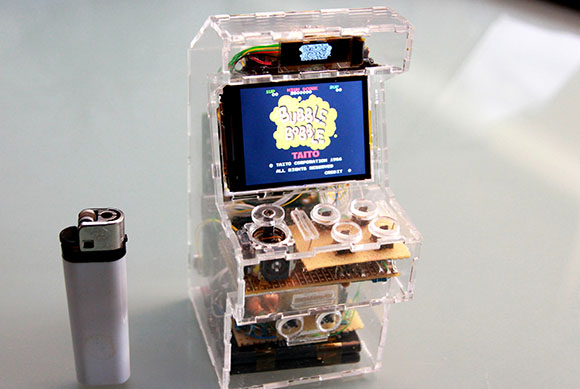
The build uses a Raspi for all the Linux-ey and MAME goodness, but [Sprite_tm] didn’t want to fiddle around with the HDMI or analog video output. Instead, he chose to use an SPI-controlled TFT display that is only 2.4 inches across. This isn’t a new hack for [Sprite] – he figured out how to connect this display over GPIO pins with a Carambola earlier this year.
To make his cabinet portable, [Sprite] opted for using old cell phone batteries with a cleverly designed charging circuit. When the power supply is connected to +5V, the batteries charge. When this power is removed, an ATtiny85 provides 5V of power to the Raspi and display.
No arcade cabinet is complete without a marquee of some sort, so [Sprite] used an extremely tiny 128×32 white OLED to display the logo of the game currently being played. Everything in the Raspi is set up to be completely seamless when switching between games, automatically configuring the controls and marquee for the currently selected game.
You can check out [Sprite]’s mini MAME booting straight into Bubble Bobble after the break along with some gameplay footage and finally switching it over to Nemesis. A very awesome build from an exceedingly awesome maker.
Continue reading “Tiny MAME Cabinet Built From Raspberry Pi”


