The ray tracer racer

Whipping Together A Little Ray Tracer Racer

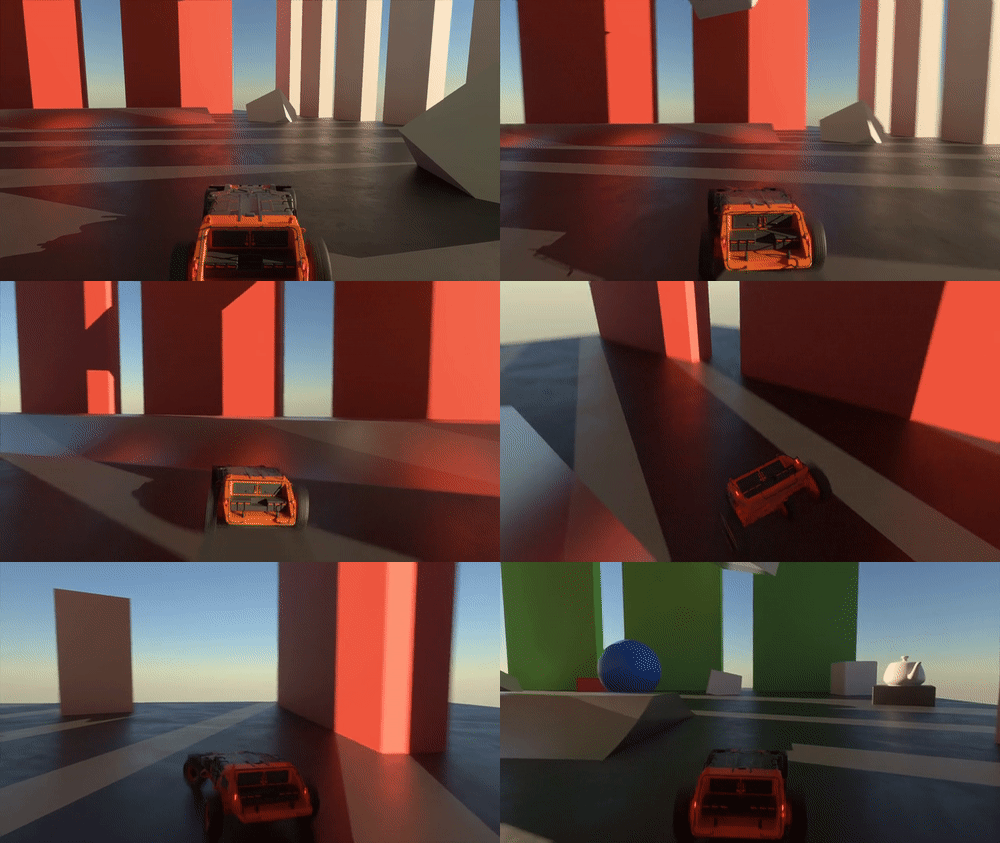
When you hear raytracing, you might think of complex dark algorithms that to stare too long at their source code invites the beginning of madness. And you’re technically not far off from the truth, but [h3r2tic] put a small open-source ray tracing game demo up on GitHub. The actual rust code powering the game is relatively short (just four files), with the longest file being the physics file. But, of course, there is a small mountain of code under this sample in the form of libraries.

Kajiya, physx-rs, and dolly are the three libraries that make this little demo possible. Kajiya, in particular, is what makes raytracing possible as it uses the newer RTX features (so only more recent Nvidia and AMD cards are supported) and Vulkan bindings. But, of course, it isn’t wholly ray-traced as we are still several years out from proper real-time raytracing. Nevertheless, the blend between raytracing and traditional rasterization looks incredible. The most important thing about this simple tiny sample isn’t the game itself but what it stands for. It shows how easy it is to create a sample like this. Even just five years, creating a demo like this required massive effort and expertise.

Visually, it is stunning to look at. While the reflections are most apparent, the takeaway from this is the ease that real-time global illumination brings. A quick look through the code shows that there are very few lights in the scene, despite looking well lit with soft shadows. Traditional video games spend a significant amount of development time lighting a scene, placing additional lights, and tweaking them to make up for all the shortcuts that lighting has to take in a rasterized environment. As more and more games are built with raytracing in mind rather than tacked on at the end, we can ditch the small crumbling mountain of hacks that we are forced to use in games today and just rely on the rays to accurately light a scene.

If using a library for your raytracing seems too easy, perhaps you’d like to take on the challenge of raytracing in excel. Video after the break.

Continue reading “Whipping Together A Little Ray Tracer Racer”

Remoticon Video: KiCad To Blender PCB Renders

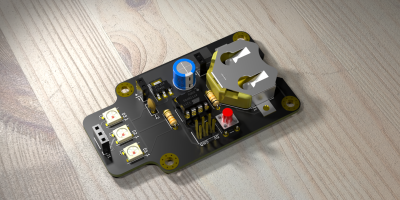
We seem to want our PCB design software to do everything these days, and it almost delivers. You can not only lay it all out, check electrical and design rules, and even spit out a bill of materials, but many PCB tools produce 3D models that are good enough to check parts clearance or are useful in designing enclosures. But when it comes to producing photorealistic output, whether for advertising or just for eye-candy, you might want to turn to 3D design tools.

In this workshop, Anool Mahidharia takes the output of KiCad’s VRML export, gets it rendering in Blender, and then starts tweaking the result until you’re almost not sure if it’s the real thing or a 3D model. He starts off with a board in KiCad, included in the project’s GitHub repo, and you can follow along through the basic import, or go all the way to copying the graphics off the top of an ATtiny85 and making sure that the insides of the through-plated holes match the tops.

If you don’t know Blender, maybe you don’t know how comprehensive a 3D modelling and animation tool it is. And with the incredible power comes a notoriously steep learning curve up a high mountain. Anool doesn’t even try to turn you into a Blender expert, but focuses on the tweaks and tricks that you’ll need to make good looking PCB renders. You’ll find general purpose Blender tutorials everywhere on the net, but if you want something PCB-specific, you’ve come to the right place.

Continue reading “Remoticon Video: KiCad To Blender PCB Renders”

Racing The Beam On A Thin Client, In FPGAs

A few years back, a company by the name of Pano Logic launched a line of FPGA-based thin clients. Sadly, the market didn’t eventuate, and the majority of this stock ended up on eBay, to eventually be snapped up by eager hackers. [Tom] is one of those very hackers, and decided to try some raytracing experiments with the hardware.

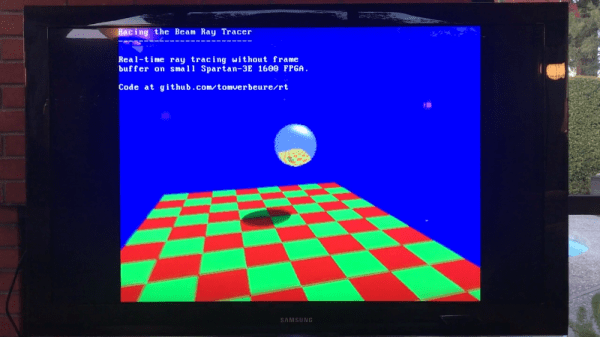
[Tom] has one of the earlier Pano Logic clients, with VGA output and a Xilinx Spartan-3E 1600 FPGA under the hood. Due to limited RAM in the FPGA, and wanting to avoid coding a custom DRAM controller for the memory on the board, there just wasn’t room for a framebuffer. Instead, it was decided that the raytracer would instead “race the beam” – calculating each pixel on the fly, beating the monitor’s refresh rate.

This approach means that resource management is key, and [Tom] notes that even seemingly minor changes to the raytracing environment require inordinately large increases in calculation. Simply adding a shadow and directional light increased core logic utilisation from 66% to 92%!

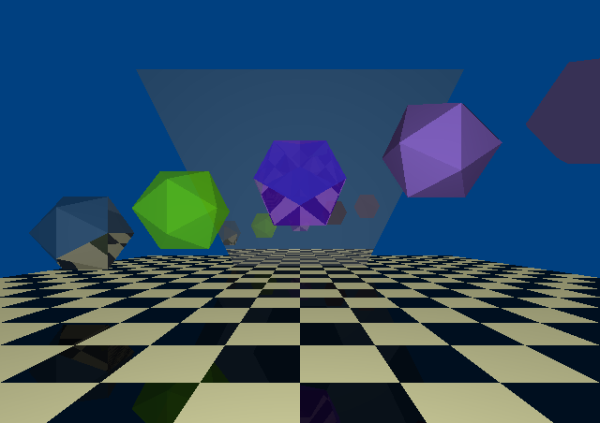
While the project may not be scalable, [Tom] was able to implement the classic reflective sphere, which bounces upon a checkered plane and even added some camera motion to liven things up through an onboard CPU core. It’s a real nuts-and-bolts walkthrough of how to work with limited resources on an FPGA platform. Code is available on Github if you fancy taking a further peek under the hood.

If you’re new to FPGAs yourself, why not check out our FPGA bootcamp?

Ray Tracing On An Arduino

[Greg] implemented a simple ray tracer for Arduino as a fun exercise and a way to benchmark the processor. He started out with the Moller-Trumbore algorithm, a common ray-tracing algorithm that calculates the intersection of a ray with a triangular plane without doing any pre-calculation of the planes. His code supports one static light and one static camera, which is enough to render a simple scene.

[Greg] started out with a small scene composed of a few polygons, but just finished up a scene with 505 vertices, 901 faces, and reflective surfaces (shown above). He made the above render on his PC emulator, but estimates that it would take just over 4 days to render on the Arduino. [Greg]’s project supports multiple bounces of light, which differentiates his ray tracer from some we’ve covered before (and which explains why it takes so long to render).

The ray tracer is implemented entirely with double-precision floats. This translates to a ton of software float emulation instructions, since the Arduino doesn’t have a floating-point unit. While this ray tracer can’t render anything near real-time graphics due to the slowness of the microcontroller, it’s still a great proof of concept.

The title image for this post was rendered on a modern PC, taking 263 seconds to complete. The same scene, at 64×64 resolution, was rendered on the Arduino, taking 4008 seconds to complete. That render is below.

ardu