Friendly Fiberglassing: Can Hide Glue Replace Epoxy?

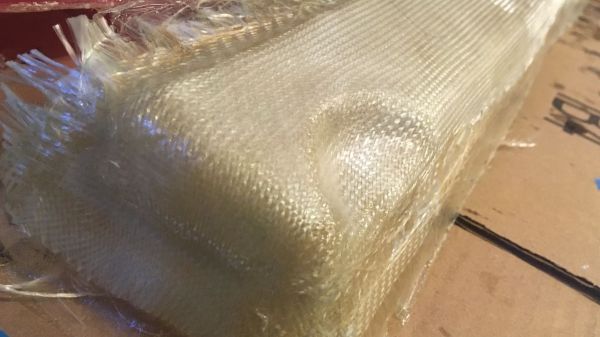
Hide glue has been around for thousands of years, and some of it is holding wood pieces three thousand years after application. It is made from animal protein, so vegetarians may want to stick to the petroleum-based adhesives. [Surjan Singh] wanted to see if its longevity made it a contender with modern epoxy by casting a couple of fiberglass car parts with the competing glues. In short, it doesn’t hold up in this situation, but it is not without merit.

Musical instrument makers and antique restorers still buy and use hide glue, but you would never expose it to heat or moisture. To its credit, hide glue doesn’t require a ventilator. All you need is boiling water and a popsicle stick, and you are in business. [Surjan] writes his findings like a narrative rather than steps, so his adventures are a delight to read. He found that a car part made with fiberglass and epoxy will withstand the weather better than the alternative because heat and humidity will soften hide glue. His Saab 96 isn’t the right application, but since it is nearly as strong as epoxy once set, you could make other fabric shapes, like a flannel nightstand or a lace coffee table, and you could shape them in the living room without toxifying yourself

No matter how you want to work with glues and substrates, Bil Herd has you covered, and here is an excellent tip for a cheap degassing setup.

Reverse Engineering A Saab’s In-Dash Display

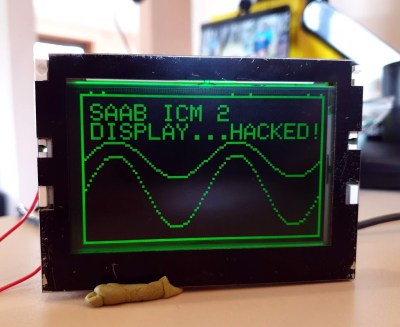
For [Leigh Oliver], there’s something undeniably appealing about the green on black instrumentation of the 2003 Saab 9-3 Gen2. Perhaps it’s because the Infotainment Control Module 2 (ICM2) screen brings a bit of that classic Matrix vibe to the daily commute. Whatever the reason, it seemed the display deserved better than to be stuck showing the nearly 20 year old stock user interface. Luckily, you can control it via I2C.

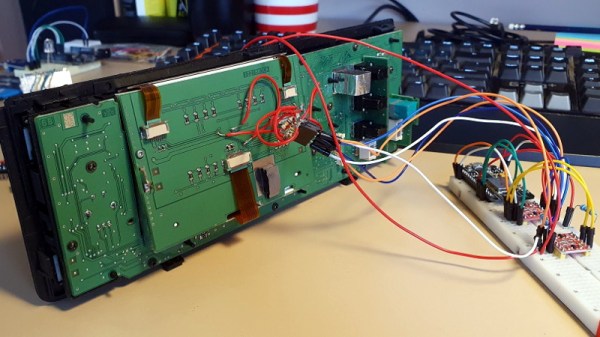
Though as you might expect, that fact wasn’t obvious at first. [Leigh] had to start by taking the ICM2 apart and reverse engineering the display board. With a multimeter and high resolution photographs of both sides of the PCB, all of the traces were mapped out and recreated in KiCAD. This might not have been strictly necessary, but it did serve as good practice for using KiCAD; a worthwhile tip for anyone else looking to build practical experience creating schematics.

With everything mapped out, [Leigh] was able to connect a BusPirate V3 up to the board and pretty quickly determine it was using I2C to control the display. As far as figuring out how to repurpose existing displays goes, this was perhaps the best possible scenario. It even allowed for creating a display library based on Adafruit_GFX which offers graphical capabilities far beyond what the ICM2 module itself is capable of.

Even with so much progress made, this project is really just getting started. [Leigh] has managed to put some impressive imagery on the black and green Saab display, but the hardware side of things is still being worked on. For example, there’s some hope that an I2C multiplexer would allow the display to easily and quickly be switched between “stock” mode and whatever enhanced version comes about thanks to the new libraries and an ESP8266 hiding behind the dashboard.

If you don’t have a sufficiently vintage Saab to take advantage of this project, don’t worry. Tapping into the OBD port with an OLED display can get you similar results on a wide range of vehicles.

Updating A 1999 Saab With An Arduino

Unless your car is fresh off the lot, you’ve probably had the experience of riding in a newer car and seeing some feature or function that triggered a little pang of jealousy. It probably wasn’t enough for you to run out and sign yourself up for a new car loan (which is what the manufacturer was hoping for), but it was definitely something you wished your older model vehicle had. But why get jealous when you can get even?

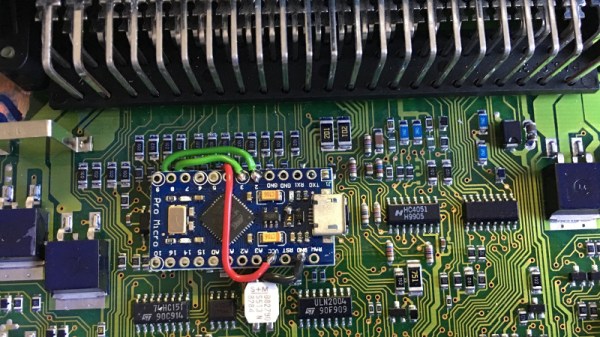
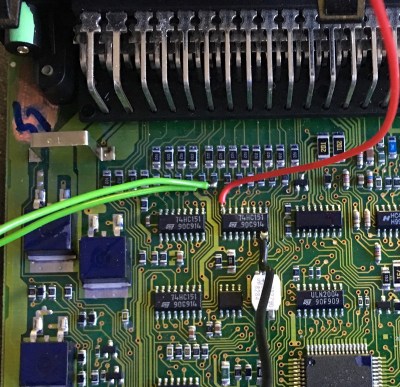
[Saabman] wished his 1999 Saab 9-5 had the feature where a quick tap of the turn signal lever would trigger three blinks of the indicator. Realizing this was an electronic issue, he came up with a way to retrofit this function into his Saab by adding an Arduino Pro Micro to the vehicle’s DICE module.

The DICE (which stands for Dashboard Integrated Central Electronics) module controls many of the accessories in the vehicle, such as the lighting and wipers. In the case of the blinkers, it reads the state of the signal lever switches and turns the blinkers on and off as necessary. After poking around the DICE board, [Saabman] found that the 74HC151 multiplexer chip he was after: the state of the blinker switches could be read from pins 1 and 2, and he’d even be able to pull 5 V for the Arduino off of pin 16.

After prototyping the circuit on a breadboard, [Saabman] attached the Pro Micro to the top of the 74HC151 with some double sided tape and got to work on refining the software side of the project. The Arduino reads the state of the turn signal switches, and if they flick on momentarily it changes the pin from an input to an output and brings it high for three seconds. This makes the DICE module believe the driver is holding the turn lever, and will keep the blinkers going. A very elegant and unobtrusive way of solving the problem.

Hackers aren’t complete strangers to the garage; from printing hard to find parts to grafting in their favorite features from other car manufacturers, this slick Saab modification is in good company.

Continue reading “Updating A 1999 Saab With An Arduino”