Commandeer X10-based Home Automation With Your Favorite Microcontroller

X10 has been around for a long time. It’s the brand name for a set of wireless modules used to switch electrical devices in the home. There’s all kinds of different units (bulb sockets, electrical outlets and plug pass-throughs, etc.) and they’re mass-produced which makes them really inexpensive. Whether you already have some X10 controlled devices or just plan to add them later, we think you’ll find [Jeff Ledger’s] post on controlling the system with a Propeller chip interesting. The technique is not Propeller specific and will be simple to port to your microcontroller of choice.

[Jeff] got his hands on an X10 Firecracker. This provides a DB-9 serial connection meant to be used for computer control. But the interface is so simple all you need is two I/O pins feeding the level converter circuit seen above. You can get the TC4427 for less than a dollar, and the Firecrcker module for as little as $6. Since [Jeff] has already covered adding Ethernet via a ENC28J60 he goes on to detail a web-server that lets him switch his devices, all served from the Propeller chip.

Here’s a different ENC28J60 Ethernet tutorial for those interested in webpages from microcontrollers. And then there’s also a ZigBee home automation project if you’re not warming up to the idea of using X10 modules.

Pushing FPGA Config Files Via Serial Using ‘cat’

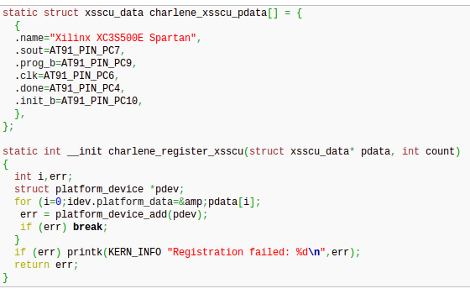
[Andrew] is trying to buckle down and hammer out his PhD project but was surprised by the sorry state of the configuration options for his FPGA/ARM dev board. Using JTAG was painfully slow, so he studied the datasheet to see if there was another way. It turns out the Xilinx FPGA he’s using does have a slave serial mode so he came up with a way to push configuration from the ARM to the FPGA serially.

Four of the connects he needed were already mapped to PortC pins on the AT91SAM9260 ARM System on a Chip. He ended up using the EN_GSM pin on the FPGA, since there is no GSM module on this board; connecting it to the microcontroller with a piece of wire. Now he can SSH into the ARM processor, grabbing information on the FPGA from /dev/fpga0. When it comes time to program, it’s as easy as using the cat command on the binary file and redirecting the output to the same hook.

N64 Controller Input Using An ATtiny85

[Larsim] worked out the timing necessary to read button and joystick data from an N64 controller using an ATtiny85 microcontroller. The project was spawned when he found this pair of controllers in the dumpster. We often intercept great stuff bound for the landfill, especially on Hippie Christmas when all the student switch apartments at the same time.

Instead of cracking the controllers open and patching directly to the buttons, [Larsim] looked up the pinout of the connector and patched into the serial data wire. In true hacker fashion, he used two 5V linear regulators and a diode in series to step his voltage source down to close to 3.6V, as he didn’t have a variable regulator on hand. It does sound like this causes noise which can result if false readings, but that can be fixed with the next parts order.

The controller waits for a polling signal before echoing back a response in which button data is embedded. This process is extremely quick, and without a crystal on hand, the chip needs to be configured to use its internal PLL to ramp the R/C oscillator up to 16Mhz. With the chip now running fast enough, an external interrupt reads the serial response from the controller, and the code reacts based on that input.

It seems the biggest reason these N64 controllers hit the trash can is because the analog joystick wears out. If you’ve got mad skills you can replace it with a different type.

Add A Real Life Hardware Terminal To That Newfangled Computer Of Yours

vt200_serial_hardware_terminal_over_usb

If you find a crusty old IT guy and give him half a chance, he’ll probably regale you with stories of how things were done “in the old days” where no one had their own computer and everyone worked on mainframe-connected dumb terminals. [JSTN] yearned for a true to life terminal display that he could attach to his 2010 Mac Pro, and since there’s no chance anybody is bringing one to market any time soon, he pieced one together on his own.

He dug up a digital VT220 terminal, and got to work trying to interface this office relic with his shiny new Mac. He found a few helpful tips from someone

Flashing Arduinos With A Zipit

zipit_arduino_flashing

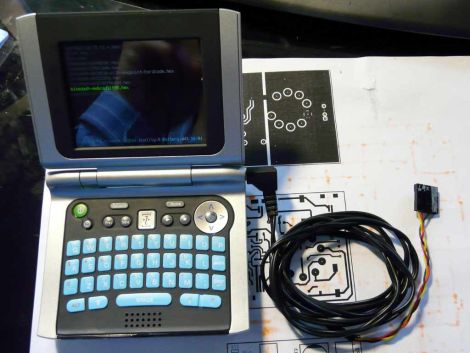
[Giacomo] finds that every once in awhile, he needs to flash a sketch to an Arduino while on the go. While he doesn’t always carry his laptop with him, he almost certainly has his Zipit Z2 on hand. He prefers to use the Zipit because it’s tiny, it uses Debian, has built-in WiFi, and can run for about 5 hours before requiring a recharge. The only shortcoming is that the device lacks a serial port.

Following instructions we featured last year he added a serial port to his device, then built a small converter cable that allows him to connect it to virtually any Arduino. He says it only takes a moment to get avrdude up and running on the Zipit via apt-get, and once that’s done, he is in business. He wrote a short script that saves him from entering the flash command over and over, so the process couldn’t be simpler.

He does mention that since the Zipit does not have a DTR line, Arduino resetting must be done manually. For the convenience of flashing sketches from the palm of our hand, we can deal with that.

Check out the video below for a quick demonstration of his setup.

Continue reading “Flashing Arduinos With A Zipit”

Hacking Into Your Router’s Administrative Interface

zte_zxdsl_router_hack

[Arto] recently upgraded his home Internet subscription from an ADSL to VDSL, and with that change received a shiny new ZTE ZXDSL 931WII modem/wireless router. Once he had it installed, he started to go about his normal routine of changing the administrator password, setting up port forwarding, and configuring the wireless security settings…or at least he tried to.

It seems that he was completely unable to access the router’s configuration panel, and after sitting on the phone with his ISP’s “support” personnel, he was informed that there was no way for him to tweak even a single setting.

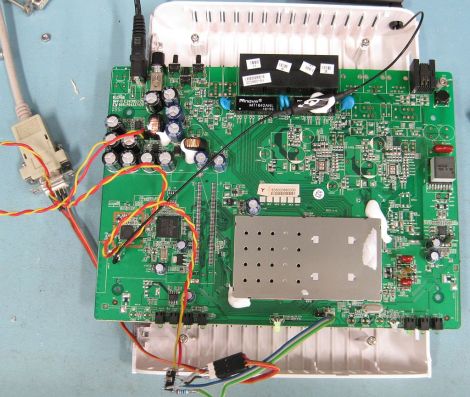
Undaunted, he cracked the router open and started poking around. He quickly identified a serial port, and after putting together a simple RS232 transceiver, was able to access the router’s telnet interface. It took quite a bit of experimentation and a good handful of help from online forums, but [Arto] was eventually able to upload an older firmware image to the device which gave him the configuration tools he was looking for.

Aside from a few Ethernet timeout issues, the router is now performing to his satisfaction. However, as a final bit of salt in his wounds, he recently read that the admin panel he was originally seeking can be accessed via the router’s WAN interface using a well-known default password – frustrating and incredibly insecure, all at the same time! He says that he learned quite a few things along the way, so not all was lost.

Compaq Portable III Rises Again For A Noble Cause

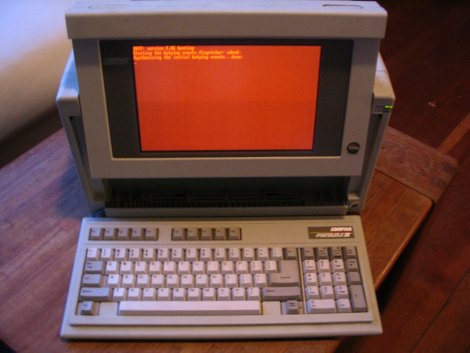
[Autuin] found a Compaq Portable III destined for the scrap bin at Free Geek Vancouver. Upon seeing it he realized that it still had some fight left in it — perfect to go up against the tyranny of hipsters and their shiny Macbook Pros at his local coffee shop.

Unfortunately, being a 286, the computer couldn’t do much. He could take the usual route; which is to remove all the internals, and use the vast amount of space to fit a more modern computer inside. However, he decided to go a different path and save the internals, leaving it in original working order. The computer didn’t have enough power to browse the web, but it had just enough room to fit a small single-board computer inside, to which he could connect through serial. He hasn’t taken it down to the coffee shop yet, but we’re hoping for a few horrified hipsters and a full mission report when he does.

Thanks to [Alec Smecher] for the tip.