BAMF2011: Google’s SKPR Bot, Not For Arachnophobes

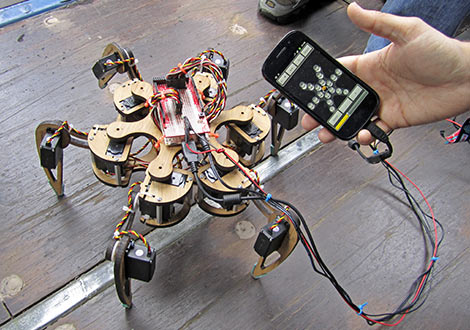
Google’s Maker Faire exhibit space is swarmed with robots…er, androids. Amidst some cool bipeds and Segway-balancers, our inner sci-fi nerd was most smitten with this hexapod design, which they’ve dubbed SKPR Bot. The “Skipper” is on hand to showcase the ease of various Google technologies: SketchUp, Android OS and the Android Open Accessory Development Kit. The whole project came together in less than six weeks.

18 servos are mounted to a framework designed in SketchUp and laser-cut by Ponoko. The low-level servo PWM control is handled by the Dev Kit (essentially a rebadged Arduino Mega, as we’ve seen), while an Android OS phone provides a slick GUI and handles all the inverse kinematics calculations required as the robot takes each step. The coolest bit is that it’s all up for grabs. At this moment you’ll have to scrounge around the ’net a bit to find the plans and code, but some time post-Faire they plan to bring everything together at the SKPR Bot site.

Cutting Paper Scrolls With Frickin’ Lasers

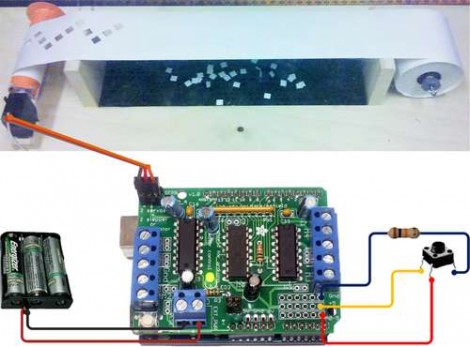
This circuit illustration adds a scrolling paper feeder to the bed of a laser cutter. In the video after the break you can see that the actual assembly is put on the bed of the laser cutter. After the laser has cut out the specified pattern, the scroll is wound to move an un-cut portion into place. It uses a servo motor to drive one of the spools.

An Arduino Uno with a servo shield is being used for this application. It has one button which winds one spool for a pre-programmed period of time. There’s a few issues with this setup, namely that it’s not tied into the CNC program that runs the laser. There’s also a lack of precision when using a continuously rotating servo like this. If it were upgraded to use a stepper motor and patched into the CNC hardware this would make cutting new scrolls for your player piano a breeze.

Here’s a project that does the opposite, it takes old player piano rolls and digitizes them.

Continue reading “Cutting Paper Scrolls With Frickin’ Lasers”

MindWave Is Developer (read: Hacker) Friendly Mind Control

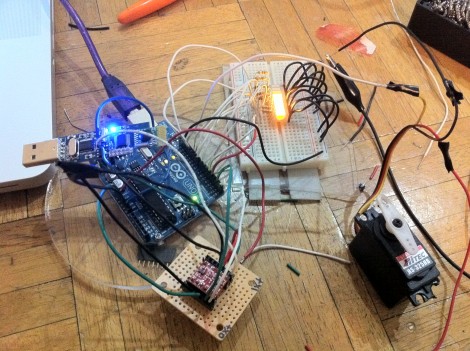
Here’s a setup to control a servo motor with your mind. [Danny Bertner] made this project happen by interfacing a MindWave headset with an Arduino. You might wonder what’s the big deal about that since we’ve covered quite a few mind control hacks that work this way? So far, the majority of those hacks used the Mindflex toy (to be fair there were several using the Force Trainer as well), which depends on a chip made by the company that is responsible for the MindWave. Both the Mindflex and the Force Trainer were reverse engineered to access the stream of data coming in from the EEG sensors. But NeuroSky is embracing the urge to mess with their products by offering developer tools.

[Danny] took advantage of these resources, using the comany’s own guide to interfacing with an Arduino (PDF). The quick clip after the break shows his finished project, grabbing data from the USB dongle that comes with the headset, converting it to the necessary levels for the Arduino, then processing the signals for display on and LED bar graph.

We can’t help but chuckle about the warranty-voiding disclaimer at the top of the PDF guide.

Continue reading “MindWave Is Developer (read: Hacker) Friendly Mind Control”

One-eyed, One-armed Metal Rolling Roomba Robot

roomba_robot

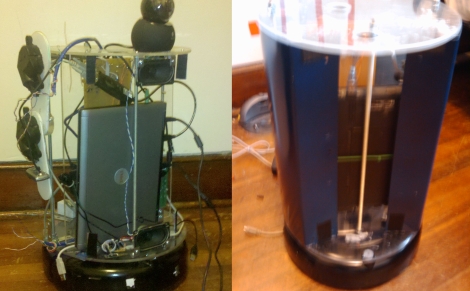
[Erik] was looking for a sturdy robotics platform and was initially considering the iRobot Create, until he found that he could score a Roomba Discovery series for a fraction of the price. The Discovery includes a battery, which is missing from the iCreate, though it also has all of the standard vacuum bits included as well.

He immediately removed all of the vacuum parts once he got his hands on the Roomba, and began adding the support structure to house the rest of his robot’s components. The robot is controlled via a small laptop which sits on top of the Roomba’s base, and features a panning and telescoping webcam to provide feedback to the operator.

The robot has been under construction for a little over a year now, and has had a few upgrades over that time. The original laptop was swapped out for a newer dual-core model, and the webcam was upgraded to a model featuring motion tracking. The whole thing has been skinned in thin sheet metal for a sleek look, and he has added a servo-driven arm as well.

The project is not quite complete, and he hasn’t really stated what he plans on using the robot for, but it looks good so far – we can’t wait to see it when it’s finished.

Blu-ray Laser Plotter Writes On Glow-in-the-dark Screen

This laser display is persistent thanks to a glow-in-the-dark screen. [Daniel] built it using a Blu-ray laser diode. As the laser dot traverses the screen, it charges the phosphors in the glow material, which stay charged long enough to show a full image.

The laser head is simple enough, two servo motors allow for X and Y axis control. A Micro Maestro 6-channel USB servo controller from Pololu drives the motors, and switches the diode on and off. This board offers .NET control, which [Daniel] uses to feed the graphics data to the unit. Check out the video demonstration below the fold to see a few different images being plotted. It’s shot using a night-vision camera so that you can really see where the laser dot is on the display. It takes time to charge the glow material so speeding up the plotting process could actually reduce the persistent image quality.

This is yet another project that makes you use those geometry and trigonometry skills.

Continue reading “Blu-ray Laser Plotter Writes On Glow-in-the-dark Screen”

Real Life Super Mario Coin Block

mario_coin_block

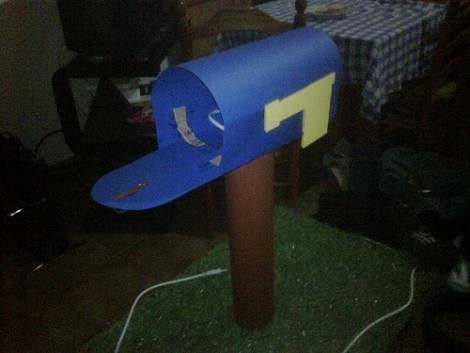
Instructables user [Bruno] recently constructed a fun little toy that brings a bit of the Mario nostalgia out of the video game universe and into ours. His Super Mario coin block is instantly recognizable from the first Mario game and performs just as you would expect it to. Punching or tapping the bottom of the block releases coins one at a time, complete with sounds straight from the game.

The coin block is constructed from thick cardboard and wrapped in color mock ups of the in-game block. Inside, a spring-loaded tube of coins is placed above a launch arm which is also connected to a spring. A servo actuated arm pulls the launch arm down, dropping a coin from its tube on to the launch arm which is then flung from the top of the box once the servo arm rotates far enough. When this occurs, the built-in MP3 player is triggered to play the “coin sound” from the game. A 555 timer is used to ensure the servo actuated arm rotates once per activation, and a LM386-based amplifier is used to increase the output volume of the MP3 player, both of which operate using rechargeable batteries.

Be sure to check out some of the inner workings as well as the final product in the videos embedded below.

[Thanks, Samjc3]

Continue reading “Real Life Super Mario Coin Block”

RC Override For Autonomous Hardware

[Simon Inns] developed this board to act as a radio controlled override for autonomous hardware. It sits between some servo motors and two different sets of controllers for those motors. One set of hardware that can control the motors is a microcontroller programmed for autonomous tasks. In [Simon’s] case this enables a sailboat to navigate open water with out human intervention. But if that board fails, or if you just need to call the boat back to port, this module allows for a traditional RF vehicle controller to take command.

The board seen above, dubbed the Servo Switcher, uses a PIC 12F683 to monitor the incoming signal from the RF receiver. If that signal is not present it switches control of the motors over to a separate microcontroller board. This means that the override control is established simply by turning the handheld controller on. This will save you a swim to retrieve your boat, which is a nice convenience. But if you modify this for a plane or helicopter, it can save your aircraft from certain destruction. Check out the video walk through after the break.

Continue reading “RC Override For Autonomous Hardware”