A Failed SwitchBot Plug Mini And Cooking Electrolytics

Poorly designed PCBs and enclosures that slowly cook the electrolytic capacitors within are a common failure scenario in general, but they seem especially prevalent in so-called Internet-of-Things devices. The SwitchBot Plug Mini that [Denki Otaku] took a look at after many reports of them failing is one such example.

The location of the failed electrolytic cap in the SwitchBot Plug Mini. (Credit: Denki Otaku, YouTube)

These Mini Plugs are ‘smart’ plugs that fit into a regular outlet and then allow you to control them remotely, albeit not integrated into a wall or such like the Shelly 2.5 smart relay that also began dying in droves. Yet whereas with the Shelly relays this always seemed to take a few years to show up, generally in the form of WiFi connectivity issues, these SwitchBot plugs sometimes failed within weeks or start constantly switching the relay on and off.

After SwitchBot started an exchange program for these plugs, [Denki Otaku] decided to examine these failed devices from affected users. Inside a dead unit the secondary side’s 680 µF capacitor was clearly bulging and had cooked off its electrolyte as a teardown of a dead capacitor confirmed. After replacing this one capacitor a formerly unresponsive plug sprung back to life.

Continue reading “A Failed SwitchBot Plug Mini And Cooking Electrolytics”

A Cheap Smart Plug To Block Distractions

We have all suffered from this; the boss wants you to compile a report on the number of paper clips and you’re crawling up the wall with boredom, so naturally your mind strays to other things. You check social media, or maybe the news, and before you know it a while has been wasted. [Neil Chen] came up with a solution, to configure a cheap smart plug with a script to block his diversions of choice.

The idea is simple enough, the plug is in an outlet that requires getting up and walking a distance to access, so to flip that switch you’ve really got to want to do it. Behind it lives a Python script that can be found in a Git Hub repository, and that’s it! We like it for its simplicity and ingenuity, though we’d implore any of you to avoid using it to block Hackaday. Some sites are simply too important to avoid!

Of course, if distraction at work is your problem, perhaps you should simply run something without it.

Monitor Your Smart Plugs On The Command Line

The plethora of smart home devices available today deliver all manner of opportunities, but it’s fair to say that interfacing with them is more often done in the browser or an app than in the terminal. WattWise from [Naveen Kulandaivelu] is a tool which changes all that, it’s a command-line interface (CLI) for power monitoring smart plugs.

Written in Python, the tool can talk either directly to TP-Link branded smart plugs, or via Home Assistant. It tracks the power consumption with a simple graph, but the exciting part lies in how it can be used to throttle the CPU of a computer in order to use power at the points in the day when it is cheapest. You can find the code in a GitHub repository.

We like the idea of using smart plugs as instruments, even if they may not be the most accurate of measurement tools. It takes them even further beyond the simple functionality and walled-garden interfaces provided by their manufacturers, which in our view can only be a good thing.

Meanwhile, for further reading we’ve looked at smart plugs in detail in the past.

The Easy Way To Make A Smart Appliance

It seems that finding an appliance without some WiFi connectivity and an app to load your laundry data into the cloud is an increasingly difficult thing to do in the 2020s. Many of us resolutely refuse to connect these smart appliances to the Internet, but not because we don’t see the appeal — we just want to do it on our own terms.

[Terence Eden] did just this with his rice cooker, using a surprisingly straightforward approach. He simply connected it to the mains via an energy monitoring smart plug, and that was the hardware part, done. Of course, were it that simple we probably wouldn’t be featuring this here, as the meat of this project lies in connecting it to his smart home systems and getting something useful from it.

He’s using Home Assistant, and after a bit of messing about had it part of his home automation system. Then it was time for Appliance Status Monitor, which allowed him to easily have the rice cooker send him a notification once it has done its thing by monitoring the power it was using. All online, part of a smart home, and not a byte of his data captured and sold to anyone!

This isn’t the first home automation project we’ve brought you from this source.

Decoding 433 MHz Signals With Arduino & Raspberry Pi

433 MHz radio signals are all around us. They’re used for things like smart power plugs, garage door openers, and home weather stations. Decoding these signals can allow you to interface and work with these devices on your own terms. To help in those efforts, [Joonas Pihlajamaa] has written a three-part tutorial on decoding these signals.

A soundcard makes for a very cheap oscilloscope.

The focus of the tutorials is decoding the signals of a Nexa radio-controlled smart plug. [Joonas] first explores using an Arduino to do the job, paired with a RFM210LCF-433D radio receiver module. This setup dumps out data to a computer over serial for decoding. [Joonas] then tried an alternative strategy, using a soundcard as a “poor man’s oscilloscope” to do the same job, using the same radio module and using Audacity for signal analysis. Finally, [Joonas] brought out the big guns, hooking up a Picoscope digital oscilloscope to a Raspberry Pi 4 for a more deluxe attempt at decoding the signals.

The tutorial goes to show that higher-end tools can make such a job much easier. However, the cheaper techniques are a great way of showing what can be done with the bare minimum in tools. We’re hoping for an exciting fourth part to [Joonas’s] work, where he instructs us on how to decode 433 MHz signals by drinking huge amounts of caffeine and staring at a very fast blinking LED. If you’ve got your own nifty signal analysis (or SIGINT!) hacks, be a good sport and drop them into the tipsline!


Automate Your Home From The Clearance Rack

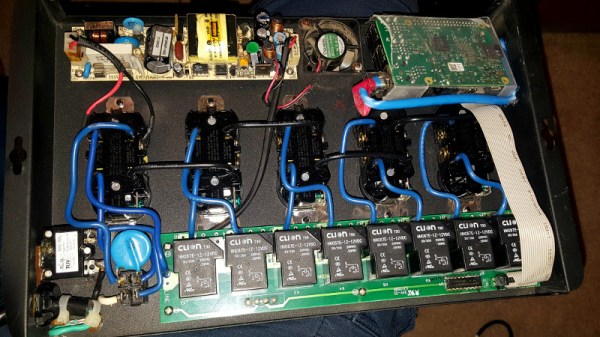
The month or so after the holidays have always been a great time to pick up some interesting gadgets on steep clearance, but with decorations and lights becoming increasingly complex over the last few years, the “Christmas Clearance” rack is an absolute must see for enterprising hackers. You might just luck out like [ModernHam] and find a couple packs of these dirt cheap wireless light controllers, which can fairly easily be hacked into the start of a home automation system with little more than the Raspberry Pi and a short length of wire.

In the video after the break, [ModernHam] walks the viewer through the start to finish process of commanding these cheap remote plugs. Starting with finding which frequencies the remotes use thanks to the FCC database and ending with using cron to schedule the transmission of control signals from the Pi, his video really is a wealth of information. Even if you don’t have this particular model of remote plug, or don’t necessarily want to setup a home automation system, there’s probably some element of this video that you could still adapt to your own projects.

The first step of the process is figuring out how the remote is communicating to the plugs. [ModernHam] noticed there was no frequency listed on the devices, but using their FCC IDs he was able to find the relevant information. In the United States, devices like these must have their FCC IDs visible (though they could be behind a battery door) by law, so the searchable database is an invaluable tool to do some basic reconnaissance on a poorly documented gadget.

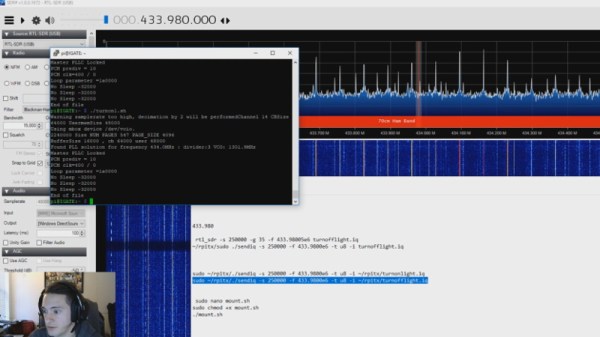
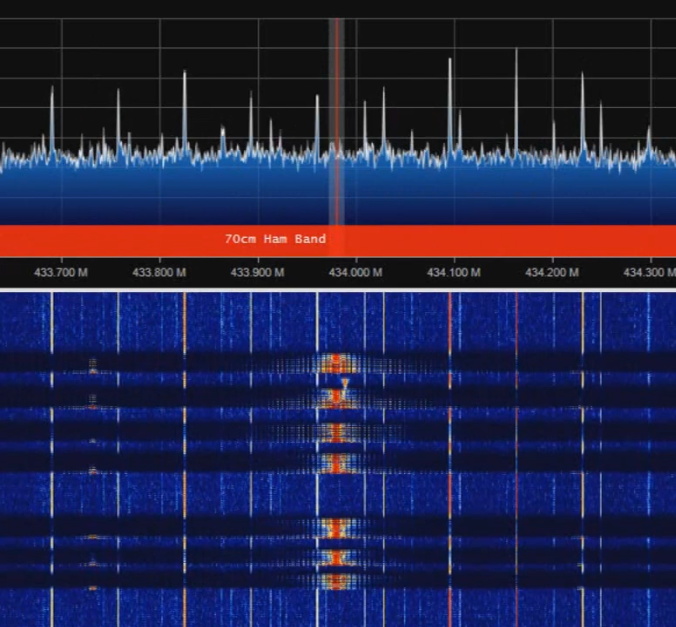
An RTL-SDR receiver is then used to fine tune the information gleaned from the FCC filing. [ModernHam] found that the signals for all four of the remote plugs were being broadcast on the same frequency, which makes controlling them all the easier. Using the rtl-sdr command, he was able to capture the various signals from the transmitter and save them to separate files. Then it’s just a matter of replaying the appropriate file to get the plugs to do your bidding.

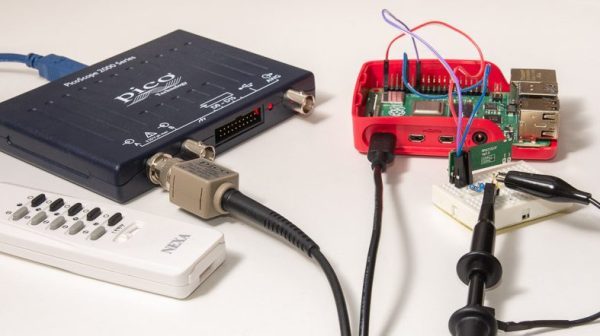
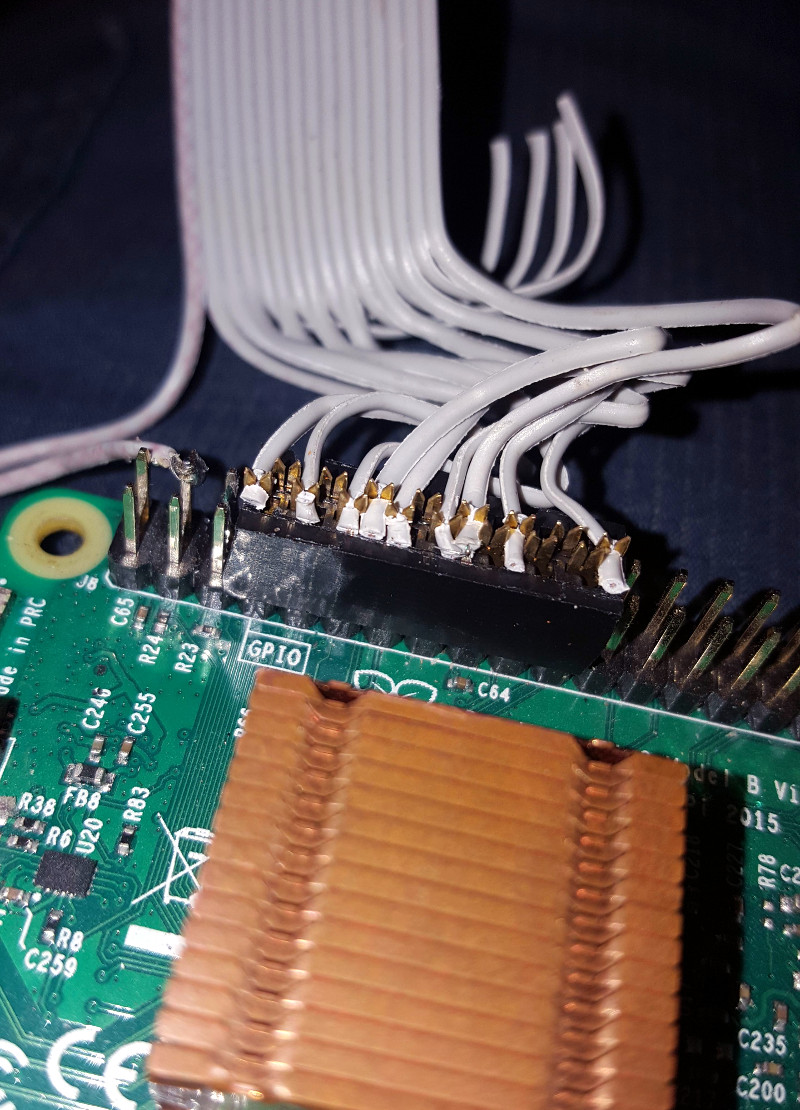
Of course, the RTL-SDR can’t transmit so you’ll have to leave your dongle behind for this last step. Luckily all you need to transmit is the rpitx package created by [F5OEO], along with a supported Raspberry Pi and a small length of wire attached to the appropriate GPIO pin. This package contains the tool sendiq which can be used to replay the raw captures made in the previous step. With some scripting, it’s fairly straightforward to automate these transmissions to control the remote plugs however you wish from the Pi.

The RTL-SDR Blog put together their own guide for “brute forcing” simple remote control devices like this as well, and we’ve even seen similar techniques used against automotive key fobs in the past. Amazing what a piece of wire and some clever code can pull off.

Continue reading “Automate Your Home From The Clearance Rack”

Smart Power Strip Revived With Raspberry Pi

We’re all for buying broken stuff from eBay to save yourself a few bucks: buy it cheap, fix it, and reap the rewards of being a step ahead of the average consumer. Searching through the “For parts or not working” categories is nearly the official pastime here at the Hackaday Bunker. But buying an eBay find only to have it give up the ghost in a couple weeks? That hurts.

That’s precisely what happened to [idaresiwins] when he bought this beefy looking “Web Power Switch” on the Electronic Bay. After two weeks, the controller board blew and his “smart” power strip became very stupid indeed. But with the addition of a Raspberry Pi, he’s got it back up and running. Not only that, but given the extra horsepower this device now contains, it now doubles as a basic server for the home lab.

This conversion was helped by the fact that the original controller was on a separate board from the relays, and connected with a small ribbon cable. All [idaresiwins] had to do was figure out which wire in the cable went to each of the eight relays, and fire them off with the Pi’s GPIO pins. In an interesting detail, he opened up one of the ends of the ribbon cable and used it as a punch down block of sorts to easily hook the wires up to the Pi’s pins. We might suggest some hot glue to keep everything from moving around, but otherwise it’s a neat tip.

[idaresiwins] found some information online about making a web-based GPIO interface, which he adapted to control the outlets on the power strip. He then wrapped the Pi up in plastic to keep it from shorting out, and tucked it inside the case. Note that he was able to pull 5 VDC from the relay board and run it to the Pi over the ribbon cable, so he didn’t need to bother with hacking a USB adapter in there.

Controlling AC devices over the Interwebs is an extremely popular project, and we’ve even seen a DIY device that looks quite similar to this product. Most of them are now using the ESP8266, but with the Pi onboard this hack is more like a super-sized version of the PowerPwn.