The Art Of USB Dongle Repair

Faced with a broken USB dongle for our wireless devices, most of us would likely bin the part and order a replacement, after all the diminutive size of those things probably means hard to impossible repairability, right? Well, [The Equalizor] took it as a challenge and used the opportunity to practice his microscopic soldering skills just for funsies.

The wireless adapter in question, which came from one of his clients who accidentally bent it while it was plugged into a laptop, refused to be recognized by a computer under any circumstances. After sliding out the metal casing for the USB plug and snapping off the plastic housing, [The Equalizor] discovered that the slightly bent exterior hid a deeply cracked PCB. Then, with an inspection of the severed traces and lifted components, it was simply a matter of reflowing solder a few times to try to make the board whole again. Once the dongle was confirmed working, a new 3D shell was printed for it, replacing the original which had to be broken off.

It might not seem extraordinary to some people, but this video is a good example to show that repairs to delicate electronics in such a small scale are feasible, and can serve to reduce the amount of electronic waste we constantly dump out. Just because some electronics seem dauntingly elaborate or beyond salvaging, it doesn’t always mean there isn’t light at the end of the tunnel. You can see the work performed on this tiny dongle after the break.

Continue reading “The Art Of USB Dongle Repair”

Solder SMDs With A Pan O’ Sand

For those that grew up working with through-hole components, surface mount parts can be challenging to deal with. However, there are plenty of techniques out there that are more than accessible to the DIY set. With the right gear, soldering SMD boards is a snap – just get yourself a hot pan of sand (Youtube link, embedded below)!

The process starts with a professionally manufactured PCB, and accompanying stencil. All major PCB CAD packages are capable of generating stencil files these days, and many manufacturers will throw in a laser cut stencil for minimal extra cost with a PCB order. The board is first mounted on a stable surface, and has solder paste applied, before components are placed with tweezers. Perfect placement isn’t necessary, as the surface tension of the molten solder pulls components into their correct orientations. The populated board is then placed on a bed of sand in a frying pan, which is placed on an induction cooktop. The board is then heated until the solder melts, and all the components are neatly reflowed. Once allowed to cool, the board is done!

The trick is that the sand helps evenly heat the circuit board, while keeping it a safe distance away from the heat source. Results are good, and the process is far quicker than hand soldering. It’s easy to keep an eye on the process too. Of course, the traditional method is still to use the humble toaster oven, but new techniques are always useful. We’ve seen it done with a Bunsen burner, too. Video after the break.

Continue reading “Solder SMDs With A Pan O’ Sand”

Hunting Replicants With The 2019 LayerOne Badge

Blade Runner showed us a dystopian megatropolis vision of Los Angeles in the far-off future. What was a distant dream for the 1982 theater-goes (2019) is now our everyday. We know Los Angeles is not perpetually overcast, flying cars are not cruising those skies, and replicants are not hiding among the population. Or… are they?

The LayerOne conference takes place in greater Los Angeles and this year it adopted a Blade Runner theme in honor of that landmark film. My favorite part of the theme was the conference badge modeled after a Voight-Kampff machine. These were used in the film to distinguish replicants from humans, and that’s exactly what this badge does too. In the movies, replicants are tested by asking questions and monitoring their eyes for a reaction — this badge has an optional eye-recognition camera to deliver this effect. Let’s take a look!

Continue reading “Hunting Replicants With The 2019 LayerOne Badge”

Breakfast At DEF CON — The Greatest Illicit Meetup Of All

Every year we host Breakfast at DEF CON on the Sunday morning of the largest hacker conference in the United States. I think it’s a brilliant time to have a meetup — almost nobody is out partying on Sunday morning, and coffee and donuts is a perfect way to get your system running again after too much excess from Saturday evening.

This year marks our fourth Breakfast and we thought this time it would be completely legit. Before we’ve just picked a random coffee shop and showed up unannounced. But this year we synced up with some of our friends running the Hardware Hacking Village and they were cool with us using the space. Where we ran afoul was trying to wheel in coffee and pastries for 100+ people. The casino was having none it.

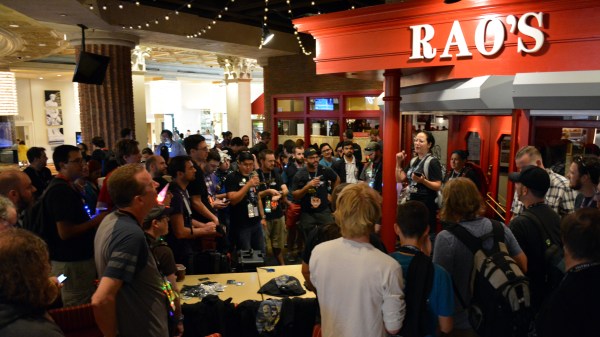
But to their credit, we were forbidden from bringing the food into the conference center, not into the greater casino. We ended up squatting in a restaurant seating area that wasn’t open until 5pm. The awesome Hackaday Community rolled with the venue change, and a fantastic time was had by all! For what it’s worth, this ended up being the best space for a Breakfast yet! There was plenty of room with many tables, and we had no problem filling all of the space.
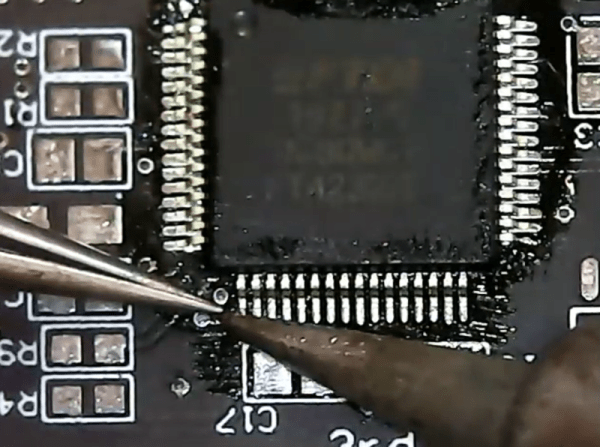
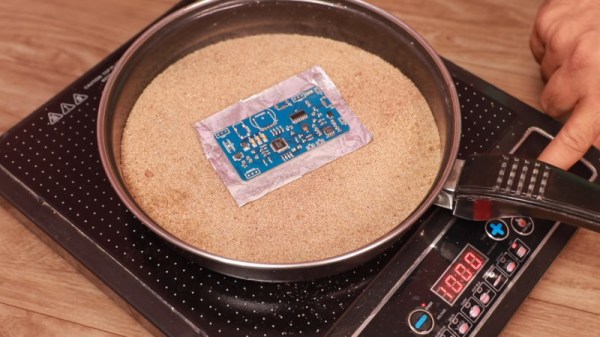
Tindie and Hackaday were sponsors of the SMD Challenge this year (a timed soldering challenge going all the way down to 0201 packages that was also judged for quality). Jasmine announced the winner live at the meetup, that’s the image at the top of this article. I thought the award the Solder Skills Village made for the Most Dropped Parts was pretty epic. It’s a round pendant with a piece of carpet and a bunch of components that was on display during the meetup.
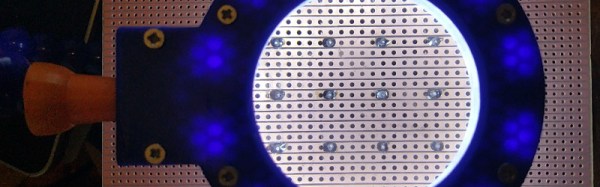
The number one piece of hardware people brought with them was badges. Since we’re doing in-depth badge coverage I won’t go into that here. But I’d like to mention that for the second year in a row, Brian McEvoy brought some epic hardware. Last year it was an OpenSCAD controller demo, this year it’s a custom mechanical keyboard design system.

Taking wide shots of crowds is frowned upon at DEF CON so what follows are posed shots. I made sure to ask all involved before snapping the image. DC27 is a long way away, I’m hoping to see many of these awesome folks much sooner than that when Supercon gets going this November.

3D Printed Diffuser Lights Up This Magnifier

If you are working with surface mount electronics and don’t have the handy heritage of a pulp-comic superhero to give you super-high-resolution eyesight, then you will quickly find yourself needing a magnifying glass. And since you’ll be using both hands doing the soldering, you’ll need some way to hold it.

There are multiple solutions to this problem on the market, from headband magnifiers and inspection magnifiers on arms to cheap “Helping hands”. They all have their strengths and weaknesses, but none of them appealed to our reader [Anil], who wanted an illuminated magnifier to fit the Hobby Creek arm on his Pana-Vise.

His solution was to 3D print a surround for a lens from a set of helping hands. This is no simple print though, it’s made of three layers. There is a translucent diffuser, a layer that holds a set of LEDs and attaches to the arm, and a cover to hold the lens in place. Power for the LEDs comes via USB.

The print itself was a bit tricky, his diffuser used T-glase translucent filament, and was fused to the PLA LED ring in a single print from his dual-extruder printer. He takes us through the various steps he needed to get it right, and shows us a few of his failed prototypes. The resulting magnifier looks to be a useful addition to his bench, he’s made the STL files available towards the bottom of his post so you can have a go at making one for yourself.

This is the kind of simple hack that can make life so much easier for the SMD constructor. We’ve had  another set of augmented helping hands featured here in the past, and of course there’s the ultimate portable SMT station. If SMD soldering is new to you, please also read our SMD guide for the nervous.

Rainbow Cats Announce Engagement

[ANTALIFE] is going to tie the knot sometime in 2017. Instead of sending out paper announcements or just updating his Facebook status, he wanted to give their family members something lasting and memorable, like a small trinket with a pair of light-up cats.

This project is pretty simple in theory. A pair of RGB LEDs cycle through the colors of the rainbow with the help of an ATtiny25 and resistors carefully chosen for each LED. But there are several challenges at play here. [ANTALIFE] wanted to design something quite small that would last at least a day on a single CR2032 coin cell. This project was his first foray into SMD/SMT design and construction. We think that this warrants its own congratulations, especially since it looks as though he made at least a dozen of these things.

[ANTALIFE] made things much easier for himself with the purchase of a cheap hot air rework station and used a chip clip to program the ‘tiny. The cats are a design from Thingiverse, which he modified to turn them into bride and groom. Watch a whole line of them glow after the break. We sincerely hope that a larger version of these cats end up on top of the wedding cake.

For anyone with an undying love blinkenlights and impending nuptials, don’t forget the light-up invitations, wedding attire, and centerpieces.

Continue reading “Rainbow Cats Announce Engagement”

Tools Of The Trade – Component Placing

Recently we started a series on the components used to assemble a circuit board. The first issue was on dispensing solder paste. Moving down the assembly line, with the paste already on the board, the next step is getting the components onto the PCB. We’re just going to address SMT components in this issue, because the through hole assembly doesn’t take place until after the SMT components have gone through the process to affix them to the board.

Reels!
Reels!

SMT components will come in reels. These reels are paper or plastic with a clear plastic strip on top, and a reel typically has a few thousand components on it. Economies of scale really kick in with reels, especially passives. If you order SMT resistors in quantities of 1-10, they’re usually $.10 each. If you order a reel of 5000, it’s usually about $5 for the reel. It is cheaper to purchase a reel of 10 kOhm 0603 resistors and never have to order them again in your life than it is to order a few at a time. Plus the reel can be used on many pick-and-place machines, but the cut tape is often too short to use in automated processes.

Continue reading “Tools Of The Trade – Component Placing”