hassler_pcb

Annoy Your Enemies With The Hassler Circuit

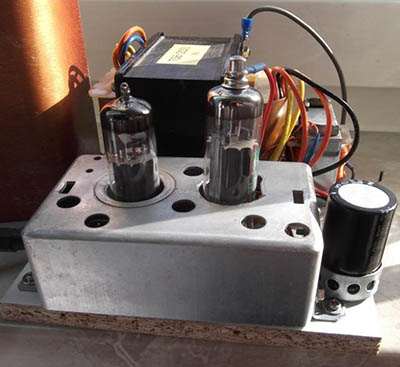
[Craig] recently built himself a version of the “hassler” circuit as a sort of homage to Bob Widlar. If you haven’t heard of Bob Widlar, he was a key person involved in making analog IC’s a reality. We’ve actually covered the topic in-depth in the past. The hassler circuit is a simple but ingenious office prank. The idea is that the circuit emits a very high frequency tone, but only when the noise level in the room reaches a certain threshold. If your coworkers become too noisy, they will suddenly notice a ringing in their ears. When they stop talking to identify the source, the noise goes away. The desired result is to get your coworkers to shut the hell up.

[Craig] couldn’t find any published schematics for the original circuit, but he managed to build his own version with discrete components and IC’s. Sound first enters the circuit via a small electret microphone. The signal is then amplified, half-wave rectified, and run through a low pass filter. The gain from the microphone is configurable via a trim pot. A capacitor converts the output into a flat DC voltage.

The signal then gets passed to a relaxation oscillator circuit. This circuit creates a signal whose output duty cycle is dependent on the input voltage. The higher the input voltage, the longer the duty cycle, and the lower the frequency. The resulting signal is sent to a small speaker for output. The speaker is also controlled by a Schmitt trigger. This prevents the speaker from being powered until the voltage reaches a certain threshold, thus saving energy. The whole circuit is soldered together dead bug style and mounted to a copper clad board.

When the room is quiet, the input voltage is low. The output frequency is high enough that it is out of the range of human hearing. As the room slowly gets louder, the voltage increases and the output frequency lowers. Eventually it reaches the outer limits of human hearing and people in the room take notice. The video below walks step by step through the circuit. Continue reading “Annoy Your Enemies With The Hassler Circuit”

LeslieSnubber

Organ Donor Gives Up A Leslie Speaker

It was about ten years ago that [Richard] received an old musical organ. Moving to a new house meant it would be cumbersome to move the organ with him, so he opted to harvest some interesting components instead. Specifically, he kept the Leslie speaker.

A Leslie speaker is a special kind of speaker mechanism that creates a tremolo effect as well as a vibrato effect. You can hear this effect in [Richard’s] video below. Simple effects like this would be easy to do on a computer nowadays, but that wasn’t the case several decades ago. Before digital electronics, musical effects were often performed by analog means. [Richard’s] Leslie speaker is a small speaker behind of a Styrofoam baffle. The baffle spins around the speaker which changes the reflection angle of the sound, producing the musical effect.

[Richard] tried hooking this speaker up to other musical instruments but found that turning off the electric motor created an audible pop over the speakers. To remedy this, he build a simple “snubber” circuit. The circuit is just a simple 240 ohm resister and a 0.05 uF capacitor. These components give the transients a path to ground, preventing the pops and clicks when the motor is powered up. Now [Richard] can use this classic piece of audio equipment for newer projects. Continue reading “Organ Donor Gives Up A Leslie Speaker”

tweeter

Repairing Burnt Speakers With A Steady Hand

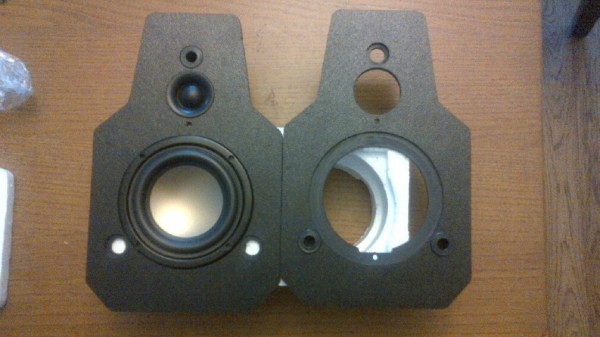
[Martin] seems to have a knack for locating lightly damaged second-hand audio gear. Over the years he’s collected various types of gear and made various repairs. His most recent project involved fixing two broken tweeter speakers.

He first he needed to test the tweeters. He had to remove them from the speaker cabinet in order to gain easier access to them. The multimeter showed them as an open-circuit, indicating that they had likely been burned. This is an issue he’s seen in the past with this brand of speaker. When too much power is pumped through the speaker, the tiny magnet wire inside over heats and burns out similar to a fuse.

The voice coil itself was bathing in an oily fluid. The idea is to help keep the coil cool so it doesn’t burn out. With that in mind, the thin wire would have likely burned somewhere outside of the cooling fluid. It turned out that it had become damaged just barely outside of the coil. [Martin] used a sharp blade to sever the connection to the coil. He then made a simple repair by soldering the magnet wire back in place using a very thin iron. We’ve seen similar work before with headphone cables.

He repeated this process on the second tweeter and put everything back together. It worked good as new. This may have ultimately been a very simple fix, but considering the amount of money [Martin] saved on these speakers, it was well worth the minimal effort.

Parametric Spherical Speakers Are Not A Moon

A good speaker enclosure is not just about building a box out of plywood and covering it with carpet, although playing with 1F capacitors is pretty cool. No, for a good speaker enclosure you need the right internal volume, the right size bass port, the right speaker, and it should definitely, certainly, not be a moon.  [Rich] figured out he could do all of this with a 3D printer, resulting in the NOMOON: The NOMOON Orbital Music-Making Opensource, Openscad-generated Nihilator.

This work is a continuation of earlier work that designed parameterized speakers in the shape of Borg cubes. Now [Rich] is on to Borg scout ships,  and this version has everything you would expect for speaker design.

The NOMOON is available on the Thingiverse Customizer with variables for the internal diameter, the volume of the enclosure in liters, wall thickness, speaker hole, bass port, and wire holes. Of course a customized design is also possible with a stock OpenSCAD installation.

[Rich] has printed a few of these not moons and even with a speaker with terrible bass response, he has a pretty good-sounding setup as far as Youtube videos go. You can check that out below.

Continue reading “Parametric Spherical Speakers Are Not A Moon”

Speaker Cabinet Boom Box Build

When you get that itch to build something, it’s difficult to stop unless you achieve a feeling of accomplishment. And that’s how it was with [Rohit’s] boombox build.

He started out with a failing stereo. He figured he could build a replacement himself that played digital media but his attempts at mating microcontrollers and SD cards was thwarted. His backup plan was to hit DX for a cheap player and he was not disappointed. The faceplate he found has slots for USB and SD card, 7-segment displays for feedback, and both buttons and a remote for control. But this little player is meant to feed an amplifier. Why buy one when you can build one?

[Rohit] chose ST Micro’s little AMP called the TDA2030 in a Pentawatt package (this name for a zig-zag in-line package is new to us). We couldn’t find stocked chips from the usual suspects but there are distributors with singles in the $3.50-5 range. [Rohit] tried running it without a heat sink and it gets hot fast! If anyone has opinions on this choice of chip (or alternatives) we’d love to hear them.

But we digress. With an amp taken care of he moved onto sourcing speakers. A bit of repair work on an upright set got them working again. The bulky speaker box has more than enough room for the amp and front-end, both of which are pretty tiny. The result is a standalone music player that he can be proud of having hacked it together himself.

Making A Speaker With Resin, Magnets, And Wire

A speaker is just about the simplest electronic component possible, just barely more complex than resistors and wire. They’re also highly variable in their properties, either in size, shape, frequency response, and impedance. Obviously, building custom speakers would be of interest to a lot of people, but there aren’t many people out there doing it. [Madaeon] is one of those people. He created a speaker from scratch, using nothing but magnets, wire, and a bit of UV curing resin.

The frame of the speaker contains a magnet, and the coil of wire is carefully attached to the 0.1mm thin speaker cone with a bit of UV curing resin. All the parts are available on Thingiverse, but you will need a UV resin printer with a low layer height to print this thing out.

The speaker was built by [madaeon] as a demonstration of what the printer he built can do. It’s a fairly standard resin-based 3D printer built around a DLP projector. It’s also cheap, and unlike some other cheap resin-based 3D printers, there’s a reasonable likelihood his will ship within the next few months.

A Pair Of Projects To Scare The Trick-or-Treaters

The countdown is on! There’s only a few days left until Halloween, and if you’re still looking for something to spice up the experience for the kids heading to your door, [MagicWolfi] has just what you need. He’s put together two motion-sensing projects that are sure to startle any trick-or-treater.

The first project is a chain of LED-lit pumpkins that are activated by a motion sensor. A set of inverters paired with RC delay lines light up the pumpkins sequentially. They are arranged almost like a strand of Christmas lights and are powered by AA batteries, so in theory they could be expanded to make a strand as long as needed. The project was inspired by a motion-sensing dress and works pretty well as a Halloween decoration!

9378581414283863206[MagicWolfi] is pairing the LED pumpkins with his second project which uses another motion sensor to play scary sound effects. Dubbed the Scare-o-Matic, this device uses a 45-millimeter speaker connected to a SparkFun microSD audio module to produce the scary sound effects. Each time it is triggered it plays a different sound from the list. There are videos and schematics for each of these projects on the project sites if you are interested in recreating any of these before Friday!