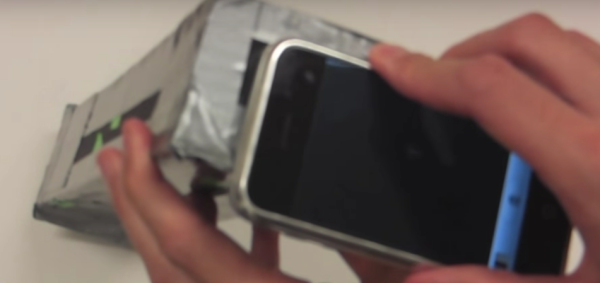
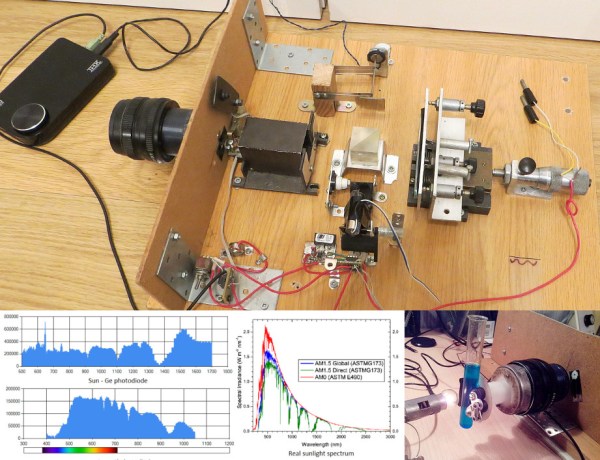
Can you make a spectrometer for your home lab all from materials you have sitting around? We might not believe it from a less credible source, but this MIT course does indeed build a spectrometer from foam board using two razor blades as the silt cover and a writable CD as the diffraction grating. The coolest part is removing the metal backing of the CD.
 Hackaday reader [gratian] tipped us off about the course available from MIT courseware called Nanomaker. It boils down some fairly complicated experiments to the kind one can do in the home lab without involving thousands of dollars of lab equipment. The whole point is to demystify what we think of as complicated devices and topics surrounding photovoltaics, organic photovoltaics, piezoelectricity and thermoelectricity.
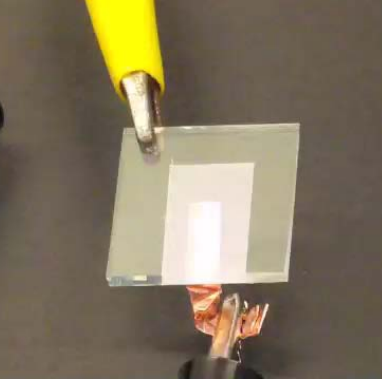
Spectrometers are used to analyze the wavelengths of a light source. Now that you have a measurement tool in hand it’s time to build and experiment with some light sources of your own. Here you can see an LED that is the topic of one of the course labs.
If you have a bit of background in chemistry this is a good step-by-step guide for getting into these types of experiments at home. It reminds us of some of the really cool stuff [Jeri Ellsworth] was doing in her garage lab, like making her own EL panels.
Continue reading “Bring Doping, Microfluidics, Photovoltaics, And More Into The Home”


 The NoteOn smartpen
 [Mario], the guy behind OpenExposer, the combination SLA printer, PCB exposer, and laser harp is chugging right along.
  Goliath, the gas-powered quadcopter, had a few problems earlier this month. During its first hover test


