When it comes to building a split keyboard, you have a lot of options when it comes to the cable. Many will use a standard 3.5 mm TRRS cable, and others might use something more esoteric like RJ-45 to run between the halves. This only works if you’re using two controllers; if you only want one controller, you have to pass the matrix from one side to the other, which typically requires more than the four wires offered by the aforementioned choices. While rummaging around, [Joe Scotto] found a VGA cable and thought, why not use that?
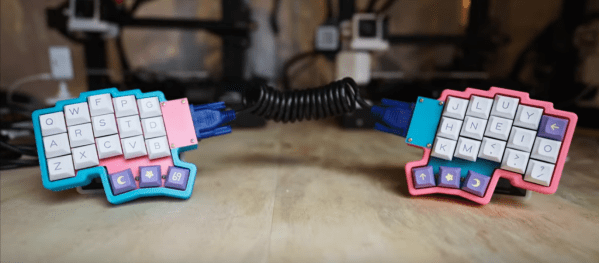
This lovely Barbie-themed peripheral is a split version of an earlier board he built called the ScottoFly, which is a monoblock split with a void in the middle. As with that one, this is hand-wired using thicc brass insulated with heat-shrink, uses a solid 3D-printed plate, and a printed case. And like a madman, [Joe] coiled the cable.
Unfortunately, this proved to be problematic in the wire breakage sense, or so he thought. The real problem turned out to be that the middle row of pins on a VGA connector all act like ground, so they can’t be used to pass rows and columns. However, there were still enough viable pins to send the 4×5 matrix across. Be sure to check out the build video after the break.
Custom keyboards? They’re totally great. And we can keep telling you this, but you really won’t feel it until you try a few and find one or two that are right for you. If you’re already on board, we wonder: is there any limit to what custom keyboards can provide in terms of a good, comfortable time for your fingers, wrists, arms, shoulders, and neck? We think not, and as time goes on, there is more and more evidence to support this.
Take [vpzed]’s Toast keyboard for example. The beauty of customization is that as with any other human input problem, you’ll discover many more people who share your misery once you present a solution. In this case, it is the portion of the population whose index fingers are shorter than their ring fingers (which is evidently men in general). This is known as the 2D:4D ratio and is decided during gestation. At first, the phenomenon was thought to be due to high testosterone exposure in the womb, but subsequent studies have debunked this belief.
Toast aims to sate the need for a keyboard layout that accounts for a significantly shorter 2D than 4D by way of aggressively staggering the index finger’s key positions and staggering the columns overall. As you might imagine, there are no inner keys for length-challenged index fingers to grasp at — that would just be cruel. But there is another pinky column on each hand, which bring the key total to 34. We like the square boards, and frankly wish they were bread-shaped.
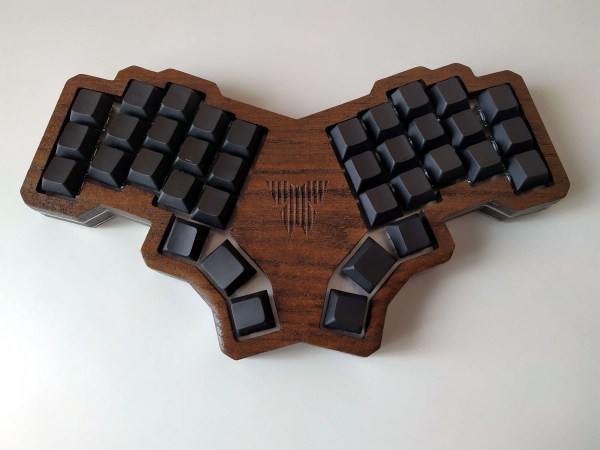
This is usually how it happens — [mrzealot] had been using some awful chiclet-style keyboard without much of a care, and topping out at 50-60 WPM using an enhanced hunt-and-peck method. But he really wanted back-lighting, and so got his first taste of the mech life with a Master Keys Pro S. Hooked, [mrzealot] started researching and building his endgame keyboard, as you do once bitten. It looked as though his type would have as few keys as possible, and thumb keys laid out in arcs.
And so the cardboard prototyping began, with real switches and keycaps and a split design. After getting tired of adjusting the halves’ position on the desk, [mrzealot] threw that plan out the window and started scheming to build a monoblock split. He had a steel switch plate cut for this prototype, and used cardboard for the bottom layer, complete with a little hatch to access the Pro Micro’s reset button.
Now satisfied with the 36-key layout, it was time to go wireless with a Feather nRF52 Bluefruit LE. This is where things get serious and final, with a laser-cut layered oak case and thick, blank, PBT keycaps.
Under all that plastic lies a range of actuation force levels on the key caps that (in our opinion) range from heavy to really heavy — 62 gram switches on the pinkies and ring fingers, 65 g on the middle, 67 g on the index fingers, and a whopping 78 g for the thumb clusters.
We just love the way this ended up looking, and are pretty jealous of that neoprene layer on the bottom. Beauty aside, there is some real utility here to be shared. In designing the layout, [mrzealot] created a keyboard generator called ergogen that will get you closer to your endgame without the need for CAD skills, just YAML.
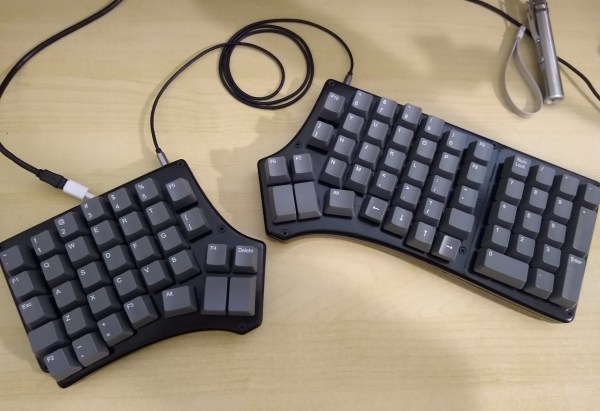
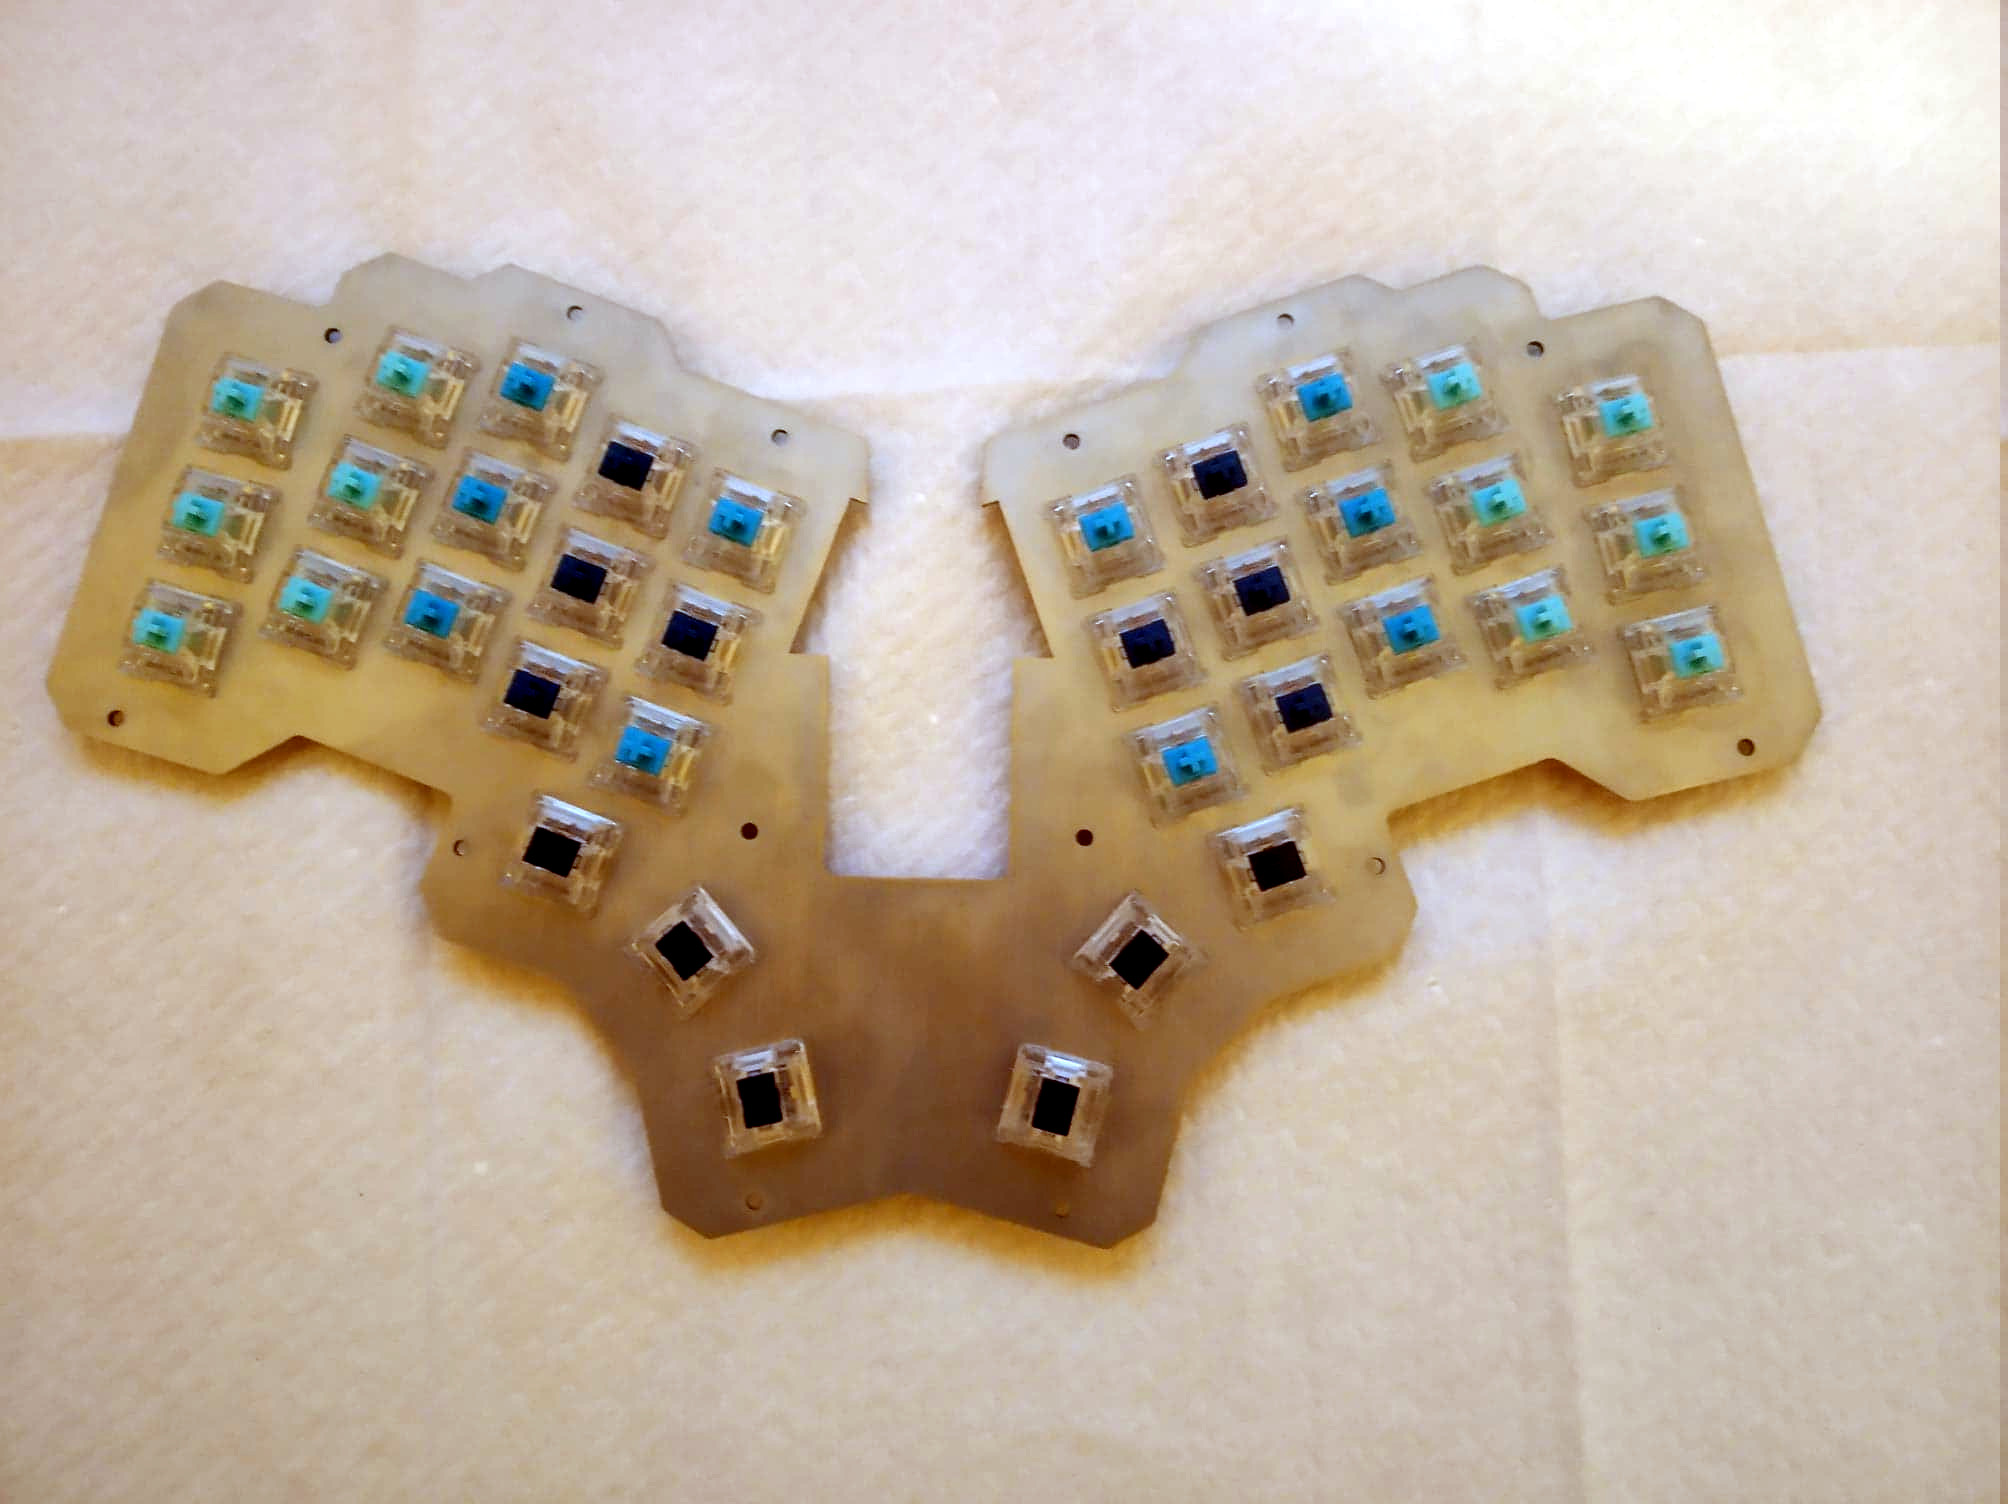
Special thanks to [Maarten], who stumbled upon this old gem of a geekhack thread by [suka]. It’s essentially a show and tell of their DIY keyboard journey, complete with pictures. [suka]’s interest started with a yen for ergonomic keyboard layout alternatives. They soon found the geekhack forum and started lurking around, practicing layouts like Neo and AdNW, which [suka] still uses today.
When it was time to stop lurking and start building something, [suka] got plenty of support from the community. They knew they wanted a split ortho with a trackpoint and plenty of thumb keys. [suka] started by building them from old Cherry keyboards, which are easier to come by in Germany.
The first build was a pair of num pads turned landscape and wired up to a Teensy, but [suka] wanted those sweet, clacky Cherry MX switches instead of MLs. So the second version used a pair of sawed-off num pads from old MX boards.
When the Truly Ergonomic came out, it got [suka] interested in one-piece splits. Plus, they were tired of carrying around a two-piece keyboard. So their next build was a sexy monoblock split with a laser-sintered case and keycaps. But that was ultimately too uncomfortable, so [suka] went back to split-splits.
Everyone takes a different path into and through this hobby, and they’re all likely to be interesting. Is yours documented somewhere? Let us know.
What Could Have Been: The Dygma Raise
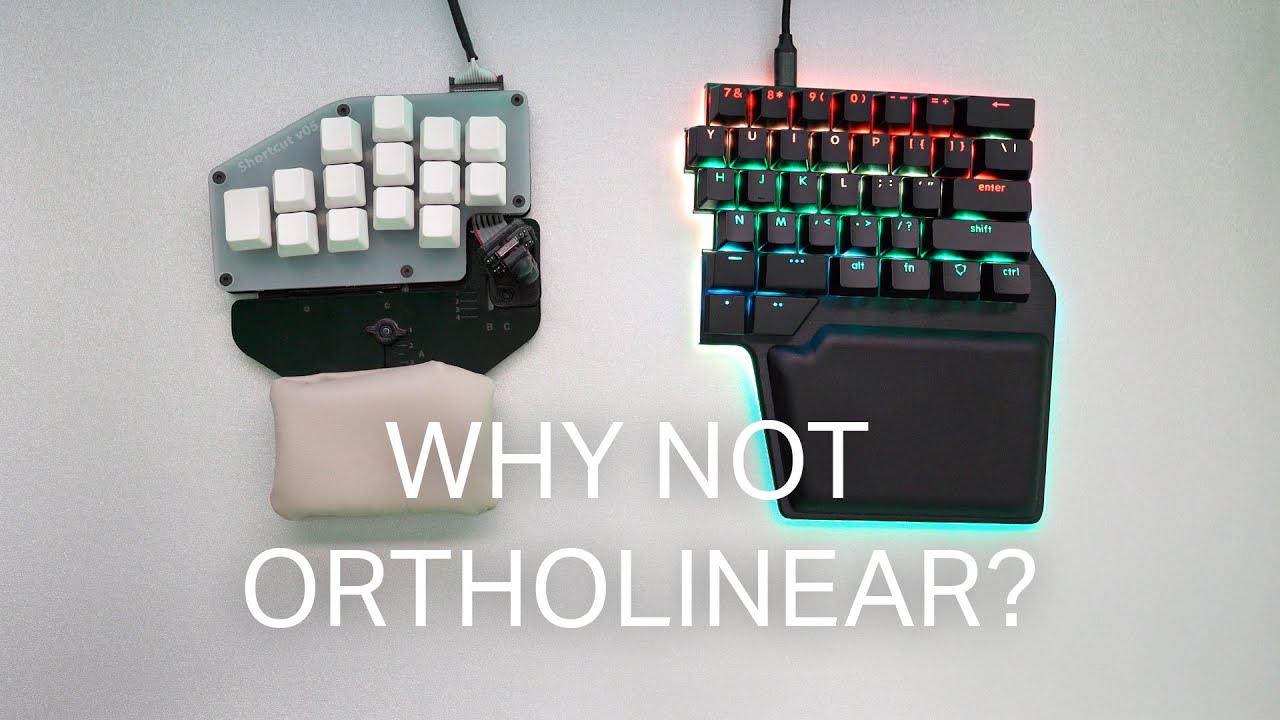
I do some streaming here and there, mostly for the sense of focus I get out of being live on camera. I like to find out what my people in chat are clacking on, and one of them told me they have a staggered split called the Dygma Raise. I hadn’t heard of it before that day, but this keyboard has been around for a few years now.
This same person told me that Dygma might make an ortholinear version sometime soon, but apparently Dygma wanted it that way from the beginning. According to the timely video below sent to the tips line by [deʃhipu], Dygma’s original plan was a split ortho with few keys and presumably a layer system.
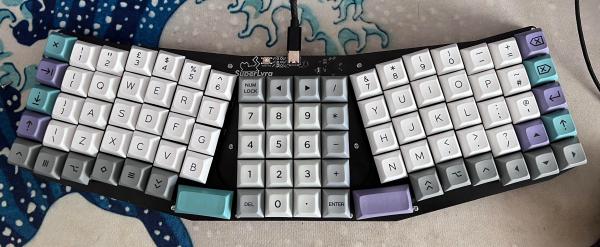
We sure do love a good one-piece split keyboard, and it’s not just because you never have to worry about the halves drifting too far apart throughout the day, though that’s a big plus. For one thing, the angles are always just right without having to mess with anything, so muscle memory gets you back to the home row every time. Usually, the only thing missing from these mono-block splits is the num pad. Well, not on the SuperLyra.
This is [Malevolti]’s back-to-the-office build, and it’s sure to start a few conversations. While we don’t have a lot of details, there will be plenty forthcoming on the Black Cat Plasticworks website. As soon as next year, [Malevolti] plans to sell fully-assembled SuperLyras, kits, and bare-bones PCBs. We really appreciate that it allows for either MX-type switches or Chocs, depending on the hot swap sockets installed.
As much as we love the Maltron-esque num pad in the middle, we imagine that it would be more comfortable to use if it were canted at 45° angle relative to the user’s dominant hand. Fortunately, some enterprising redditor had the same idea. They’ve already mocked this up in Photoshop and are inviting comments on another thread.
You may have noticed that I neglected to write an introductory paragraph for the last one of these — I was just too excited to get into the keyboards and keyboard accessories, I guess. I can’t promise that I’ll always have something to say up here, but this week I definitely do: thank you for all the tips I’ve received so far! The readers are what make Hackaday great, and this little keyboard roundup column is no exception. Fabulous fodder, folks!
Kamina Chameleon
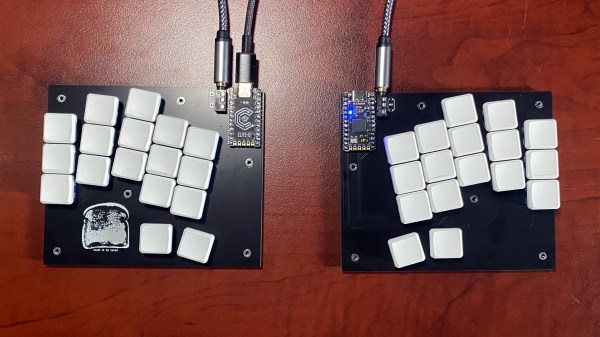
This is [deʃhipu]’s daily driver. Vroom!Like any keyboard enthusiast worth their soldering iron, [deʃhipu] keeps trying for the ultimate keyboard — ideally, one that runs CircuitPython and makes a great daily driver for high-speed typing.
The latest version is the Kamina, a one-piece split with a SAMD21 brain that is slim and narrow without being cramped. [deʃhipu] started by splitting the Planck layout, spreading it, adding a number row, and eventually, an extra column of Kailh Chocs on the right hand. One-piece splits are great as long as the split suits your shoulders, because everything stays in place. When you do move it around, both halves move as one and you don’t have to mess with the positioning nearly as much as with a two-piece. And of course, since he designed it himself, it fits.
The really cool thing here is the center module concept. It’s functional, it looks nice, and as long as it doesn’t get in the way of typing, seems ideal. So far, [deʃhipu] has made a couple different versions with joysticks, encoders, and buttons, and is currently working on one with a Home button made for cell phones to take advantage of their built-in optical trackpads.
Esrille NISSE Looks Nice
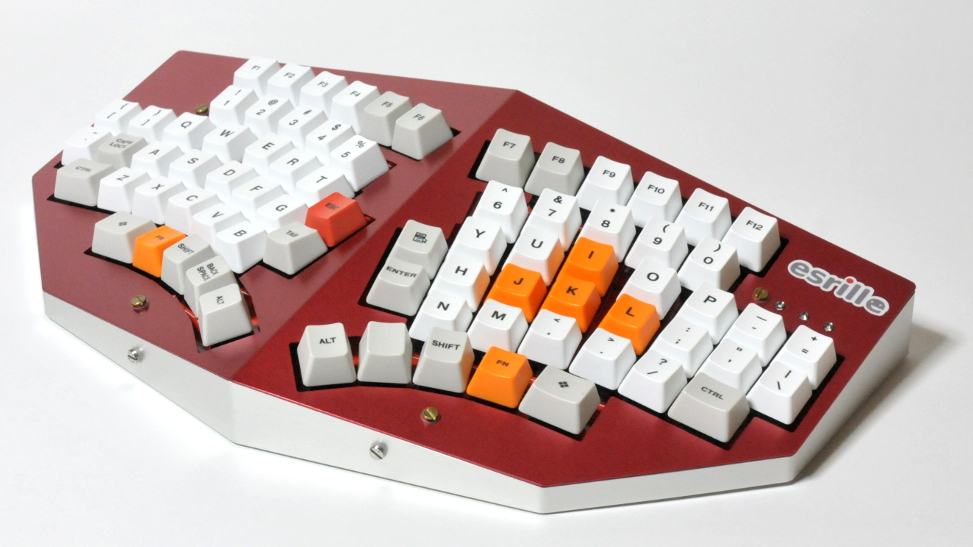
This is the Esrille NISSE keyboard and it comes in two sizes! Okay, the two sizes don’t look that different, but the key spacing specs say otherwise. To me, this looks like an Alice with a better and ortholinear layout. These bat-wing beauties are new to me, but they’ve been around for a few years now and are probably difficult to stumble upon outside of Japan. Although Esrille doesn’t seem to make any other keyboards, they do make a portable PC built on the Raspberry Pi compute module.
I love me a one-piece split when its done properly, and this one seems to be pretty darn close to perfect. How do I know? You can print out a paper-craft version to try out either of the two sizes. I didn’t take it quite that far, but you can bet that I opened the smaller size’s image in a new tab and put my hands all over the screen to test the layout.
I especially like the thumb clusters and the inside keys on this thing, but I think the innermost thumb keys would be too painful to use, and I would probably just use my index finger. I would totally buy one of these, but they’re a little too expensive, especially since the smaller one costs more. (What’s up with that?) The great news is that the firmware is open-source. Between that and the paper-craft models, a person could probably build their own. Check out [xahlee]’s site for a review and a lot more pictures of the NISSE and similar keebs.
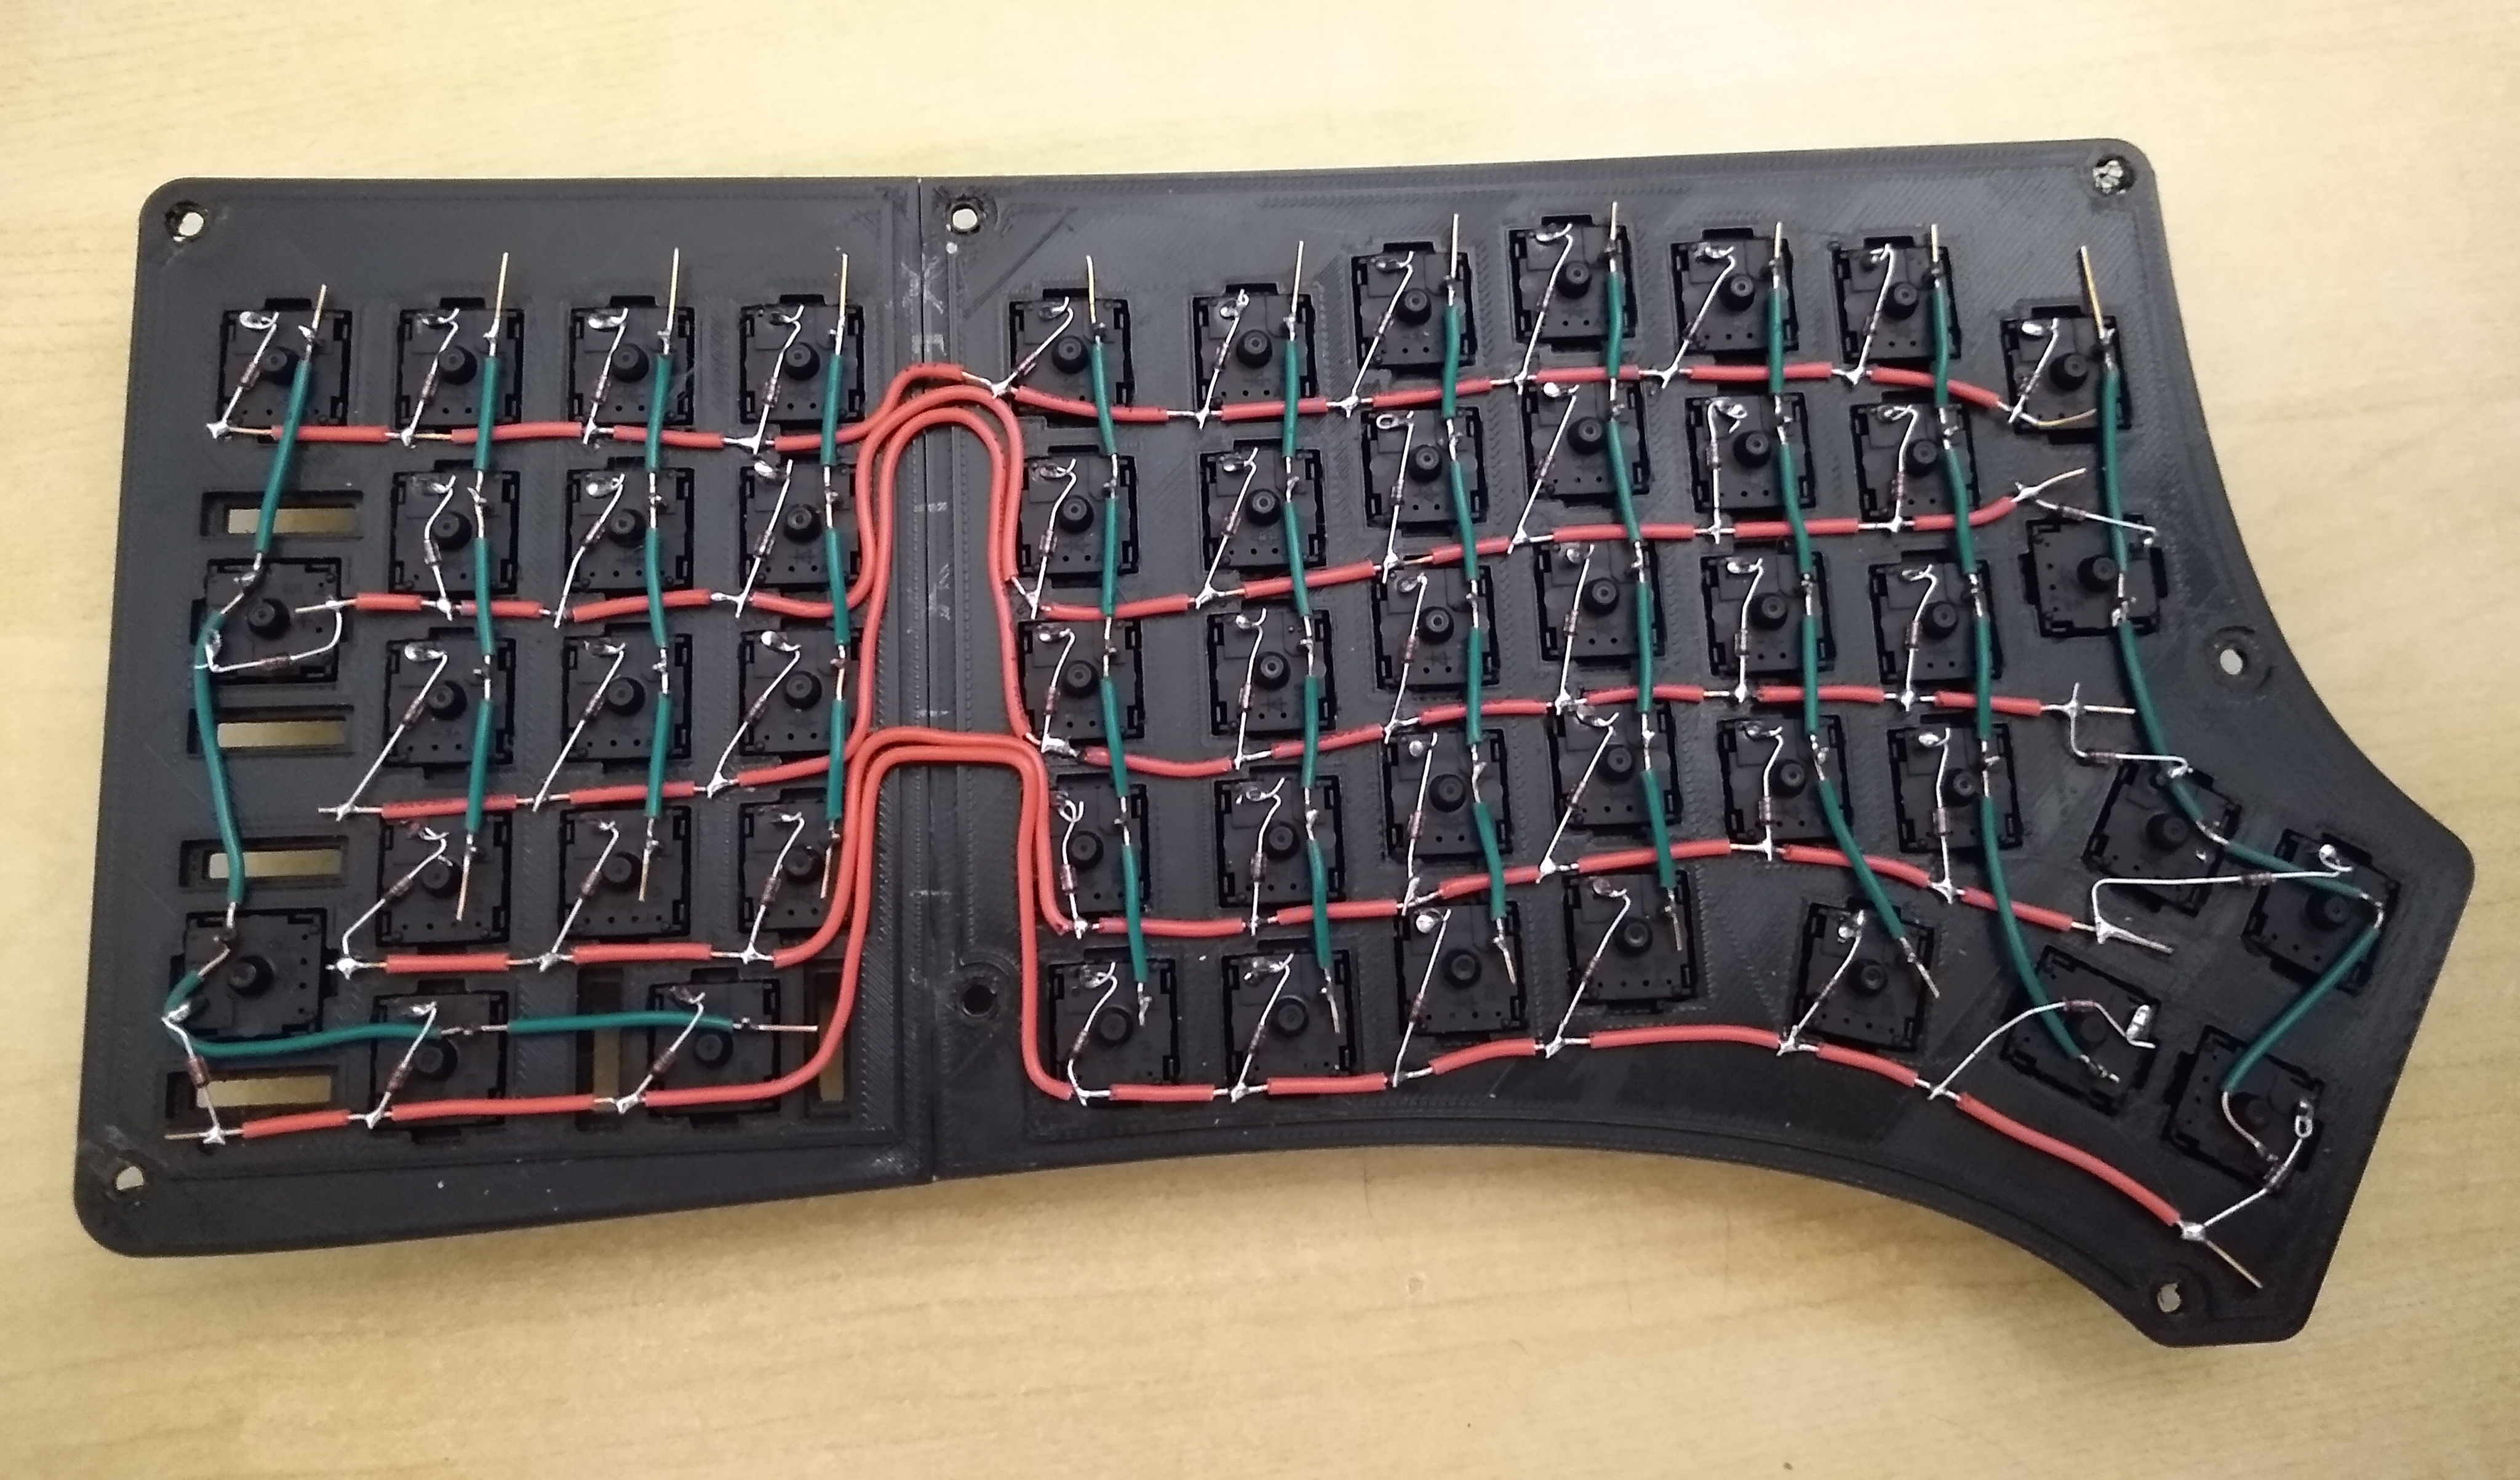
What’s the worst thing about split keyboards? If they have one general fault, it’s that almost none of them have a number pad. If you can fly on that thing, but struggle with using the top row numbers, you will miss the num pad terribly, trust us. So what’s the answer? Design your own keyboard, of course. [ToasterFuel] had enough bread lying around to cook up a little experiment for his first keyboard build, and we think the result is well done, which is kind of rare for first keebs.
This design is based on the Redox, itself a remix of the ErgoDox that aims to address the common complaints about the latter — it’s just too darn big, and the thumb clusters are almost unusable. We love how customized this layout is, with its sprinkling of F keys and Escape in the Caps Lock position. Under those keycaps you’ll find 100% Cherry MX greens, so [ToasterFuel] must have pretty strong fingers to pound those super clackers.
Everything else under the hood is pretty standard, with a pair of Arduino Pro Micros running the show. [ToasterFuel] had to wire up the whole thing by hand because of the num pad, and we’re impressed that he built this entire project in just three weeks. And that includes writing his own firmware!


![[deshipu]'s DIY keyboard with various center modules](https://hackaday.com/wp-content/uploads/2021/08/deʃhipu-Kamina.png)