Battlelines are being drawn in Canada over the lowly Flipper Zero, a device seen by some as an existential threat to motor vehicle owners across the Great White North. The story started a month or so ago, when someone in the government floated the idea of banning devices that could be “used to steal vehicles by copying the wireless signals for remote keyless entry.” The Flipper Zero was singled out as an example of such a nefarious device, even though relatively few vehicles on the road today can be boosted using the simple replay attack that a Flipper is capable of, and the ones that are vulnerable to this attack aren’t all that desirable — apologies to the 1993 Camry, of course. With that threat hanging in the air, the folks over at Flipper Devices started a Change.org petition to educate people about the misperceptions surrounding the Flipper Zero’s capabilities, and to urge the Canadian government to reconsider their position on devices intended to explore the RF spectrum. That last bit is important, since transmit-capable SDR devices like the HackRF could fall afoul of a broad interpretation of the proposed ban; heck, even a receive-only SDR dongle might be construed as a restricted device. We’re generally not much for petitions, but this case might represent an exception. “First they came for the Flipper Zero, but I did nothing because I don’t have a Flipper Zero…”
steadicam8 Articles
Homemade Camera Stabilizer
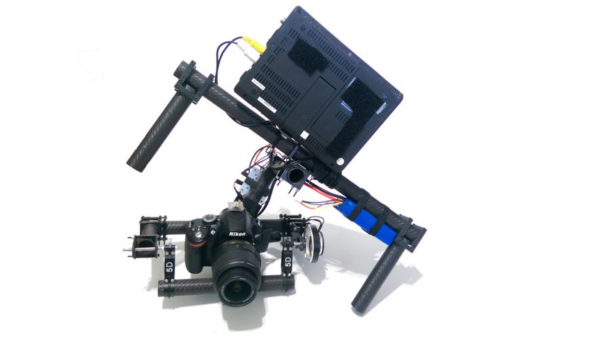
We’ve featured quite a few camera gimbals and steady cams here, but this one stands out. For one, [Daniel Rhyoo] was in his sophomore year when he built it. His 2-axis camera gimbal uses brushless DC motors, and is made out of carbon fiber.
[Daniel] machined the carbon fiber parts on a CNC desktop mill and some hand tools. And he also had to teach himself Solid Works to design it. In his slick DIY guide, he starts off by listing the parts and where to source them from, along with the tools needed. Most gimbals use servos for axis movements, which limits the range and do not provide very smooth motion. Brushless motors overcome these limitations allowing a nice, smooth moving gimbal to be built with a wide range of movement. When [Aleksey Moskalenko] introduced the AlexMos brushless motor controller, [Daniel] ordered it out, and then waited until he could get his hands on the right kind of motors. CAD files for all of the machined parts are available for download (.zip file).
He then goes on to blog his build progress, with ample photos to describe the machining and assembly. He does a couple of nice design choices along the way – like using press-nuts to make assembly and dis-assembly easy, and dismantling one of the motors and replacing its shaft with a custom, longer one instead of using a coupler to extend it. At the end, the result is not only a nice looking, light weight rig, but one that works very well thanks to the motors and controller that he used. Check out the video below to see it in action.
DIY Camera Stabilizer Takes The Shakes Out Of Filming
We’ve all prematurely stopped watching some Youtube video because of shaky camera work that makes the video unwatchable. There is a solution available for this problem, it’s a device called a camera stabilizer and it is designed to compensate for jerky camera movement. There are several types available for purchase but they can get fairly expensive. Even the cheaper ones at a few hundred dollars are not economical for hobbyists. [John] set out to make his own camera stabilizer using some unorthodox parts.
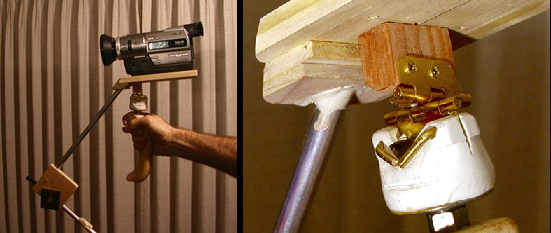
[John’s] chose a gimble style design that effectively lowers the camera’s center of gravity down close to the camera persons hand. The handle of the device must also be mounted in a manor to prevent angular and rotation movement of the supporting hand from transferring to the camera.
The handle is from a cement trowel, on top of which is a ball bearing mounted to a threaded rod. A PVC fitting was heated to soften it and the bushing pressed in. This bearing is responsible for allowing the rotational freedom between the handle and the camera. To decouple any angular movements, two hinges were attached to the PVC fitting. The hinges are perpendicular to each other, one allows forward-back tilting while the other allows left-right tilting. The upper hinge is attached to a piece of poplar wood that also serves as a base for the camera.
At this point, if you were to try to hold this contraption with the camera installed, it would immediately tip over due to gravity. To prevent this, the center of gravity of the moving parts (including the camera) must be lowered. [John] did this by using some aluminum tubing to support wood weights that reside lower than the pivot points created by the hinges.
If you like the DIYer-style stabilizers, check this other wooded one out. Want something more polished looking? How about this pistol grip stabilizer?
Using A Chicken As A Steadicam

This has been circulating around the net for a bit. For those that haven’t seen it, let me just give you a quick rundown of what is happening. This guy strapped a camera to a chicken’s head. No really, that’s it. There’s some interesting science behind it though. He’s taking advantage of the Vestibulo-Ocular Reflex in the chicken. It is basically the reflex that we use to keep our eyes firmly focused on something while our head is moving. In a chicken however, they move their entire head. This means that he can strap a camera to the chicken’s head and have an instant steadicam. At least that is the theory. As you can see in the video after the break, the harder part is getting the chicken to look at what you want it to look at. We also found a conversation about it with the creator,[MrPennywhistle] in some reddit comments.
Machined Steadicam, Steadier Than The Rest

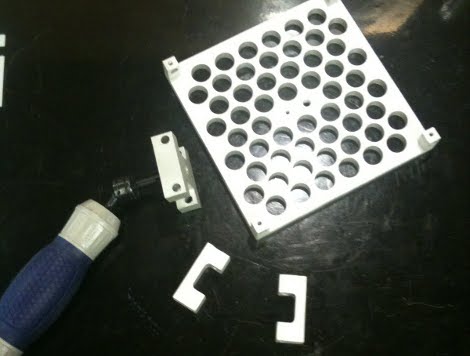
No, the picture above is not a store made steadicam. Rather, a CNC machined one by [Matt]. Interestingly, unlike most steadicams we’ve seen before the gimbal is not the main focus of the design though an aluminum machined gimbal would make us drool. The central idea is allowing for X and Y axis adjustment to get oddly weighted bulky camera’s exact center of gravity. [Matt’s] steadicam is also designed to handle more weight than commercial versions, and (if you already have a CNC) to be much cheaper. There’s no video, but from the skill of craftsmanship we can safely assume it’s as good and level as some of the best.
IPhone 4 Steadicam

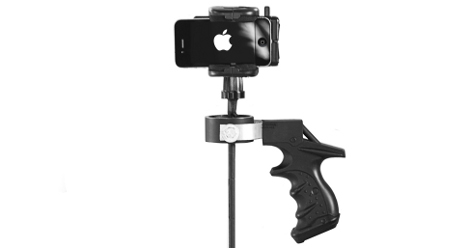
It’s been a while since we’ve seen a steadicam, and to quench our thirst is this iPhone 4 steadicam. The system does use the typical 3 axis PVC gimbal and heavy weight setup that we’ve seen before, but (why has it taken so long to get this implemented?) the addition of a hand grip means you no longer get blistered fingers. The tutorial recommends the use of an expensive cup holder mounting system, but we think making your own epoxy one might save another dime and allow a wider range of cameras or phones.
The whole process is also wrapped up in a quick and simple how-to video (after the jump alongside an in action video), which goes to show even though a hack may have been done several times before, presentation can make a big difference and impact.
[Thanks Max Lee]
Five Updates For The Steadicam

[YB2Normal] has updated his steadicam 5 times! For those that remember the original, it allowed indie film makers to create smooth and steady video. Version 2 implemented a new gimbal based on a throttle linkage in cars. Version 3 allowed the user to easily adjust angles and weights to prevent accidentally knocking the assembly. Version 4 seems to have disappeared. And finally, version 5 updates the gimbal again using a Traxxas U-joint and redistributes the weight. What should come next? We think a handle, holding onto a threaded bolt can’t be good for your hands.
[Thanks Update]


