Soldering Iron Plus Camera Gimbal Helps Cancel Out Hacker’s Hand Tremors

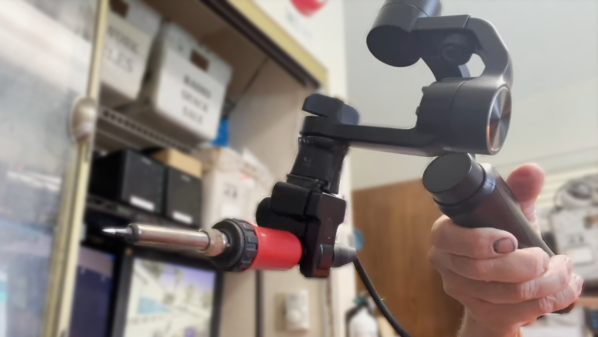
Soldering requires steady hands, so when [Jonathan Gleich] sadly developed a condition called an essential tremor affecting his hands, soldering became much more difficult. But one day, while [Jonathan] was chatting with a friend, they were visited by the Good Ideas Fairy and in true hacker fashion, he ended up repurposing a handheld camera stabilizing gimbal to hold a soldering iron instead of a camera or smartphone. Now instead of the gimbal cancelling out hand movements to keep a camera steady, it instead helps keep a soldering iron steady.
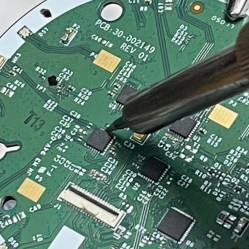
While the inner workings of the cheap gimbal unit didn’t need modification, there were a couple of things that needed work before the project came together. The first was to set up a way to quickly and easily connect and disconnect the soldering iron from the gimbal. Thanks to a dovetail-like connector, the iron can be safely stored in its regular holster and only attached when needed.

The other modification is more subtle. The stabilizer motors expect to be managing something like a smartphone, but a soldering iron is both lighter and differently balanced. That meant that the system worked, but not as well as it needed to. After using some small lead weights to tweak the mass and center of gravity of the soldering iron — making it feel and move a bit more like an iPhone, as far as the gimbal was concerned — results were improved.

The soldering iron stabilizer works well enough for now, but we don’t doubt that [Jonathan] already has further tweaks in mind. This is a wonderful repurposing of a consumer device into an assistive aid, so watch it in action in the short video embedded below.

Continue reading “Soldering Iron Plus Camera Gimbal Helps Cancel Out Hacker’s Hand Tremors”

Print Your Way To Keyboard Stability

Keyboard key stabilizers, or stabs as they’re known in enthusiast circles, do exactly what you’d expect — they stabilize longer keys like the Shifts and the space bar so that they don’t have to be struck dead-center to actuate evenly. Stabs work by flanking the key switch with two non-functional switch actuators linked with a thick wire bar. Some people love stabs and insist on stabilizing every key that’s bigger than 1u, while other people think  stabs are more trouble than they’re worth for various reasons, like rattling.

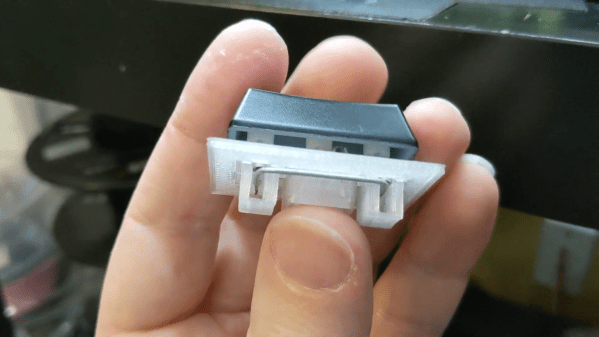
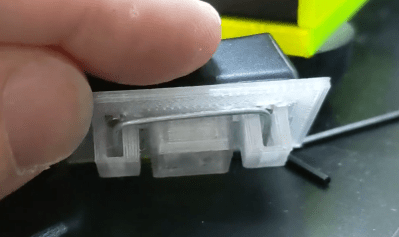
[Riskable 3D Printing] has been working on a parametric, printable stabilizer system for Cherry MX caps that uses small disk magnets to keep the wire in place. As you can see in the video (embedded after the break), the result is a crisp clacker that doesn’t rattle. The magnets stabilize the wire, so it snaps back quite nicely.

Although the print is an easy one, [Riskable] says the design process wasn’t as cut and dried as it seems. The center points of the stabilizer stems aren’t supposed to be in the center of cutouts, even though it looks that way to the naked eye. After that, the pain point has shifted to the wire, and getting it as straight as possible before making the necessary bends. [Riskable] is going to make a straightener to help out, and we suggest something like this one.

Clacker hacking is quite the rabbit hole, especially when combined with 3D printing. We recently saw a completely 3D-printed macro pad, springs and all.

Continue reading “Print Your Way To Keyboard Stability”

Scratch-built Camera Gimbal For Photographer With Cerebral Palsy

We so often hack for hacking’s sake, undertaking projects as a solitary pursuit simply for the challenge. So it’s nice to see hacking skills going to good use and helping someone out. Such was the case with this low-cost two-axis handheld camera gimbal intended to help a budding photographer with a motion disorder.

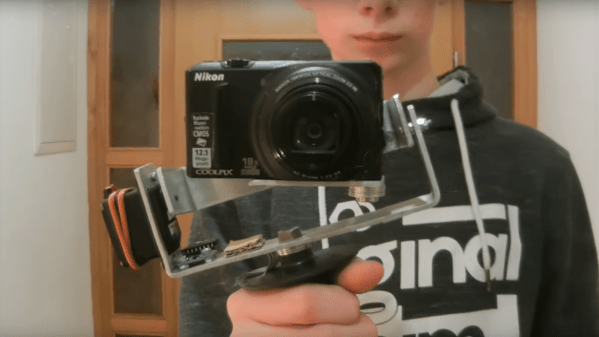
When [Tadej Strah] joined his school photography club, a fellow member who happens to have cerebral palsy needed help steadying cameras for clean shots. So rather than shell out a lot of money for a commercial gimbal, [Tadej] decided to build one for his friend. A few scraps of aluminum bar stock were bent into the gimbal frames and camera mount. Two hobby servos take care of the pitch and roll axes, controlled by an Arduino talking to an MPU-6050. Mounted to a handle from an angle grinder with the battery and electronics mounted below, the gimbal looks well-balanced and does a good job of keeping the camera level.

Hats off to [Tadej] for pitching in and solving a real world problem with his skills. We like to see people helping others directly, whether it’s building a gyroscopic spoon for Parkinson’s sufferers or vision enhancement for a nearly blind adventurer.

Continue reading “Scratch-built Camera Gimbal For Photographer With Cerebral Palsy”

Homemade Camera Stabilizer

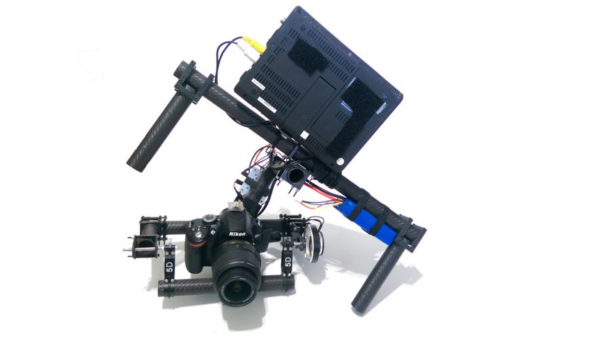
We’ve featured quite a few camera gimbals and steady cams here, but this one stands out. For one, [Daniel Rhyoo] was in his sophomore year when he built it. His 2-axis camera gimbal uses brushless DC motors, and is made out of carbon fiber.

[Daniel] machined the carbon fiber parts on a CNC desktop mill and some hand tools. And he also had to teach himself Solid Works to design it. In his slick DIY guide, he starts off by listing the parts and where to source them from, along with the tools needed. Most gimbals use servos for axis movements, which limits the range and do not provide very smooth motion. Brushless motors overcome these limitations allowing a nice, smooth moving gimbal to be built with a wide range of movement. When [Aleksey Moskalenko] introduced the AlexMos brushless motor controller, [Daniel] ordered it out, and then waited until he could get his hands on the right kind of motors. CAD files for all of the machined parts are available for download (.zip file).

He then goes on to blog his build progress, with ample photos to describe the machining and assembly. He does a couple of nice design choices along the way – like using press-nuts to make assembly and dis-assembly easy, and dismantling one of the motors and replacing its shaft with a custom, longer one instead of using a coupler to extend it. At the end, the result is not only a nice looking, light weight rig, but one that works very well thanks to the motors and controller that he used. Check out the video below to see it in action.

Continue reading “Homemade Camera Stabilizer”

DIY Camera Stabilizer

DIY Camera Stabilizer Takes The Shakes Out Of Filming

We’ve all prematurely stopped watching some Youtube video because of shaky camera work that makes the video unwatchable. There is a solution available for this problem, it’s a device called a camera stabilizer and it is designed to compensate for jerky camera movement. There are several types available for purchase but they can get fairly expensive. Even the cheaper ones at a few hundred dollars are not economical for hobbyists. [John] set out to make his own camera stabilizer using some unorthodox parts.

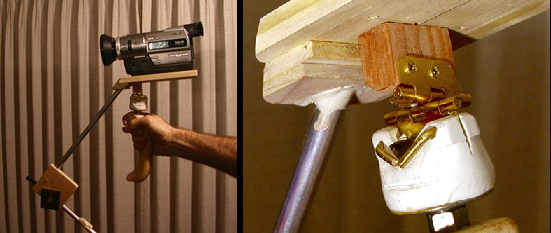
[John’s] chose a gimble style design that effectively lowers the camera’s center of gravity down close to the camera persons hand. The handle of the device must also be mounted in a manor to prevent angular and rotation movement of the supporting hand from transferring to the camera.

The handle is from a cement trowel, on top of which is a ball bearing mounted to a threaded rod. A PVC fitting was heated to soften it and the bushing pressed in. This bearing is responsible for allowing the rotational freedom between the handle and the camera. To decouple any angular movements, two hinges were attached to the PVC fitting. The hinges are perpendicular to each other, one allows forward-back tilting while the other allows left-right tilting. The upper hinge is attached to a piece of poplar wood that also serves as a base for the camera.

At this point, if you were to try to hold this contraption with the camera installed, it would immediately tip over due to gravity. To prevent this, the center of gravity of the moving parts (including the camera) must be lowered. [John] did this by using some aluminum tubing to support wood weights that reside lower than the pivot points created by the hinges.

If you like the DIYer-style stabilizers, check this other wooded one out. Want something more polished looking? How about this pistol grip stabilizer?

DIY Camera Stabilizer Keeps Your Video Shake Free On The Cheap

diy_camera_stabilizer

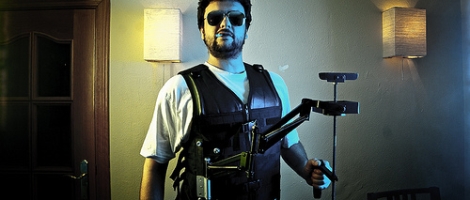
Commercial vest-based camera stabilizer systems are quite expensive, sometimes bearing price tags in the $700-$800 dollar range. Photographer [Miguel Vicente] has a pretty well-stocked workshop and decided there was no way he would shell out that much cash for a rig, so he simply built his own.

“Simply” is a bit of a misstatement, to be honest. The system looks relatively complex, judging by the build videos embedded below. Constructed of steel tubing, custom-built springs, and a really snazzy vest, the rig is adjustable in almost every direction. He has tested its capacity up to 2.5 Kg (roughly 5.5 pounds), though he says it’s pretty unruly to manage at that weight. [Miguel] says that 1.5 Kg (3.3 pounds) is a far more reasonable limit, and that the stabilizer works quite well at or below that weight.

While it looks pretty good to us, he says that there are plans to improve the design even further. One particular point that he wants to address is the ability for the stabilizer to accept asymmetric camera setups, i.e. cameras with attached lighting and microphones.

Stick around to see a short “highlight” film of the build process, as well as a video featuring a more thorough documentation of the stabilizer’s construction.

Interested in more DIY camera equipment?  Check out this overhead camera dolly and this DIY gimbal mount we featured a short while back.

[via Make]

Continue reading “DIY Camera Stabilizer Keeps Your Video Shake Free On The Cheap”