Retrotechtacular: Discovering Electronic Music

retrotechtacular-discovering-electronic-music

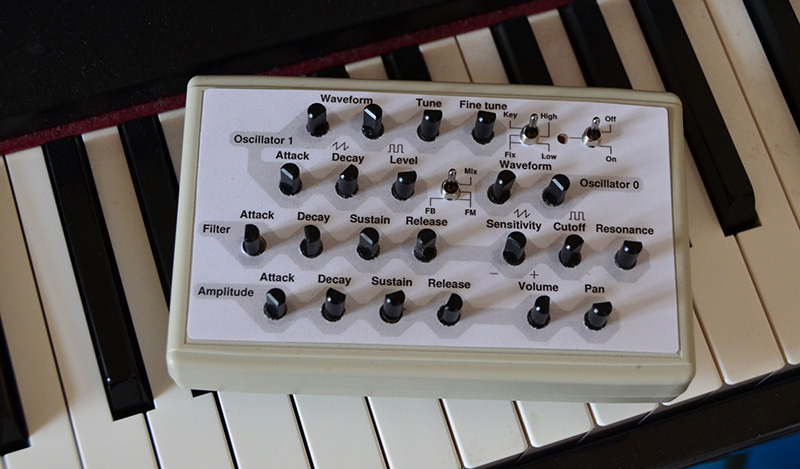
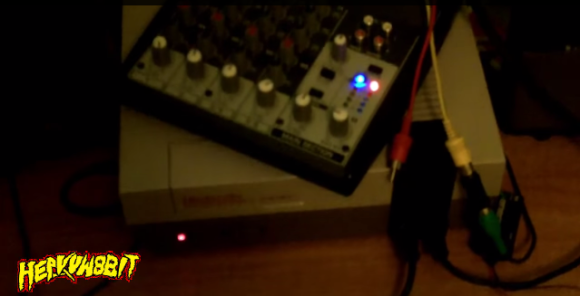
We take it for granted today that a lot of the music we hear includes synthesized instruments and sounds. But looking all the way back to 1983 for this Discovering Electronic Music video series provides a glimpse of the humble beginnings of the technology. The first five minutes of part one may annoy your aurally, but it’s worth it as that’s the point at which we get into sound generation using equipment like that seen above. All three parts in the series are embedded below; about twenty minutes of video in total.

Mixer boards and other control interfaces used today still have a large area of real estate devoted to knobs and adjustments. But they also include a ton of software processing options which weren’t available until computers became both affordable and ubiquitous. What’s shown in the video is a set of hardware interfaces that process signals from oscillators or alter recorded sound. We’ve spent a lot of time marveling about software defined radio and how it’s making RF hacking accessible to the masses. But who here hasn’t done at least a bit of tinkering in electronic music using any of the myriad of audio software? Would you have done that if you needed to build your own envelope and filter circuitry?

Continue reading “Retrotechtacular: Discovering Electronic Music”

Time-lapse Synthesizer Build Will Blow Your Mind

[themonkeybars] recently uploaded a time-lapse video of his DIY synthesizer build. First off the video itself is a pretty neat hack. An iPhone time-lapse app was used to capture one frame every 5 seconds. By the time the build was complete, approximately 46,000 frames had been snapped. This boiled down to over 43 minutes of youtube footage. [themonkeybars] didn’t work full time on the project, so the video covers about a year’s worth of work which we think makes it even cooler. The synth is also featured in much of the video’s soundtrack.

The synthesizer itself would be classified as an analog modular synth, a type we’ve seen before. Modular synthesizers are one of the earlier forms of electronic music. The synthesizer is composed of discrete modules such as oscillators, modulators, and filters. The modules may be housed in the same box, but they are not internally connected. All connections are made via front panel patch cables. This is where the term “Patch” came from. Continue reading “Time-lapse Synthesizer Build Will Blow Your Mind”

Pair Of MIDI Dongles To Inspire Some Weekend Music Hacking

pair-of-midi-dongles

This pair of dongles is a fun way to get your feet wet working with MIDI hardware. They’re called MIDIvampire-I and MIDIvampire-II. Just plug one end into your MIDI-ready instrument and the other into a pair of speakers and you’re off and running. Mark I is a polyphonic synth, and Mark II is a drum machine, but both use basically the same hardware which you may already have on hand.

The single chip on each board is an ATmega328 often found anchoring Arduino boards. The other silicon component is an S1112B30MC voltage regulator. The rest of the components are passives, with MIDI and headphone jacks for connectivity. They’re selling these if you want the easy way out, but we thought we’d bring them to your attention in case you needed a breadboarding project this weekend. The firmware, BOM, schematic, and board artwork are all available on the Wiki pages linked in the articles above. After the break you can see a couple of demo videos which walk through all of the features.

Continue reading “Pair Of MIDI Dongles To Inspire Some Weekend Music Hacking”

Turning A Tiny Linux Box Into A Synthesizer

waveforms

For all the cool things the Raspberry Pi, BeagleBone, and other low-power Linux boards can do, there’s one thing we haven’t seen much of: creating music with software synthesizers. Yes, soft synths have been around for ages now, but compiling them for these ARM boards is something we haven’t seen much of (to say nothing of the Linux audio system). Luckily, [Paul] and [Trev] have put together a tutorial for making synthesizers on these small Linux boards using Csound, the premier audio programming language for Linux.

[Paul] and [Trev] have already put together a few Csound instruments that include a Vangelis-inspired synth, a Lorenz Strange Attractor FM synth, a drum machine, and a classic monophonic style synth. All these instruments are ready to play on a Raspi or BeagleBone and we’re sure we’ll see a few more applications of this great tool for creating musical instruments as more musicians are turned onto these small Linux boards.

Making A Real Instrument Out Of A Kaoss Pad And Ribbon Controllers

swinger

MIDI guitars have been around since the 80s, and nearly without exception they are designed as direct, one-to-one copies of their acoustic and electric brethren. [Michael] has been working on turning this convention on its head with the Misa Tri-Bass, a MIDI guitar designed to be the perfect guitar-shaped synthesizer interface.

The tri-bass doesn’t produce any sound itself; instead, it’s a polyphonic MIDI controller with three channels controlled by three ribbon controllers on the neck. The body contains a huge touch screen divided into four MIDI channels, essentially turning this guitar into an instrument designed for electronic music first, and not an acoustic instrument kludged into filling an electronic role.

Unlike a whole lot of other digital guitar-shaped MIDI controllers, the tri-bass is actually made out of wood. Yes, the neck is made out of maple (inlaid with the three ribbon controllers, of course), and the body comes directly from a tree, with the styling inspired by a forgotten retro-modern design. It’s an impressive piece of kit, and we can’t wait to see [Michael]’s handiwork in the hands of digital guitarists the world over.

You can check out a video of [Michael] rockin out below.

Continue reading “Making A Real Instrument Out Of A Kaoss Pad And Ribbon Controllers”

Building A Synth On A Breadboard

synth

Building an analog synth is a challenge, but with the [Tymkrs] protosynth, it’s easier than ever. It’s a 25-key keyboard attached to a stack of solderless breadboards to make analog synth prototyping a snap.

Earlier, [Tymkrs] acquired a whole bunch of solderless breadboards and decided to put them to use by making a component-level modular synth. The earlier incarnation tied each key on the keyboard to a few wires behind the breadboard and tied them in to a shift register so they could be read with a Propeller dev board loaded up with a Commodore SID emulator. The new version keeps the very clean through-the-back keyboard connector, but this time the [Tymkrs] are adding a few more components that add a sequencer setup and a rotary encoder.

The eventual goal for this really cool breadboard synth is to explore the world of Moogs, Arps, and other analog synths easily on a breadbaord. The [Tymkrs] have already put together a breadboard-compatible low pass and high pass filter. While there’s still a lot of work to be done to make an analog synth a reality, the [Tymkrs] are off to a great start.

Continue reading “Building A Synth On A Breadboard”

Quick And Dirty Touch-sensitive Keyboard Project

quick-dirty-touch-sensitive-keyboard

You don’t have to have high-quality parts to play around with electronics and here’s a great example. [Vishal] used junk to play around with CapSense, the touch sensitive Arduino library. What he ended up with is this touch-based piano keyboard.

We’ve featured the CapSense library in the past, but even that example uses a very meticulously crafted test rig of foil tape, protoboard, and some resistors. If you still haven’t given it a try follow this example of using aluminum foil, electrical tape, and a cardboard box.

[Vishal] just sandwiched the end of jumper wire between two pieces of foil to make each ‘key’. We believe the other end of the wire is soldered to the bias resistors where they connect to a couple of pin headers. The headers were hot-glued in place through holes in the bottom of the box, making the entire rig simple to plug into the Arduino board driving it. After adding in a small speaker and flashing the code he’s finished. It certainly makes for a short afternoon project which you won’t feel bad about taking apart later since you didn’t sink a ton of time or resources into the build.