Hacking Laser Tag And Building Custom Guns

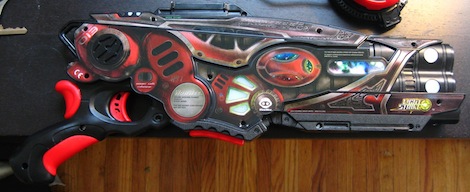
As [Brad] over at the LVL1 hackerspace watched his friend build a Laser tag/tazer mashup for Makerfaire Detroit 2012, he noticed these new laser tag guns were really cool. These Light Strike guns have an impressive array of electronics for a $30 toy, but there was still much to be desired. [Brad] decided to reverse engineer these guns and work on a drop-in replacement for the game’s electronics so people like his friend can hurt themselves more easily.

The Wowwee Light Strike guns operate with IR LEDs, so the obvious solution for decoding the laser tag protocol would be the Arduino IR remote library. [Brad] had a bit of trouble getting his Teensy to read the IR data correctly, but after connecting everything up to a logic analyzer he had the data format figured out.

Now [Brad] has the Light Strike data format figured out and is theoretically able to make his own guns that are compatible with the off-the-shelf laser tag system. It’s also possible for [Brad] to extend the capabilities of this laser tag system by using the ‘health’ function to create a medi gun, or build a gun with a larger magazine for a laser tag mini gun.

If you’d like to build your own version of laser tag compatible with the Wowwee Light Strike, you can grab all the code on [Brad]’s git.

Reclaiming The Numpad For Laptop Users Everywhere

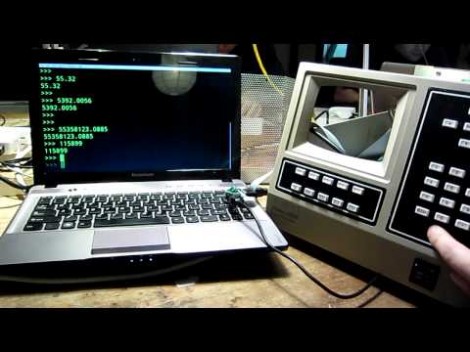
We have to agree with NYCResistor, the exclusion of numeric pads from laptops is a real loss for productivity. Ever try to working with a huge spreadsheet ledger without a 10-key? Sure, there are usually function key alternatives hiding somewhere on those reduced keyboards. But that’s hardly the same thing. We think it’s time to take back the numpad. This project shows you how easy it is by using some old time lab equipment to replace the missing keys.

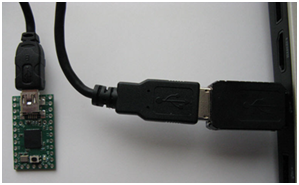
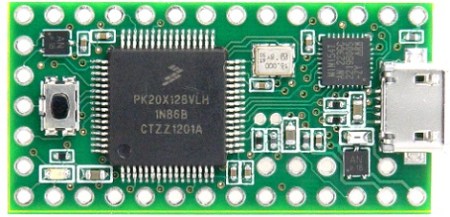
They’re using a Teensy microcontroller board to translate the key matrix into USB inputs. Most of the work is already done for you because of the USB HID Keyboard library available for the development board. Scanning your own key matrix, or decoding the buttons from some rad hardware like this Walters 600E is up to you. A demo of the rig in action can be found after the jump.

Is there anyone else who wishes the 10-key had an ‘X’ on it for coding hex values? Perhaps that will be a future project for us.

Continue reading “Reclaiming The Numpad For Laptop Users Everywhere”

Counting Bees

This is the bee counter which [Hydronics] designed. It’s made to attach to the opening for a hive, and will count the number of bees entering and exiting. We’re not experienced bee keepers ourselves (in fact we’re more of the mind of getting rid of stinging beasties) but we understand their important role in agriculture and ecosystem so we’re glad someone’s making a nice home for them.

Most of the apparatus is a circuit board lined with reflective sensors. There is a double-row of pin sockets on the top of the board which accepts the Teensy+ which monitors those sensors. The bees must pass below this PCB every time they enter or leave the hive, thereby tripping a sensor. In the video after the break [Hydronics] shows off the system with a netbook used to monitor the output. But it sounds like he has plans for an integrated display system in future versions of the bee counter.

Continue reading “Counting Bees”

Building Sensors For The Scratch Programming Language

[Kevin Osborn] is making it a bit easier for young programmers to write programs that interact with the physical world. The device he’s holding in the picture is an Arduino based accelerometer and distance sensor meant for the Scratch language.

Scratch is a programming language developed at MIT. It has kids in mind, and focuses on graphical building blocks. This can make it quite a bit easier to introduce youngsters to programming concepts without the roadblocks and gotchas that come with learning syntax.

As you can see in the clip after the break, [Kevin’s] Arduino sketch includes hooks that automatically pull the accelerometer and distance data into the Scratch environment. We figure his example provides everything you need to get just about any type of sensor up and running, be it a magnetometer or LDR (both of which would make a nice burglar-alarm type project). Give it a try with your own hardware and see what you can accomplish.

Continue reading “Building Sensors For The Scratch Programming Language”

Huge Water And Light VU Meter Plus More

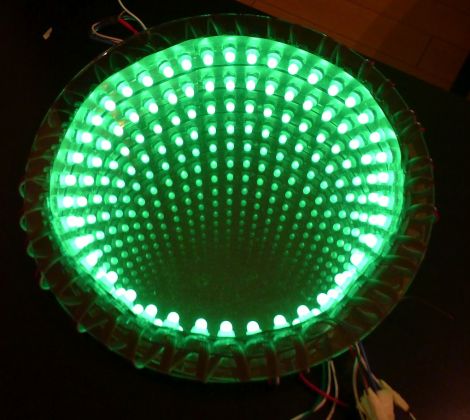
This is the senior design project for a group at the University of Vermont. It’s a wet, bubbly, blinky, interactive thing. Each column is a clear tube filled with water, with a string of fully addressable RGB LEDs suspended in the center. In idle mode, the lights scroll through a series of interesting patterns while the water is filled with bubbles to add some depth to the presentation. There is also a VU meter function, as seen here and during the Portal theme song that ends the video demo after the break.

A Teensy++ board is used to address the display. It’s set up to receive serial commands from a Processing script which is responsible for generating the animations. At the top of the frame you can see there’s a Kinect sensor. By standing in the standard post (we think it should be called the Kinect mug shot) the installation will automatically switch over to body control. We could see this thing making its way into a long airplane terminal hallway, following the travelers along their trek from one terminal to the next.

Continue reading “Huge Water And Light VU Meter Plus More”

Control Your PC With A Remote

Because his computer is gradually turning into an all-inclusive media display device, [Shawn] figured a remote to control the volume and a video playlist would be a reasonable addition. TV remotes for computers have been around for years, but [Shawn] decided to go the DIY route and build his own computer remote.

For the build, [Shawn] used a Teensy dev board with an IR receiver module and the requisite infrared remote library. To translate infrared signals to keyboard commands,[Shawn] decided to base his project off a previous build that used a small program called AutoHotKey.

Right now the build can cycle through a pre-defined YouTube and Shoutcast playlist and change the volume of the currently playing track. There’s also support for moving the mouse with directional buttons on the remote, but we’re wondering if a better implementation would be using the Windows multimedia keyboard scan codes that should be supported by [Shawn]’s laptop.

Still, [Shawn] managed a very nice build that would fit into our computer battlestations quite nicely. Check out the demo of the remote in action after the break.

Continue reading “Control Your PC With A Remote”

Building A Keyboard From Scratch

After over a year of work, [dmw] is nearly done with his Humble Hacker Keyboard. It’s a keyboard that has been influenced by some pretty crazy looking designs, but meets all of [dmw]’s needs for a compact, programmer-oriented key layout that’s easy to type on.

[dmw] posted a pseudo-build log  over at the geekhack keyboard forums. Every single part of this keyboard is custom-made. The key caps were made by Signature Plastics, the case was made by Shapeways, and the custom PCB for the key switches came directly from Express PCB. The key switches are blue Alps sliders (one of the best key switches available) with a few white Alps switches taken from an old Apple keyboard.

After soldering a hundred diodes and switches, [dmw] installed a Teensy++ to convert the closing key switches to something his computer can understand. This turned out to be a perfect of the Teensy because of the USB peripheral libraries that already exist. The source is up on github, so if you’ve ever wanted to replace your Model M with something more ergonomic, here’s your chance.