Clever And Elegant Tilt Sensors From Ferrofluid

Let’s talk about tilt sensors for a second. The simplest tilt sensors – the dead simplest – are a few ball bearings rolling around in a small metal can. When the can is tilted, the balls roll into a pair of electrical contacts, completing the circuit. How about a drop of mercury in a glass ampule with a few contacts? Same thing. You can get more expensive tilt sensors, including a few that are basically MEMS gyros, but they’re all pretty much the same. For [Aron]’s project for the Hackaday Prize, he’s come up with a tilt sensor that is so clever, so innovative, and so elegant, we’re gobsmacked by his creativity.
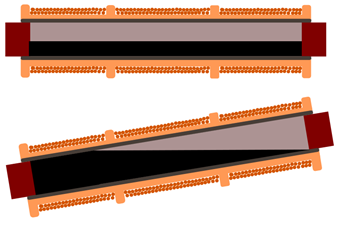
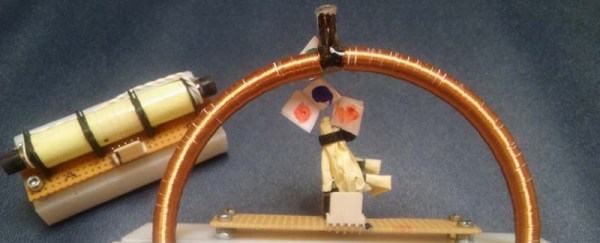
5700111461442877186Instead of electrical contacts or gyroscopes, [Aron] is using induction to measure the tilt of a sensor. By wrapping a tube with one long primary winding of copper wire, and several secondary windings in various places, [Aron] built a Linear Variable Differential Transformer. If you insert an iron rod inside this transformer, different voltages will be induced in the primary. Simple, and this device is effectively a position sensor for any ferrous material.

Now for the real trick: put ferrofluid in the core of that transformer. Liquids always find their level, and different tilts will induce different voltages in the primary. Brilliant. Continue reading “Clever And Elegant Tilt Sensors From Ferrofluid”

Reverse Engineer Your Robot Lawnmower

Your home is your castle, and you are king or queen of all you survey. You’ve built your own home-automation system from scratch. Why would you possibly settle for the stock firmware in your robotic lawnmower? [Daniel Wiegert] wouldn’t either, so in Project Landlord he has started to reverse-engineer it.

You can hardly blame him. The Worx Landroid‘s controller board uses an NXP LPC1768 ARM Cortex-M3, and the debug pins are labelled on the backside. The manufacturer didn’t protect the flash memory. It’s just begging to have its firmware dumped. So far, [Daniel] has managed to both brick and unbrick the device, and has completely mapped the controller’s pinout, so he’s on his way to complete control.

Right now, he’s got a working proof-of-concept firmware on his GitHub that’s able to drive the machine around a little bit and set the brakes. It’s running FreeRTOS, and [Daniel] is looking for other people to get in on the project. He’s done the hard initial work, so get in there and reap the rewards! Just don’t neglect to remove the blade before custom firmware.

Will custom firmware in a robotic lawnmower change the world? Probably not. But it is awesome, and will certainly make a difference in the lives of people whose robot mowers continually get stuck behind the hydrangeas.

The HackadayPrize2016 is Sponsored by:

An Open Source Lead Tester

If you’ve ever needed an example of colossal failure of government actors, you need only to look at Flint, Michigan’s water crisis. After the city of Flint changed water supplies from Detroit to the Flint river, city officials failed to add the correct corrosion inhibitors. This meant that lead dissolved into the water, thousands of children were exposed to lead in drinking water, a government coverup ensued, [Erin Brockovich] showed up, the foreman of the Flint water plant was found dead, and the City Hall office containing the water records was broken into.

Perhaps inspired by Flint, [Matthew] is working on an Open Source Lead Tester for his entry into the 2016 Hackaday Prize.

[Matthew]’s lead tester doesn’t test the water directly. Instead, it uses a photodiode and RGB LED to look at the color of a lead test strip. These results are recorded, and with a bit of a software backend, an entire city can be mapped for lead contamination in a few days with just a few of these devices.

One problem [Matthew] has run into is the fact the Pi does not have analog to digital conversion, making reading a photodiode a little harder than just plugging a single part into a pin header and watching an analog value rise and fall. That really shouldn’t be a problem – ADCs are cheap, especially if you only need a single channel of analog input with low resolution. [Matthew] is also looking into using the Pi webcam for measuring the lead test strip. There are a lot of decisions to make, but any functional device that comes out of this project will be very useful in normal, functioning governments. And hopefully in Flint, Michigan too.

The HackadayPrize2016 is Sponsored by:

Detecting Beetles That Kill Trees, Make Great Lumber

All across southern California there are tiny beetles eating their way into trees and burrowing into the wood. The holes made by these beetles are only about 1mm in diameter, making them nigh invisible on any tree with rough bark. Trees infested with these beetles will eventually die, making this one of the largest botanical catastrophes in the state.

AmbrosaMaple
Ambrosia maple, the result of these beetles boring into maple trees. Although ambrosia maple is arguable prettier, it is significantly cheaper than hard maple, making trees infested with beetles less valuable. Image source: [ironoakrva]
For [Joan]’s project for the 2016 Hackaday Prize, she’s working on a project to detect the polyphagous shothole borer, the beetle that drills into trees and eats them from the inside out. This is a surprisingly hard problem – you can’t look at the inside of a tree without cutting it down – so [Joan] has turned to other means of detecting the beetle, including listening for the beetle’s mastications with a stethoscope.

Although these ambrosia beetles will burrow into trees and kill them, there is another economic advantage to detecting these tiny, tiny beetles. The fungi deposited into these beetle bore holes make very pretty wood, but this wood is less valuable than lumber of the same species that isn’t infested with beetles. It’s a great project for the upcoming Citizen Science portion of the Hackaday Prize, as the best solution for detecting these beetles right now is sending a bunch of grade school students into the woods.

The HackadayPrize2016 is Sponsored by:

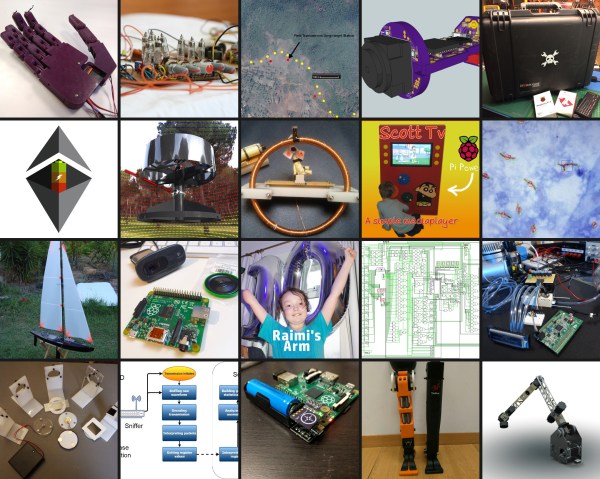
These 20 Projects Won $1000 In The Hackaday Prize

Since March, hundreds of hardware hackers around the globe have been hard at work designing and planning their entry into this year’s Hackaday Prize. The second challenge is now under way, a brand new chance for you to enter your own project. For inspiration, here are the top twenty entries from the first part of the Hackaday Prize.

The first challenge, Design Your Concept had 555 entries which we’ve spent the past week poring over. Now it’s time to reward the best of that first round with $1000 and a chance at winning the Hackaday Prize – $150,000 and a residency at the Supplyframe Design Lab in Pasadena.

The winners of Design Your Concept, in no particular order, are:

These twenty projects continue on to compete in the last phase of the Hackaday Prize. Congrats! Now get to work: you have a lot to do before the Hackaday Prize finals in October.

If your project didn’t make the cut – or you haven’t started one yet – don’t worry. Until the end of May we’re running the second challenge for this year’s Hackaday Prize. Anything Goes in this round and we’re looking for the craziest, most ostentatious, and most nonconformist project out there. Want to put the Internet of Socks on the blockchain? This challenge is right up your alley.

Anything Goes is a brand new challenge to solve a problem with technology and Build Something That Matters. Until the end of May, we’re opening up the gates for hackers, designers, and engineers to build whatever they want.

If you don’t have a project up on Hackaday.io, you can start one right now and submit it to The Hackaday Prize. If you already have a project up, add it to the Anything Goes challenge using the dropdown menu on the left sidebar of your project page.

The HackadayPrize2016 is Sponsored by:

Upgrading A 20 Year Old PDA

Before we had our iDevices and Androids, even before Blackberry, we had PDAs. The most famous of these mid-90s computing appliances are the Apple Newton and the Palm products, but the world of 90s PDAs was significantly more diverse than these two devices. Palm had a competitor in Handspring who released a cheaper and better version of a Palm OS device with the Visor. HP made hardware at one point, and you could run Windows – including Excel and Word – on a handheld device in 1998.

A company name Psion made PDAs with a clamshell design and a keyboard back then, too. Disregarding the operating system, these little clamshell PDAs could arguably be called the forerunners of yesterday’s netbooks and today’s Surface tablets. [RasmusB] is turning his Psion 5 PDA into something modern by replacing all the important bits while still keeping the clean design of this 20-year-old PDA.

The goal of this project is to completely replace the electronics of the Psion 5, while keeping all of the mechanics. That means the keyboard will stay the same, the device will run off of two AA batteries, and all the switches and ports will work. This effort began by making the Psion keyboard Arduino compatible by reverse engineering the keyboard matrix with a pencil and paper, and turning the keyboard into a USB keyboard.

Efforts to turn this Psion into a modern device are ongoing, but at least the outline of the main board is now in KiCad, with a microcontroller to decode the keyboard, switches for the lid and other buttons, and the correct space for the CompactFlash card and battery contacts. The next step is selecting a microprocessor and designing a circuit, but [Rasmus] is off to a great start to make this ancient PDA a modern computing device.

The HackadayPrize2016 is Sponsored by:

Refreshable Braille Display And Braille Keyboard

Only about 10% of blind people around the world can read Braille. One primary reason is the high cost of Braille displays. The cost is a result of their complexity and reliability – required to ensure that they are able to handle wear and tear.

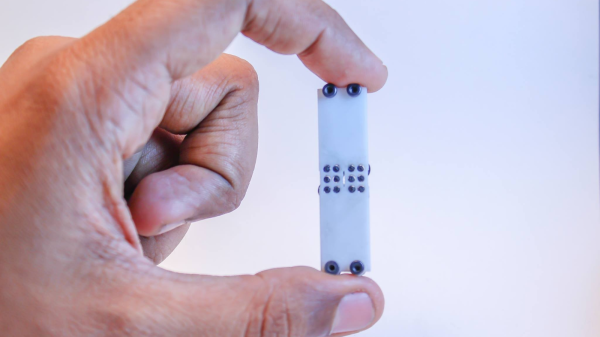
[Vijay] has been working since 3 years on a Refreshable Braille Display but has only recently been able to make some substantial progress after teaming up with [Paul D’souza]. During his initial experiments, he used dot matrix printer heads, but the current version uses tiny vibration motors as used in mobile phones. He’s converting rotary motion of the tiny motors in to linear movement for pushing the Braille “cell” pins up and down. The eccentric weight on the vibration motor is replaced with a shaped cam. Continuous rotation of the cam is limited by a stopper, which is part of the 3D printed housing that holds the motors. Another 3D printed part has three cam followers, levers, springs and Braille pins rolled in one piece, to create half a Braille cell. Depending on the cam position, the pins are either pushed up or down. One Braille cell module consists of two cam follower pieces, a housing for six vibration motors, and a cover plate. Multiple modules are chained together to form the display.

The next step would be to work on the electronics – in particular ensuring that he is able to control the motor movement in both directions in a controlled manner. Chime in with your comments if you have any ideas. The 3D design files are available from his Dropbox folder.

Continue reading “Refreshable Braille Display And Braille Keyboard”