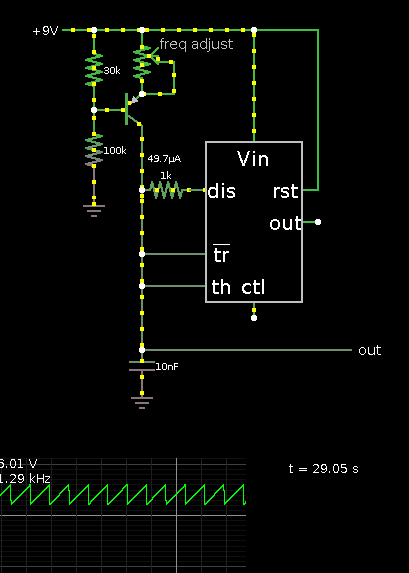
Sometimes you use a Raspberry Pi when you really could have gotten by with an Arudino. Sometimes you use an Arduino when maybe an ATtiny45 would have been better. And sometimes, like [Bill]’s motorcycle tail light project, you use exactly the right tool for the job: a 555 timer.
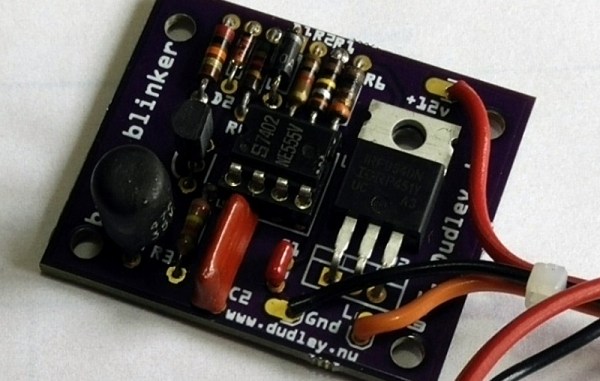
One of the keys of motorcycle safety is visibility. People are often looking for other cars and often “miss” seeing motorcyclists for this reason. Headlight and tail light modulators (circuits that flash your lights continuously) are popular for this reason. Bill decided to roll out his own rather than buy a pre-made tail light flasher so he grabbed a trusty 555 timer and started soldering. His circuit flashes the tail light a specific number of times and then leaves it on (as long as one of the brake levers is depressed) which will definitely help alert other drivers to his presence.
[Bill] mentions that he likes the 555 timer because it’s simple and bulletproof, which is exactly what you’d need on something that will be attached to a motorcycle a be responsible for alerting drivers before they slam into you from behind.
We’d tend to agree with this assessment of the 555; we’ve featured entire 555 circuit contests before. His project also has all of the tools you’ll need to build your own, including the files to have your own PCB made. If you’d like inspiration for ways to improve motorcycle safety in other ways, though, we can suggest a pretty good starting point as well.