NES Controller Uses Capacitive Touch Instead Of Buttons

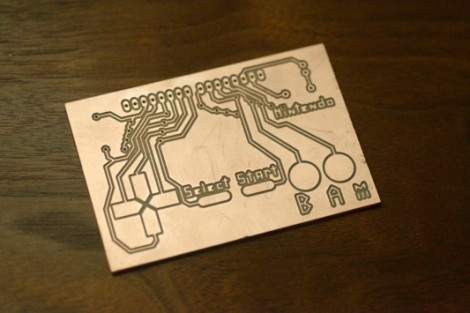
Here’s one way to really keep the component count low. [David] developed an NES controller that doesn’t use any buttons. The copper clad has been milled to provide a pad which registers a button push based on capacitance. The board has a SIL header at the top, making it easy to plug into the Arduino board that reads the inputs.

[David] had trouble getting the Arduino pin read functions to respond fast enough for he NES console’s expectations. He ended up using commands to access the ATmega’s peripherals directly in order to achieve the target timing. Speaking of, he did his own sniffing of the communication scheme using a logic analyzer. The results of that work, as well as the board files and code are available at the site linked above. And there’s a demo of the controller used to play Super Mario Bros. in the clip after the break.

This is actually a tangential project using a PCB mill which he’s developing through Kickstarter. This certainly shows that the mills works as designed.  Continue reading “NES Controller Uses Capacitive Touch Instead Of Buttons”

Simple Touch Sensors With The Arduino CapSense Library

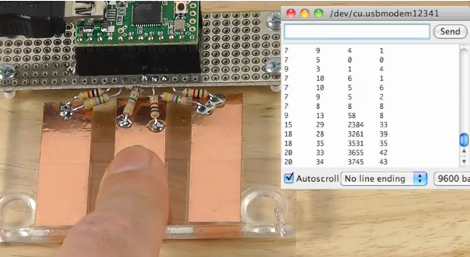
Ever thought of using touch sensors on your projects but didn’t because it would be too much work? [Paul Stoffregen] proves that it can be pretty easy if you use the CapSense library for Arduino. Here he’s created three touch sensors, connecting them to the Teensy microcontroller with two resistors each. The larger resistor (looks like 4.7 megaohms here) sends a signal through the copper pad which is read by the secondary pin. Here that pin is protected from electrostatic discharge with the 1k resistors. The microcontroller takes a reading by measuring how long it takes the voltage to change on the input pin.

Since the CapSense library takes care of the timing involved in these readings, all you have to do is decide how your program will react to the numbers that are coming in. In the video after the break [Paul] is echoing the timing figures back through the serial monitor to get an idea of what the data looks like. He experiments with touching the copper directly, and touching it through a piece of clear tape.

We’ve seen the CapSense library at work before in this interactive exhibit piece.

Continue reading “Simple Touch Sensors With The Arduino CapSense Library”

Keypad Uses A PIC’s Built In Capacitance Functionality

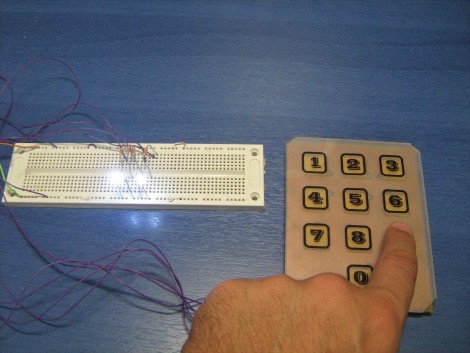
[Giorgos Lazaridis’] most recent project was to build a capacitive touch pad. Since he’s using a PIC 16F1937 it will be relatively easy. That’s because it has a 16 channel capacitance sensing module built right in. But there are still some design considerations that make the development a bit touching.

This isn’t the first time he’s worked with capacitance sensing. Through past experience he has found that it is very important to position the microcontroller as close to the button pads as possible. Because of this, the chip is soldered on the back of the PCB used for the keypad itself. Because he’s hand soldering vias, he also used some foam tape to raise the button pads just a bit. This way they will be flush with the acrylic overlay, which cannot sit flat on the board due the via solder joints.

Check out the video after the break to hear [Giorgos] walk us through the project.

Continue reading “Keypad Uses A PIC’s Built In Capacitance Functionality”

Capacitive Touch Sensor Shield For The TI Launchpad

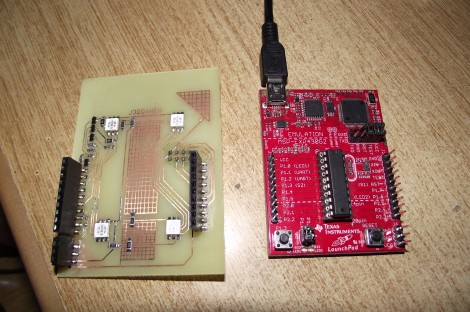
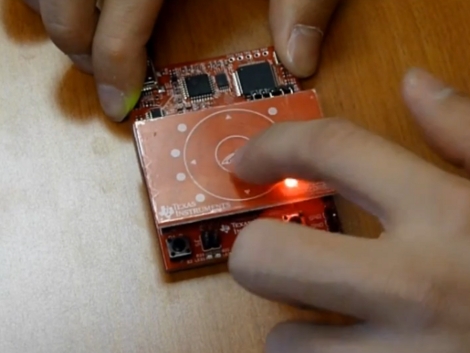
Texas Instruments just released a product they call the Capacitive Touch Boosterpack which is basically a touch-sensitive shield for the Launchpad. The video after the break shows an unboxing and demonstration of the product which TI is launching with a $4.30 limited-time price tag. The red PCB itself has a capacitive touch button in the center, surrounded by a touch-scroll wheel, which is centered in a proximity senor that takes up the rest of the board. There are also nine LEDs which look like they’re soldered on the underside of the board, through routed holes that mount them flush with the top surface. The pack also comes with a new MSP430 microcontroller, the G2452, which has 8 KB of flash memory and takes care of calibrating, reading, and processing signals from the board thanks to the software package that goes along with the add-on kit.

Looks quite nice. There’s a heck of a lot of information in the documentation for this hardware. We do wish it was a bit easier to find board layout information, but we’re sure it’s there somewhere.

Continue reading “Capacitive Touch Sensor Shield For The TI Launchpad”

Touch Sensors: Overview, Theory, And Construction

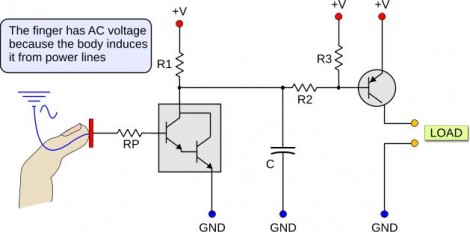
This collection of touch sensor information should be of interest to anyone who liked the simple touch sensor post from Thursday. That was a resistive touch sensor and is covered in detail along with AC hum sensors that trigger based on induced current from power lines around you, and capacitive touch switches like we’ve seen in past hacks. Each different concept is discussed and clearly illustrated like the slide above. [Giorgos Lazaridis] has also put together individual posts that build and demonstrate the circuits. We’ve embedded his resistive sensor demo video after the break and linked to all three example circuits.

Continue reading “Touch Sensors: Overview, Theory, And Construction”

Making Music With Tech Stolen From Predator

This is a second generation Manta, a touch-based controller with visual feedback made to use with Max/MSP. The hexagonal size and the patterns seen in the video after the break remind us of the arm-based computers the Predators sport in the movies. Like the previous generation, this controller can tell not only which of the 48 sensor you’re touching, but how much of your finger is touching it. The sky is the limit on extensibility with this type of data, but for now you can just try out the pre-built plugin and see how it goes. New with this rendition of the Manta is the use bi-color LEDs which adds another lay of interaction with the PC to which this is tethered.

If you don’t mind giving up the touch controllers for good old push buttons perhaps this Harmonic Keyboard is right up your alley. Continue reading “Making Music With Tech Stolen From Predator”

Keyless Entry Using Touch Sensing

[Alex] sent us this slick little keyless entry system. He wanted a discreet way to trigger the door to unlock. Knocking was too loud, and would give away his secret access code. He decided that touch sensors would be the best. Initially he planned on using the doorknob itself, which would have been awesome, but it was just too much surface area for his touch sensor. Ultimately, he settled for a wire he could touch.  An Arduino detects whether or not the correct code has been put in and initializes a high torque servo which turns the doorknob from the inside.  In the video, after the break, you can see that it works fairly well.

Continue reading “Keyless Entry Using Touch Sensing”