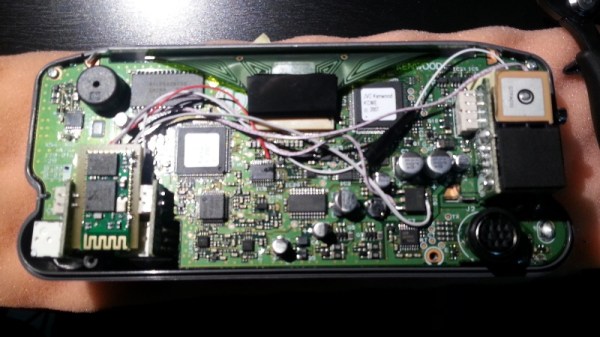
While [Selim Olcer] was relatively happy with his Kenwood TM-D710a radio, he didn’t like the fact that it needed a bulky external GPS “backpack” for APRS location data. So he decided to crack open the head unit and see if he couldn’t integrate his own GPS hardware (machine translation). Not only did he succeed, but he even threw in Bluetooth compatibility for good measure.
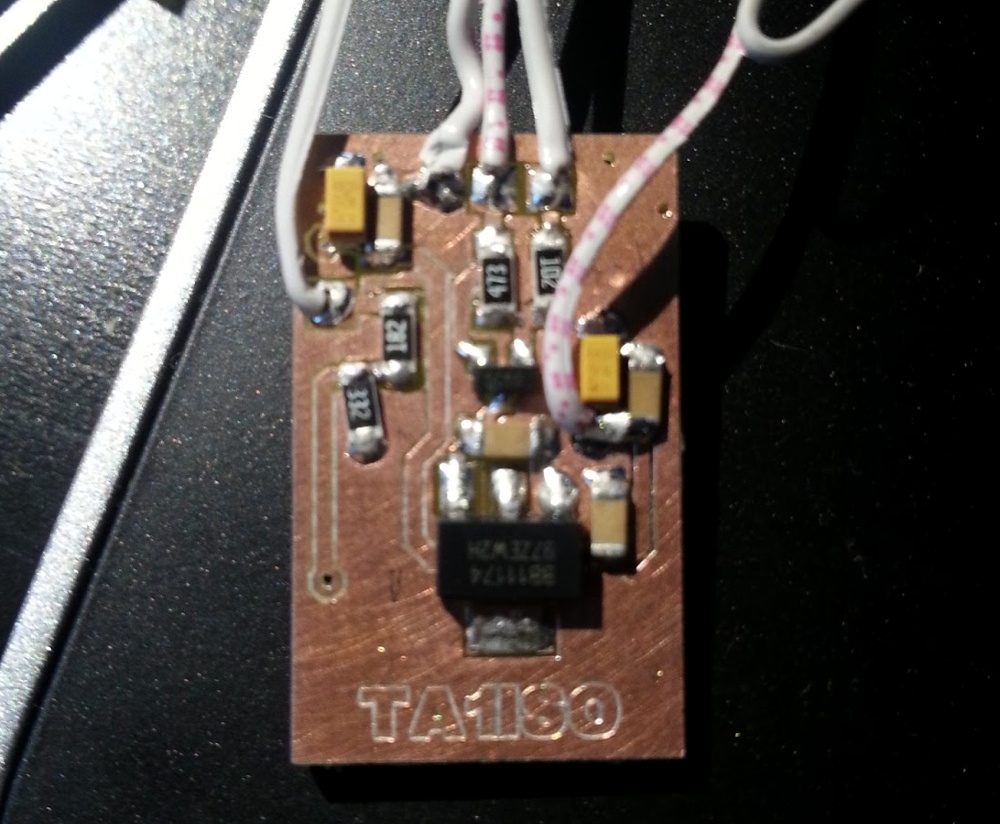 With the repair manual circuit diagrams in hand, it was no problem to find the GPS RX and TX lines that were being broken out to the external connector. Unfortunately, the radio’s electronics are all 5 volts and the GPS module [Selim] wanted to use was only 3.3 V. So he came up with a small PCB that included not only the voltage regulator to power the GPS module, but also some voltage-dividers to level shift those signals.
Since the Kenwood TM-D710a was already designed to accept a GPS upgrade module, he just needed to change some configuration options in the radio’s menus for it to see the new hardware. Technically the project was done at this point, but since there was still room in the case and he had a GPS module spitting out NMEA sentences, [Selim] tacked on a common Bluetooth serial module so he could see the position information on his smartphone. With an application like APRSdroid, he now has a nice moving map display using the position pulled from the radio’s GPS.
With this modification done it looks like the head unit is ready to go, but that’s only the beginning for a mobile rig. Now we want to see how he integrates the whole thing into the car.