Vacuum Tube

Vacuum Tube Repair After A Spectacular Failure

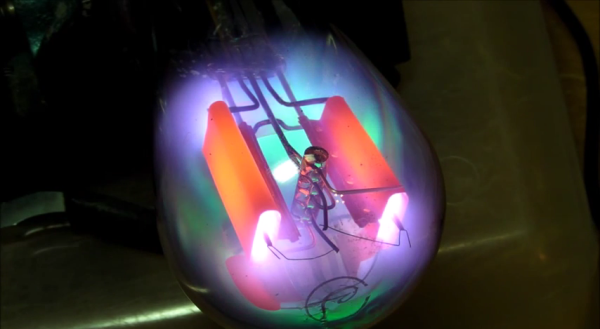
[Eric] has an Atwater Kent 55C AM radio from the early 1900’s. He’s been trying to restore the radio to proper working condition. His most recent pain has been with the rectifier tube. The tube is supposed to have a complete vacuum inside, but that’s not the case here. When the tube is powered up, it glows a beautiful violet color. It may look pretty, but that’s indicative that gas has leaked into the tube. It needed to be replaced.

[Eric] had a tube that would serve as a good replacement, but it’s plug didn’t fit the socket properly. He was going to have to use this old broken tube to make an adapter. Rather than just tearing the old tube apart, he decided to have some fun with it first. He hooked it up to a variac, an ammeter, and a volt meter. Then he slowly increased the voltage to see what would happen. The result was visually stunning.

The tube starts out with the same violet/blue glowing [Eric] experienced previously. As the voltage increases, it gets more and more intense. Eventually we start to see some green colors mixing in with the violets. [Eric’s] reaction to this unexpected result is priceless. As the tube gets increasingly hot, the anode starts glowing an orange-red color. Finally, the filament starts to crackle like a sparkler before the tube just gives up and completely fails.

After the light show, [Eric] moves on to replacing the tube. He begins by tapping on the old tube’s socket with the end of a screwdriver. After much tapping, the glass starts to come lose from the socket. After a bit of wiggling and twisting the tube finally came free from the socket. [Eric] luckily had an unused octal socket that fit perfectly inside of the old socket. All he needed to do to build his adapter was to connect the four pins from the old adapter to the proper pins on the octal socket. Piece of cake.

…Or so [Eric] thought. After testing some new tubes with a tube tester, he realized he had soldered all four pins incorrectly. On top of that, he had super glued the adapter together. He eventually got the two pieces apart. This time he removed all of the unused pins from the octal socket so he wouldn’t get it wrong. Another run on the tube tester confirmed that everything looked good. After plugging the tube into the radio, it worked just as expected

If you need fabrication rather than repair, we’ve got you covered there as well. Check out [Charles Alexanian’s] process for making new vacuum tubes in his garage. Now if you just have too darn many of them around, you can always decorate your pad with ’em.

Continue reading “Vacuum Tube Repair After A Spectacular Failure”

Small, Detailed Nixie Clock Build

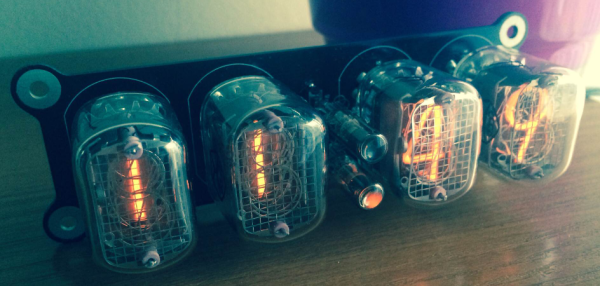
Nixie tubes, while built during the vacuum tube era of the mid-20th century, still exist in a niche among hackers. It’s quite the task to get them up and running due to a number of quirks, so getting an entire clock to work with Nixie tubes is a badge of honor for those who attempt the project. For anyone thinking about trying, [Tomasz] has written an extremely detailed write-up of his Nixie clock which should be able to help.

There is a lot of in-depth theory behind Nixie tubes on [Tomasz]’s page that he covers in the course of describing his clock. As far as the actual project is concerned, this is a simplified design which uses one board for the entire clock, including circuits for the lamps, drivers, microcontroller, power supply, and DC/DC conversion. This accomplishes his goal of making this project as small as possible. The Nixies he chose were IN-12 which are popular in his Eastern European home, but could be sourced from eBay and shipped anywhere in the world.

There is a lot of documentation on the project site, including schematics, microcontroller code, PCB design, and even screenshots of the oscilloscope for various points in the circuit. While this might not be the simplest Nixie clock ever, it is certainly close, more easily readable, and the most detailed build we’ve seen in a while!

[Glasslinger] Builds Tiny Tubes

In the early days of transistors, RCA and GE were battling against silicon with ever smaller vacuum tubes. These tubes – Nuvistors, Compactrons, and some extremely small JAN triodes were some of the tiniest tubes to ever be created. [glasslinger], YouTube’s expert on DIY valves, is pretty close to beating the tiniest tubes that were ever manufactured. He’s created a miniature diode and triode that are about 1/4″ in diameter and 1″ long.

The most difficult part of making a vacuum tube is getting a perfect glass seal around the pins. For this, [glasslinger] is using very fine tungsten wire and glass beads. A bead is placed around each wire, mounted in a stand, and melted together with a torch.

A diode is simple as far as tubes go, requiring only a filament between two pins. [glasslinger] is just stringing a fine piece of wire between two pins and welding them on with a miniature spot welder. After that, it’s just an issue of melting a 1/4″ glass tube to the base of the tube, putting it under vacuum overnight, and sealing it shut.

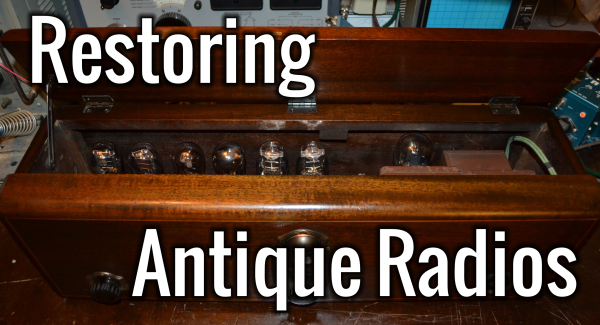
Welcome To The Old School: Restoring Antique Radios

Before the second world war Radio was a revolution in mass-communication much like the internet today. Fortunes were made and lost, empires built, epic patent battles ensued, all of which resulted in the world being more connected than ever before, which makes for a really great story (and a great Ken Burns documentary).

Last month we showed you how to modify a vintage radio to play your own audio source through it while re-using the existing electronics and maintaining its functionality. In this post we will show you how to restore any vacuum tube radio. You will learn basic repair/restoration procedures from a different era when it was actually worth repairing consumer electronics. Plug into history and get your hands on the most influential technology of the first-half of the 20th century!

Continue reading “Welcome To The Old School: Restoring Antique Radios”

Keep Those Filaments Lit, Design Your Own Vacuum Tube Audio Equipment

It was a cold January Saturday night in Chicago and we had big plans. Buddy Guy’s Legends bar was packed. We setup directly under one of the PA speakers less than 15′ from the stage. Time to celebrate. Skip the glass, one pitcher each and keep them coming. We’re about to make bootleg recording history. Conversation evolved into bloviation on what our cover art would look like, certainly it would be a photo of our battery powered tube mic pre-amp recently created in my basement lab. We had four hours to kill before Buddy’s appearance. Our rate of Goose Island and Guinness consumption would put us at three-sheets to the wind by 11. Must focus. It’s time, Buddy was on. Much fumbling about and forgetting how to turn on the Japanese-made 24 bit digital recorder with its nested LCD menus, cryptic buttons, and late 90’s firmware. Make it work. We did, just in time for the bouncers to notice the boom mike and battery packs. Wait, wait… maybe we should talk about why tube amps are worth this kind of trouble first.

Yes, vacuum tubes do sound better than transistors (before you hate in the comments check out this scholarly article on the topic). The difficulty is cost; tube gear is very expensive because it uses lots of copper, iron, often point-to-point wired by hand, and requires a heavy metal chassis to support all of these parts. But with this high cost comes good economic justification for building your own gear.

This is one of the last frontiers of do-it-yourself that is actually worth doing.

Continue reading “Keep Those Filaments Lit, Design Your Own Vacuum Tube Audio Equipment”

Measuring The Lifespan Of Nixie Tubes

nixie

Nixie tubes have two things going for them: they’re awesome, and they’re out of production. If you’re building a clock – by far the most popular Nixie application, you’re probably wondering what the lifespan of these tubes are. Datasheets from the manufacturers sometimes claim a lifetime as low as 1000 hours, or a month and a half if you’re using a tube for a clock. Obviously some experimentation is in order to determine the true lifetime of these tubes.

Finding an empirical value for the lifetime of Nixies means setting up an experiment and waiting a very, very long time. Luckily, the folks over at SALTechips already have a year’s worth of data.

Their experimental setup consists of an IN-13 bargraph display driven with a constant current sink. The light given off by this Nixie goes to a precision photometer to log the visual output. Logging takes place once a week, and the experiment has been running for 57 weeks so far.

All the data from this experiment is available on the project page, along with a video stream of the time elapsed and current voltage. So far, there’s nothing to report yet, but we suppose that’s a good thing.

VFD Display Becomes An Amplifier

Born well into the transistor era of the late 80s, [Fernando] missed out on all the fun you can have with high voltage and vacuum tubes. He wanted to experience this very cool tech, but since you won’t find a tube checker down at the five and dime anymore, where exactly do you get a vacuum tube to play around with? [Fernando]’s solution was to rip apart the vacuum fluorescent display from an old radio (Google Translate) and use that as a triode.

Inside every VFD is a filament, grid, and cathode – three simple elements also found in the triodes of just about every tube amp ever made. By applying a small voltage to the filament, a larger voltage to the cathode, and sending an audio signal to the grid, this triode amplifies the electrical signal coming from a stereo or guitar.

[Fernando] built his circuit on a breadboard, and with a little tweaking managed to get a fairly respectable amount of gain from parts salvaged from a radio. While using VFDs as amplifiers is nothing new – we’ve seen it a few times before, tube builds are always great to see, and bodged up electronics even more so.