Resurrecting A Hi-Fi Cabinet

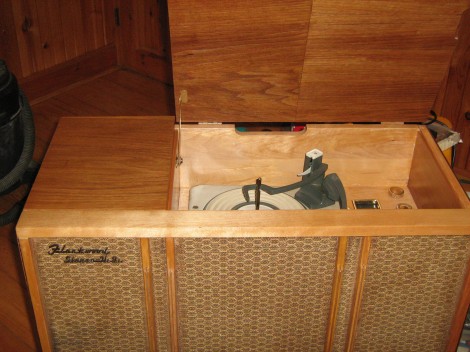
[VintagePC] pulled this old stereo out of a barn. It was in pretty shabby shape, but he managed get it running again and make it look great as well.

While it had been protected from the elements, it had not been protected from the rodents. Mice had chewed their way through the fiberboard backing and made a nice home inside. He mentions that they chewed the string which operates the tuning dial, and we’re sure they were the cause of other problems as well. He gives the wise advice of not powering on an old set like this until you have a chance to assess the situation.

The insides of the amplifier were about as disorderly as the last radio repair we looked at. But after carefully working his way through the circuits, replacing capacitors and resistors as needed, he started to make some progress. The receiver coil needed to be rewound and he used wire from an old CRT monitor for this purpose. The loop antenna was remounted and the record player arm was given a new cartridge and balanced using a clever LEGO apparatus. Some veneer work and wood finishing brought the case itself back to its original beauty. We’d say the hard work was well worth it. He’s got a big piece of furniture he can always be proud of!

Making A Miniature X-Ray Tube From Scratch

We know that most of you will have no reason to ever make a miniature X-ray tube. However, we also know that many of you will find this video mesmerizing like we did. [Glasslinger] does a fantastic job of explaining the entire process of creating the mini x-ray tube from, procuring the uranium glass and tungsten stem, creating the filament from scratch, all the glass work, and the testing.

Admittedly, most of us here at hackaday won’t go any further than admiring the craftsmanship, though we’re curious to see what [Adam Munich] has to say when he sees this story.

If you enjoyed the tube construction in the video, be sure to check out [Glasslinger’s] other videos. He makes all kinds of tubes in his shop and usually shares so much information along the process that each one has useful information beyond that particular project. Another crazy part is that he has made most of his own tools, including his glass lathe.

We really shouldn’t have to point out that X-Rays are dangerous. Don’t mess with them unless you have researched how to do it safely.

Warm Tube Clock, Take 2

warm_nixie_v2

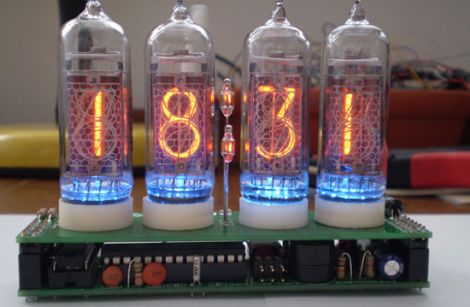
[Mure] wrote in to let us know he has put the finishing touches on the second iteration of his Warm Tube Nixie clock. We featured his original creation here last year, and while many things remain the same, he has still found a few things that he was able to improve on.

The first notable feature is the new real time clock. Instead of using a discrete crystal to keep time and a temperature sensor for compensation, he has opted to use a DS3231 RTC IC. It is far more accurate than the crystal, and it features a built-in temperature sensor as well. The alarm functionality has been simplified too, moving the controls into firmware rather than having to use a sliding switch to do so.

With the mainboard redesign, it would have been easy to leave behind the nixie “shields” he created for his first clock, but with a focus on interoperability, he chose to make this clock fully compatible with version one’s shields and vice versa.

While the changes aren’t groundbreaking, it’s nice to see a project like this undergo continued refinements. If you want to build a clone of this clock, [Mure] has made sure that all of the schematics and source code are available on his site.

Continue reading to see a brief video demo of the clock in action.

Continue reading “Warm Tube Clock, Take 2”

Geiger Counter Built In An Ohmmeter Enclosure

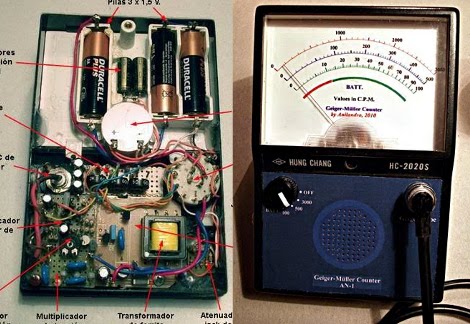
Here’s a Geiger Counter that makes itself at home inside of an old Ohmmeter (translated). [Anilandro] set out to built this radiation detector in order to learn how they work. Like other diy Geiger Counter builds we’ve seen, this project assembles a circuit to interface with a gas-filled tube which serves as the detector. [Anilandro] takes a few paragraphs to discuss how this works; the Geiger tube is basically a capacitor whose electrical characteristics change as an ionizing particle passes through it.

Once he had the theory worked out he scavenged some parts to use. A broken emergency light donated its transformer to provide the high voltage needed. The rest of the circuit was built on some protoboard, and a speaker was added to output the clicking noises that have become a familiar part of the detector hardware. The tube itself is housed in a wand that attaches to the base unit through a cable. Check out some test footage of the finished unit after the break.

Continue reading “Geiger Counter Built In An Ohmmeter Enclosure”

10 µm Scanning Electron Microscope From Vidicon Tube

[Segelfam] built his own scanning electron microscope. He based the machine around an old Vidicon tube, a video recording technology that was used in NASA’s unmanned space probes prior the Galileo probe in the late 1970’s. We struggle a bit with the machine translation of [Segelfam’s] original build log, but it seems that he filled the tube with helium in order to convert it for use as a microscope. But don’t worry, if you’re interested in this hack the information is all there – between the forum thread and build log – it’s just a matter of putting it all together to fill in the details.

In case you were wondering, the image to the upper right has been colored using Photoshop; the rest are straight from the SEM.

[Thanks Jerry]

Building Linear Amplifier Prototypes

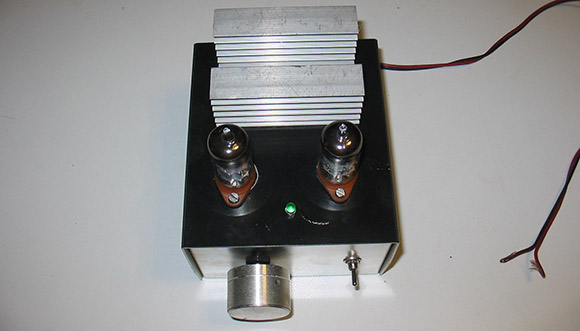
We know way too little about this subject but hopefully [Bob4analog] helped us learn a little bit more this time around. He’s building his own linear amplifiers on what looks like sheets of MDF. This is an evolving design and the two videos after the break show two different iterations. He’s salvaged several components, like transformers from microwaves, as well as built his own components like the plate choke to the right of the tubes in the image above. In standby, the amp sits at 2800 volts, warming the filament before the unit is switched on.

So what’s he got planned for this? Good question, but it appears that there’s more than enough power to drive a long-range transmitter.

Continue reading “Building Linear Amplifier Prototypes”

Time-lapse Camera Dolly

[Brian Grabski] was asked by a friend to design and build a dolly that would move a camera during a time-lapse sequence. Above you can see the product of his toils, and the videos after the break show off the parts that went into the design and showcase effectiveness of the build.

The dolly is designed to ride on a pair of tubular rails. These can be bent to match any desired path and the dolly will have no problem following it thanks to two features. First, the triad of skateboard wheels on each of the three corners are mounted on a swivel bearing that allows them to rotate without binding. The other piece of the puzzle is a set of drawer slides that let the third support move perpendicular to the other two sets of rollers. A motor drives a geared wheel to move the dolly along the track with speed adjustments courtesy of the motor controller. There’s also a failsafe that will shut the system down when it runs out of track, protecting that fancy piece of hardware taking the pictures.

We’ve seen timelapse equipment that moves the camera in the past, but those hacks usually involve rotating the camera along and axis. This track-based setup is a well executed tool useful at all levels of photography. We can’t wait to see the arch-based dolly that is teased at the end of the demo video.

Continue reading “Time-lapse Camera Dolly”